Donor Axle:
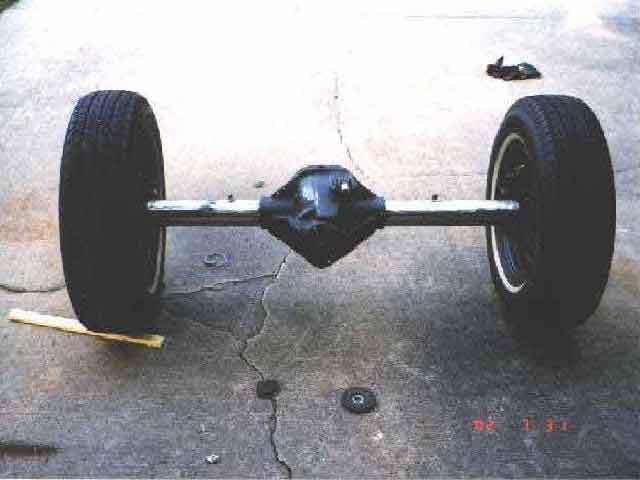
The first order of business is to track down an axle for the swap. You need to find one out of a ’95 or later Ford Explorer. These have disc brakes, 31 spline shafts and some have limited slips. They also come in various gear ratios, 3.73:1 and 4:10:1, so you may be able to get out of changing the Ring and Pinion gears to match your Jeep. The axle is about 1.25″ narrower then the Jeep axle. So that is only about 5/8″ on each side. I picked up a new axle assembly off of E-bay from Ariel Performance in Oklahoma City. They have a bunch of surplus axles from the Ford plant. Of coarse there are tons of these to be found in junkyards, so it shouldn’t be a problem to track one down.
Brackets:
Of course you are going to need brackets to weld onto the new axle. There are a few different places that make them, Rubicon Express, M.O.R.E. and Teraflex are ones that I know of. The Rubicon Express brackets are made for either a D35 or a D44, so with the larger tube diameter on the 8.8″, these will need to be ground down some to fit properly. The MORE brackets are made especially for the 8.8″ so they should fit well. I opted for the Tera brackets, which fit well, very minimal clearancing was required to make them fit tightly. The Tera brackets are made for their Tera Dana 60 and Dana 50.
Brake Lines:
Since I had a new axle assembly, the caliper and rotors were in place, but not the brake lines. I purchased a Ford Explorer disc brake conversion hose kit from Currie Enterprises, it is a P/N 6013. It comes with hoses, banjo bolts, and weld on clips to hold the end in place on the axle. The only other parts you will need are hard lines that you can bend and fit nicely around the brackets. There is a “T” hose that goes from the frame rail on the Jeep down to the axle and has a “T” fitting on the end to accept the driver and passenger side hard lines. You can get a new one of these for setup purposes or go ahead and reuse the old one when you install the axle. I opted to get a new one from Napa, P/N 380889. There is also the issue of Emergency brake cables. I ordered a set from a ’95 Grand Cherokee ZJ, Mopar P/N’s 52008904 and 52008905.
Drive Shaft Adapter:
You need to convert the flange style attachment on the 8.8″ to the regular yoke like the Jeep has. This can be found at National Drive Train, Spicer P/N 2-2-1379. You also need the flange bolts for the 8.8″ which are 12mm x 1.75 thread 12 point, Ford P/N N800594-S100.
Procedure:
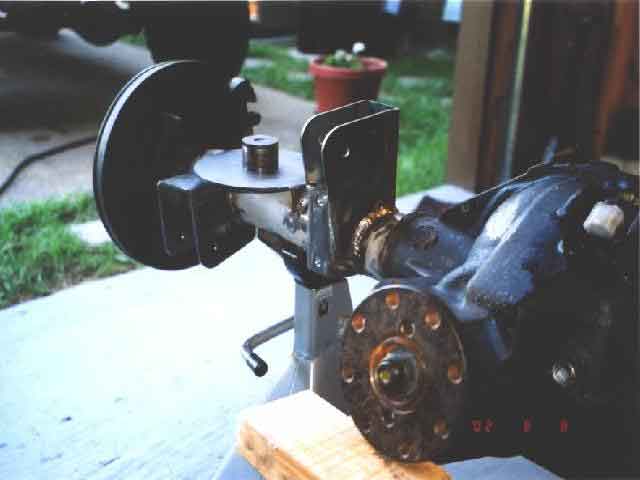
The first order of business is to cut the ford brackets off the axle. Remove the calipers so you don’t melt the guide pin boots. I used a 4.5″ grinder with a cutting wheel installed. It took about an hour of cutting and about 5 wheels to get them all off. A BFH works well here also. Then grind what is left smooth and your all done with that step.
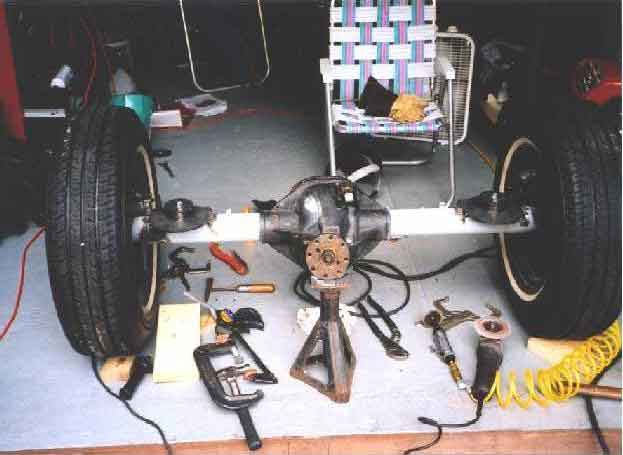
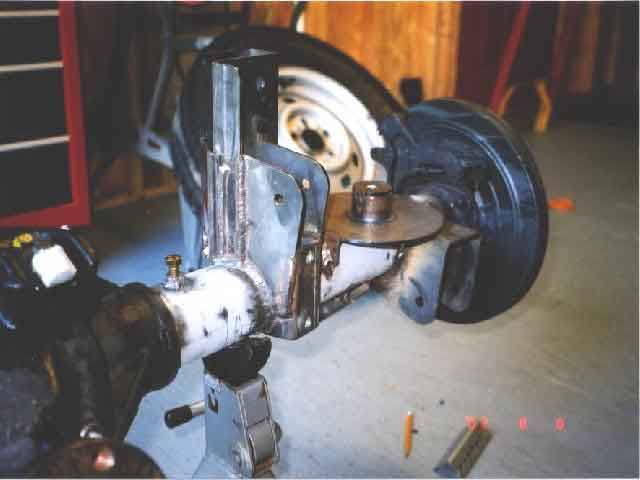
I went ahead and shot the bare areas with a light coat of primer to keep it from rusting at all. Now it is time to set the brackets in place. I opted to start from the outside and work towards the middle. You will notice that the pumpkin is offset to the passenger side by about 3″. This can cause a slight problem when trying to measure and locate the brackets. I used 2 squares and set them so one side was on the axle tube and butted up against the edge of the pumpkin. Then I could measure between the squares to get the width of the pumpkin, it is about 16 3/8″. Now measure the tubes on each side from the edge of the pumpkin to the inside of the flange on the end of the axle. I measured 20″ on the driver side and 17″ on the passenger side. So this means the overall length is 53 3/8″. So the center of the axle is at 26 11/16″ from the inside edge of the flange on the end of the axle tube. If you do a little more adding and subtracting, it is clear that the length from the center of the axle to the edge of the pumpkin on the driver side is 6 11/16″. This same distance on the passenger side is 9 11/16″. Now you can effectively measure everything from the edge of the pumpkin, since you know the distance from the edge to the center on each side.
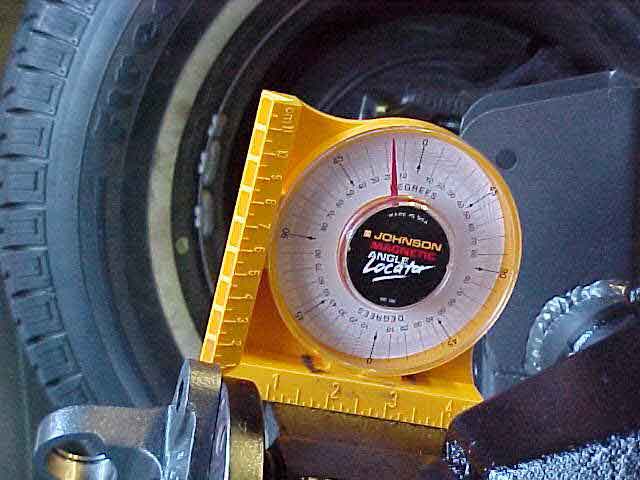
This makes measuring easier and you can measure in a straight line. Another thing to consider is the pinion angle. You will need and angle finder to measure this. I got one from Home Depot, it was about $10.00, do yourself a favor and the magnetic one, it will help you out a lot. You can measure the pinion angle on the existing axle, it is best to measure it by setting the angle finder on two of the cover bolts on the back. I set mine to 15 degrees. I run 4″ lift but when I did my engine swap, I moved the drive train forward by about 2″ so your angle may be more like 17 degrees or so. Now you can set the 8.8 up so that it is set at about 15 degree pinion angle and keep it in place somehow so it won’t move on you, I put a small jack stand under the pinion.

You will need to get the center to center measurements for each set of brackets. You can do these measurements a few different ways, the easiest way I found was to lay some cardboard under the Jeep and drop a plum bob from the center of the mount and mark the spot on the cardboard. Repeat this on the other side and simply measure the distance across the cardboard. This way you don’t have to bend the tape around the pumpkin and you get a more accurate measurement. You can now transfer this measurement to the new axle. Take the center to center measurement and divide by 2. Now take this number and subtract 6 11/16″ from it for the driver’s side and measure this distance from the edge of the pumpkin and mark the spot. Repeat this step for the passenger side, only subtract 9 11/16″. Repeat the whole process for each set of brackets. Here are my numbers.
| Mount | Center to Center existing axle | Center new axle to center of the mount (divide by 2) | Edge of Pumpkin to center of mount driver’s side (subtract 6 11/16″) | Edge of Pumpkin to center of mount passenger side (subtract 9 11/16″) | Angle of mount with pinion angle already set |
| Spring Pads | 39″ | 19″ | 13 1/16″ | 10 1/16″ | 0 |
| LCA’s | 45″ | 22 7/8″ | 15 7/16″ | 12 7/16″ | 0 |
| Sway Bar | 26 5/16″ | 13 5/32″ | 6 15/32″ | 3 15/32″ | 90 |
| Shocks | – | – | 11 7/16″ | 8 7/16″ | 40 |
Special Notes:
1. The shock mounts, set them at 1 5/8″ inside from the center of the spring pads and at 40 degrees.
2. Set the sway bar mounts so the fat part is up.
3. The UCA’s straddle the sway bar mounts so they are easy to locate.
4. Make sure the UCA’s angle to the outside of the vehicle.
5. Make sure the shock mounts angle towards the inside of the housing.
6. The lip on the track bar mount wraps around the UCA on the driver side.
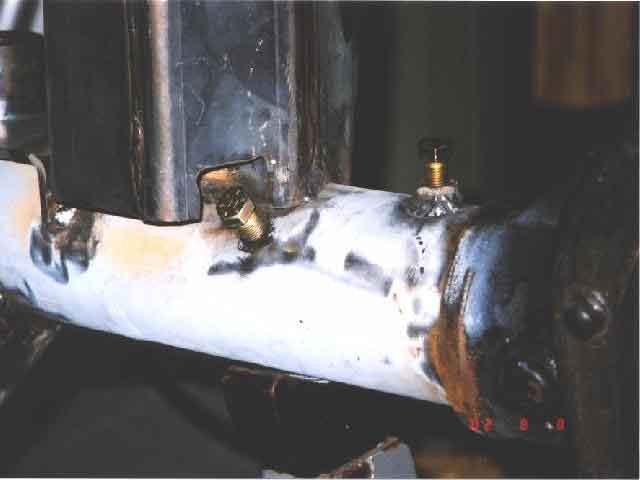
7. The breather fitting is located under the track bar mount, I chose to cut a small piece out of the bottom of the mount to give enough room for the fitting and hose to be installed. You could weld up the hole and relocate it if you like.
8. Tack all the brackets in place and recheck the measurements. Then weld them up solid and also go ahead and stitch weld the tubes to the pumpkin to keep them from spinning. I did 4 little 1″ spots around the tube on each side.
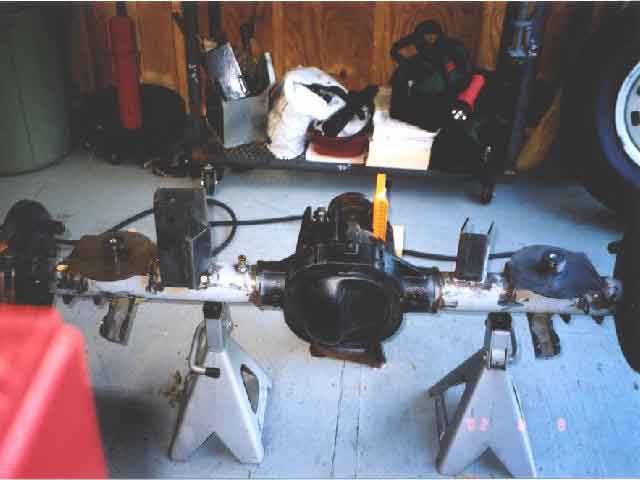
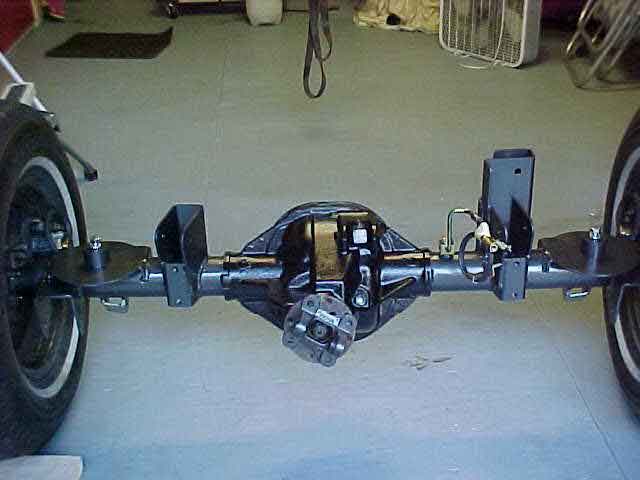
Now you can go ahead and clean up the housing and paint as desired. I primed everything and then shot it with some Rustoleum Hammered Paint. It’s nice because it has a bit of a textured finish, so it hides blemishes well. I also painted the differential cover with high temp engine paint, to keep it from peeling.
Ford 8.8 to TJ Axle Swap
by Nick Scribner
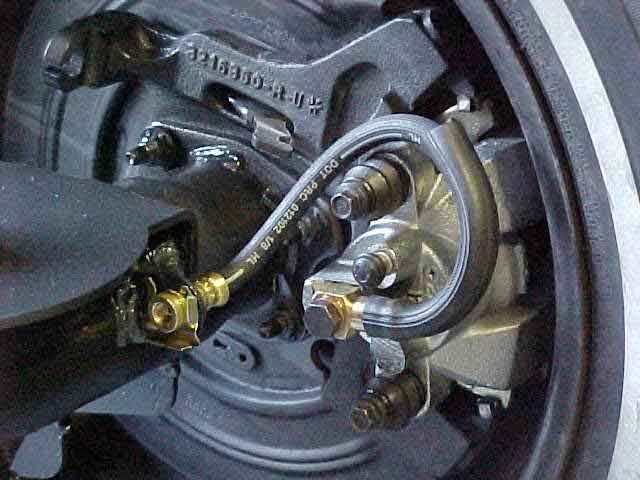
Reinstall the calipers and get out the brake hose kit from Currie. Install the Banjo bolts into the calipers and find a good place to mount the hose bracket on the housing and tack it in place. I routed mine over the topside of the caliper and mounted the tab to the outside of the shock mount pointing along the tube. Find a good spot to attach the “T” hose

I welded a nut (7/16″ fine thread) to the tube just to the inside of the track bar/panhard mount.
Now it is time to bend new hard lines to fit. Take your time and make sure they fit properly. The hard lines are 3/16″ tube.
I now had to get my ring and pinion gears changed out to 4.88:1 to match the front ratio. I also installed an Eaton limited slip unit. I considered another locker, I run an E-Z locker in the D35, but decided I didn’t want to be bothered on the street by it. I’m out east in Virginia, so I don’t do a lot of rock crawling where I have a tire in the air quite often. For this reason I think that a good limited slip will work fine for me.
Install the companion flange (yoke adapter) and now you are ready to put the axle under the Jeep. Pull out the old one and bolt in the new one. If you have done a suspension lift before, it should be pretty straightforward. Bleed the brakes and you are almost done. Pop the hood and remove the combination/proportioning valve from the brake master cylinder. You can find instructions on Stu’s web site under D-44 Disc Brake conversion . You’re all done, enjoy your new axle. Now its time for bigger tires.