D-30 Axle Shaft Oil Seal Replacement
Many of us have seen it and probably all have heard about it…..a leaky axle shaft seal in the D30 front axle. This is one of those projects where the actual job of installing the new seal is very easy. It is also one of those projects where getting everything else out of the way so that you can get to the seal is more work than most want to do. So, before you decide it is too much work, read on and then make your own decision.
A little background as to how I came to replacing a leaky seal is probably in order. I was doing some prime time wheelin’ here in Arizona (that means it was early December, the trails were dry, and the temps were in the blue-jeans and t-shirt range). An obstacle that I had routinely done, over the past several years, was giving me grief for the second time in as many trips. The driver’s side inner axle shaft broke at the splines (although at the time, I thought I had lost a hub).
Trust me, it doesn’t take long (about 20 feet in my case) for a broke shaft to chew up an oil seal. I winched myself up and over the obstacle (couldn’t go backwards) and pulled up a short distance to get clear for the next person. By then, I knew I had lost the driver’s front side and so I hopped out, locked out both hubs on the D30, and put the vehicle into 2LO (gotta love Warn hubs and Tera 2LO) to limp off of the trail.
So….as you can see, it wasn’t that I really wanted to change the seal, and it wasn’t that the seal, up until that exact moment in time, had even leaked a drop of fluid. Its just that the oil seal (and the ARB) took some collateral damage as a result of the shaft fragmenting itself. I had no choice but to replace it. The passenger side seal was replaced at the same time. Since I was in the differential, it was silly to replace one and take a chance that the other side wouldn’t start leaking in a few months.
OK….enough of the background information, time to get to the bad axle shaft seal.
To replace the axle shaft seals, you need to two perform to basic tasks in order to get to the seals.
First, you must remove the axle shafts. Second, you must remove the differential.
Rather than pad this write-up with information already available on the site, read through the D30 Axle Shaft Removal write-up, assuming you have not already done so. You can skip the step, on the second page, where the axle nut is removed and the unit bearing is separated from the axle shaft. (there is a note about it at the beginning of the page) The axle shaft and unit bearing can be removed as an assembly.
If you made it this far, your D30 should be looking a little bare, especially at the ends of the axle. You are about half way there.
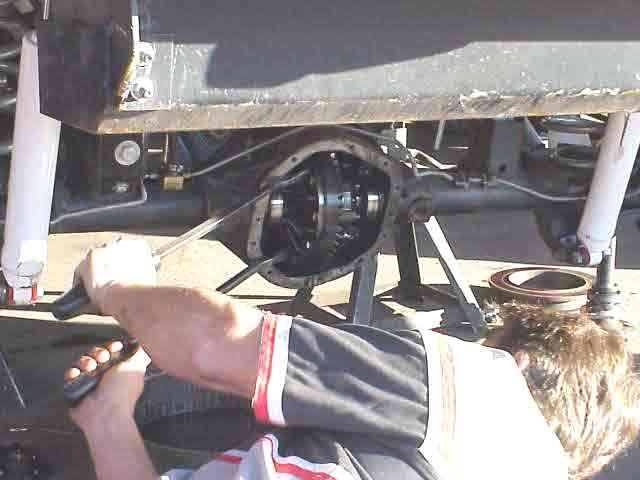
Next is the differential. It must be removed in order to gain access to the axle shaft seals. They can’t be replaced if the carrier is still in the housing. It is easier to remove the carrier from the housing if you have the vehicle on a lift, but it is not necessary. LOTS of folks pull the carrier to install a LockRite locker and do so sitting in their driveway. I had the opportunity to use a lift and I made use of it.
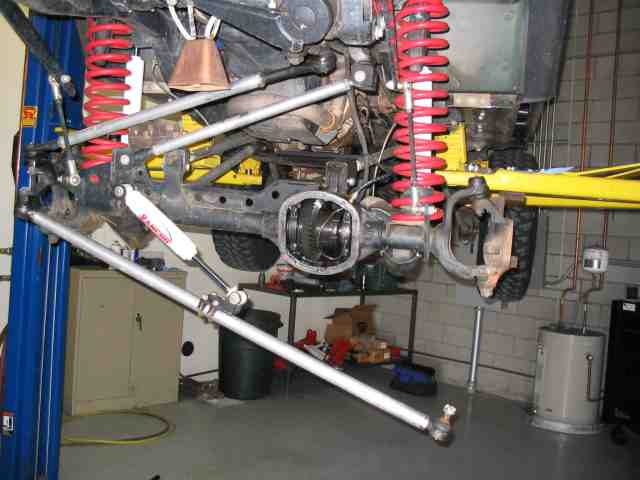
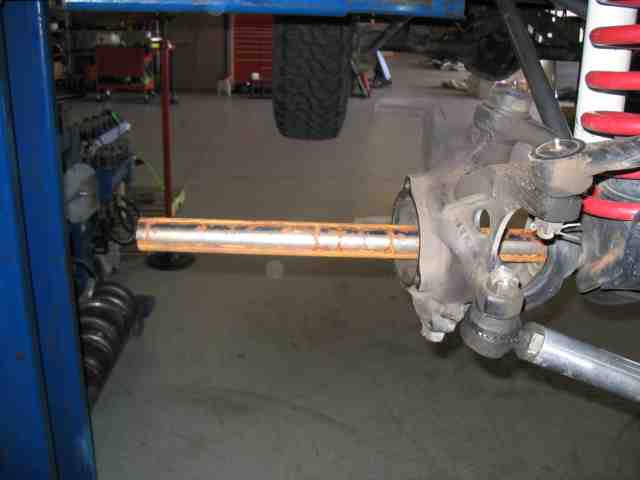
With the axle shafts out of the housing, I removed the driver’s side end of the tie-rod. To do so, remove the cotter pin and loosen the castle nut on the tie-rod end. Leave about 5 or 6 threads engaged on the nut. I then took a large hammer (about a 2 pounder) and struck the steering knuckle where the tie-rod end passes through it. After 3 or 4 good whacks, the tie-rod let loose. The castle nut was removed and the tie rod allowed to droop out of the way. There are other ways to remove the tie-rod, but I prefer this method over pickle forks and air tools.
Place a fluid catch container under the differential. Remove the bolts holding the diff cover and assuming your cover is sealed with RTV, pry it off and allow the fluid to drain.
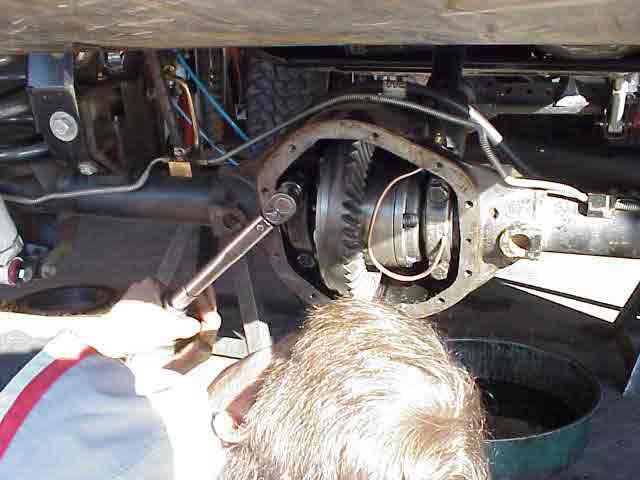
Hey, what happened to the lift? Well, I didn’t take a picture of the bearing caps and so I had to borrow one from my original ARB install write-up. (See, I told you this could be done with the vehicle on the ground). Disregarding the fact that you are looking at an ARB (which doesn’t matter in this case), remove two bolts each from the two bearing caps. If you do have an ARB and are not familiar with how the internal copper air line is plumbed into the bulkhead fitting, read through the ARB O-Ring replacement write-up for some insight on this. If you have an ARB, you will need to disconnect the air line so that the locker can be removed from the housing.
NOTE: Bearings caps are matched side to side and top to bottom. In other words, you can mix them up putting them on the wrong side and you can also mix it up by putting them on upside down. If you look at the caps and sealing surface of the housing, you should see some marks stamped into the steel. It may look like “W” or “M” or an N laid on its side, or something similar. When you find the mark on the cap, look on the flat sealing surface, right next to the bearing cap, for the same mark oriented in the same fashion. When you put the caps back on, you must make certain that the symbols match and are positioned near each other (you don’t want them on upside down) and make sure they are on the correct sides.
So, remove the bolts and the bearing caps and set them aside. The caps fit snuggly so jiggling the bolts in the caps a bit will help loosen them so they slide off the bearings.
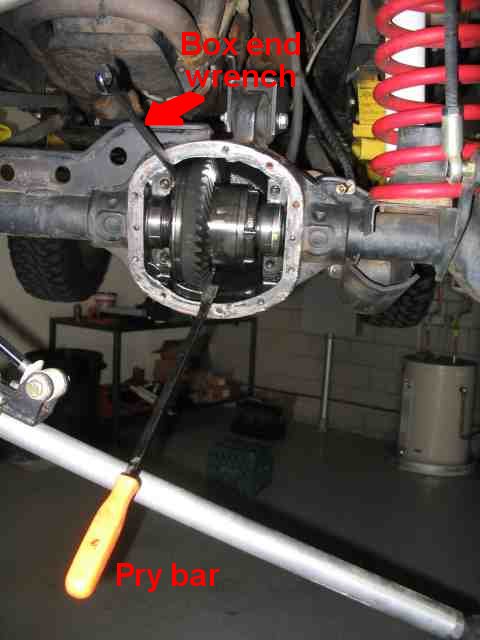
At this point, you need to pry the carrier out of the housing. Get the help of a friend for this step. This is one method that I’ve used with good success. Slip the end of a box end wrench over a ring gear bolt and rotate the ring gear until the wrench jams up against the housing. Have your friend hold the wrench in place while you use a large pry bar under one of the ring gear teeth. Push down on the pry bar and you will see the carrier start to rotate up and out of the housing. Be careful….don’t drop it on the floor (the carrier). Your friend with the wrench can help you make sure it doesn’t “pop out” of the housing.
If you are doing this in the driveway, another method that works is a pair of pry bars, hooked under the heads of two ring gear bolts. Again, carefully pry the carrier out of the housing. A friend to catch it helps here as well.
NOTE: The D30 uses external shims (at least my ARB does) on the driver’s side. Do not loose any of the shims as they must ALL be reinstalled when the carrier goes back into the housing. Failure to do so will change your bearing pre-load, your backlash, and your gear pattern. This will make your ring and pinion gears VERY unhappy….and I do mean unhappy!
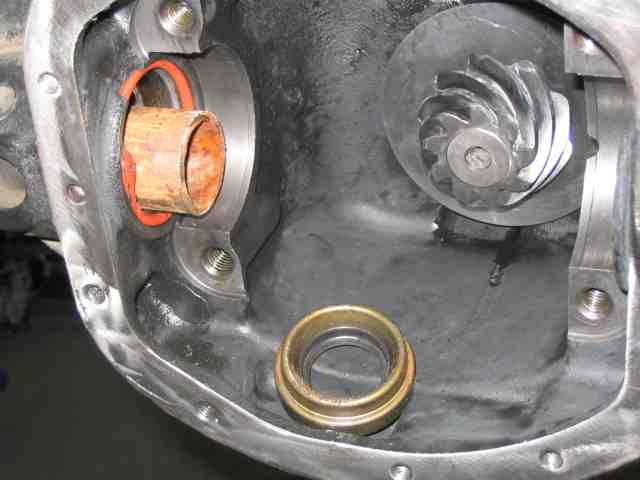
Set the carrier and shims aside. Now is a good time to clean out the housing. I use a little bit of brake cleaner and some paper towels. By the way, if you find broken parts, like teeth from your ring or pinion gear, it is time to have this looked at by a professional as you have other damage that needs to be fixed before you worry about your oil seals.
With the carrier now out and your housing looking cleaner than it was, you can finally turn your attention to the original task, that being replacement of the leaking oil seal(s).
Of course, DC makes a neat little tool for pushing the new seals into position, but I didn’t have one and I didn’t know anyone that did, so it was time to improvise. Hey, you are a Jeep owner…you are suppose to improvise every now and then.
But before we push the new seals into position, we need to remove the old ones.
I found a piece of tubing to use as a super long drift punch. In the above photo, you see it positioned in the passenger end of the axle.
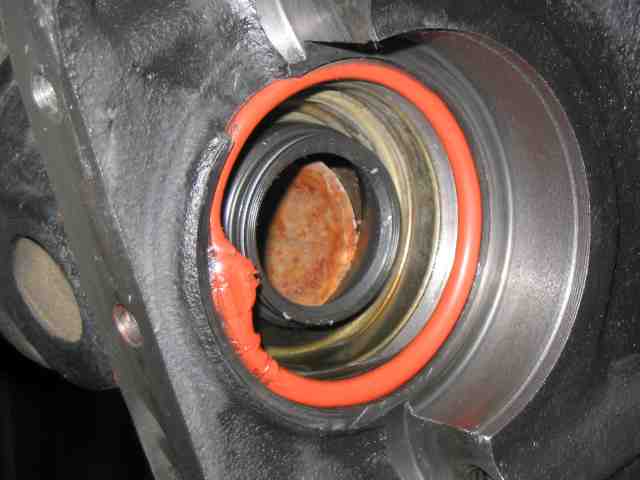
You can see my rather rusty drift punch sitting directly behind the seal. A few hits with a hammer on the end of the tubing was all it took.
The axle shaft seal popped out of the tube without much resistance at all. Easy to do….I wasn’t kidding when I said the job was easy, its just getting to the seal that is the kicker. The other side was removed in the same fashion. I used a few squirts of brake cleaner after the seals were removed, just to clean off the sealing surface.
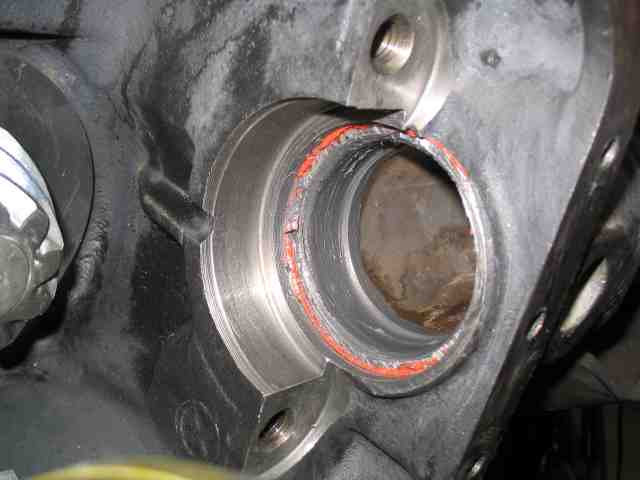
Since the driver’s side was a bit chewed up, I took a few minutes to clean up the area. I used some 220 sandpaper to remove the sharp burrs from the metal and then some finer paper to finish it up. Since I really didn’t want to go through all of this work and then see a leak at the hack up seal area, I put some RTV on my finger and ran a thin film around the inside of the tube. I’ve used this method to seal stubborn D44 rear axles. It works very well and I wasn’t going to take a chance when something this simple would greatly improve my chances of success.
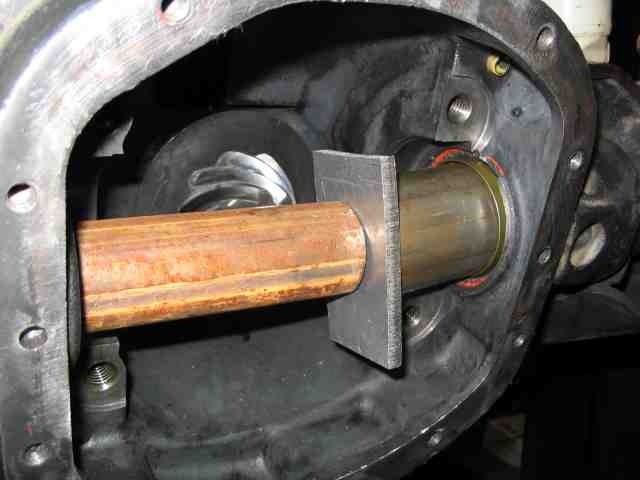
To install the new seal, you need something to press it into position. A piece of 1.75″ OD (outside diameter) tubing was just perfect. It engages the metal shoulder of the seal without touching the rubber sealing area.
The problem with the 1.75″ OD tubing is that it won’t fit through the axle tube. So I cut off a piece about 3″ long and then used the smaller tubing to push against it. A piece of scrap aluminum (it was within reaching distance) was used to prevent the smaller tube from slipping into the larger tube. It worked great. I got a friend to strike the end of the small tube (over at the passenger end of the axle) with a hammer while I guided the axle shaft seal into position. It takes a little bit of force to seat it all the way. Be sure to take your time and keep it going in straight.
That took care of the driver’s seal. The passenger side seal, which is installed through the driver’s side end of the axle, presented just one last problem. The smaller tubing I was using would not fit through newly installed seal. I located a 2 foot long piece of 1/2″ diameter rod and used it against the aluminum plate to seat the remaining seal. Again, I guided the seal into position while my buddy provided the driving force with the hammer.
Before you go any further, grab a finger full of grease and coat the inner surface of the newly installed seals.
More Oil Seal Replacement
D-30 Axle Shaft Oil Seal Replacement
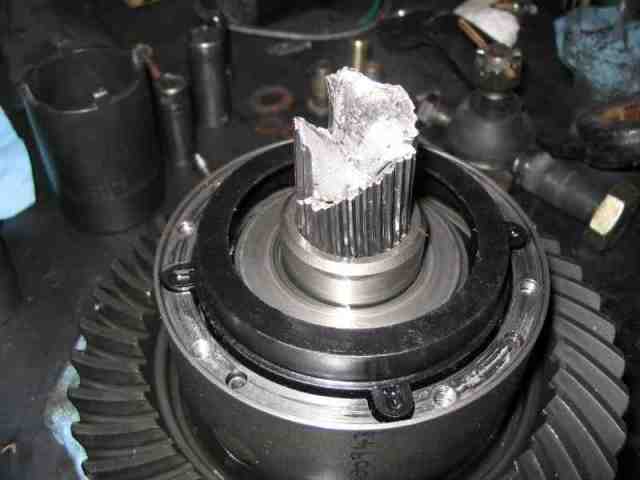
I was almost done with this project except that I had a broken ARB to deal with. The cylinder cap was ruined as was the bearing and the seal housing. In fact, I couldn’t even slide the seal housing off of the end of the locker. I removed the 6 bolts holding the seal housing in place and then hammered it off using a cold chisel. This left the splined section still jammed in the locker. Troy gave me some assistance and I quickly learned how to completely strip an ARB down to its individual components. We were able to remove the broken shaft and reassemble the locker using the new parts that had arrived the previous day. Thanks Troy for the crash course in ARB internals!
At this point, I was ready to reinstall the locker into the housing and button it up. Basically, I just needed to reverse the steps that got me to this point.
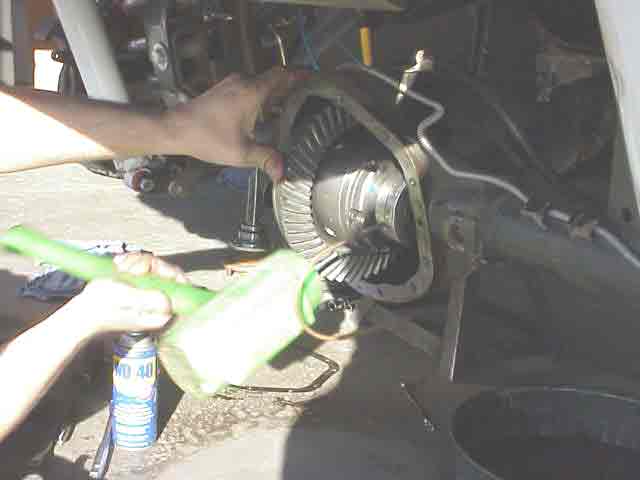
Before you put the carrier back into the housing, take a couple of minutes and clean the old RTV off of the sealing surface of the housing. You can use a gasket scraper as I have done for many years. You can also use a flapper disc on a right angle grinder to speed up the RTV removal process if you are so inclined. A few squirts of break cleaner will clean up the residue and flush the housing of the RTV debris.
OK, time to wrap it up.
Be certain you have your external shims positioned on the end of the carrier (required for an ARB differential). (Remember, you set them aside in a nice little pile so you wouldn’t get them messed up, right?) Slide the carrier back into the housing. It will be a tight fit because of the bearing pre-load. You should be able to get the carrier started into the bearing cups. I prefer to use a dead blow hammer to seat the carrier into the housing, just like the above photo. Take you time and be sure you are putting the carrier squarely into the housing. It won’t work worth a darn if it is sitting there crooked as you try to pound it into position. You can also use a large diameter brass drift punch on the bearings and the carrier. This allows you to better focus the energy if you find that smacking the ring gear isn’t getting you the results you want.
Once you have the carrier seated in the bearing cups, place the bearing caps into position. Remember to match the stamped marks side to side and top to bottom. I can NOT emphasize enough that you need to put the caps back on in the correct position.
The bearing cap bolts, per the FSM for my ’98 TJ, are torqued to 45 ft. lbs.
With the bearings cap bolts tightened, you can slide the axle shafts into the axles and button things up. Just reverse those steps you followed to remove the axle shafts from the axle housing at the beginning of this write-up.
That is about it. You should now have a pair of leak free axle shaft seals installed and ready to give you many miles of highway and wheelin’ fun. No more dripping your fluid on the driveway….and that is a good thing for sure!