Opening comments from Stu: One of the great aspects of owning a TJ is the great camping opportunities it affords you (assuming you enjoy camping). Imagine waking up in your tent, after a hard day on the trail, and the below view greets you as you step out of your tent. It was dark the night before when you picked the camp spot and set up your tent in the headlights of the TJ. Little did you know what awaited you the next morning. Such was one of many great landscapes I witnessed when I ran the Rubicon Trail back in August of 2001.

When Doug Simon asked me if I wanted to host a camp kitchen write-up on the site, I reflected on several of the many camping trips my TJ got me through. Cooking was always one of those things you had to set up “over there by that flat rock”. When Doug said he could build a fully functional camp kitchen and tuck it into the back of his TJ, I told him I would help share his project with others in the Jeep community.
Without any further delay, here is Doug’s write-up on how to build a camp kitchen in the back of your TJ….and let me be the first to pass along my thanks to Doug for the write-up.
*******************************
Several weeks ago we retraced a portion of the Mojave Road from Needles, CA. to Afton Canyon, CA. It has been a few years since I’ve had the pleasure of tent camping and packing up the essential items to prepare meals.
I made this run about twenty years ago in a 4-wheel drive pickup with a shell on it. I had built a small camp kitchen to hold everything all together instead of living out of boxes for several days and it worked out really well. This trip prompted me to design a camp kitchen for my Jeep TJ which, as we all know, is limited in extra space. I think it can be done if you do some good planning.
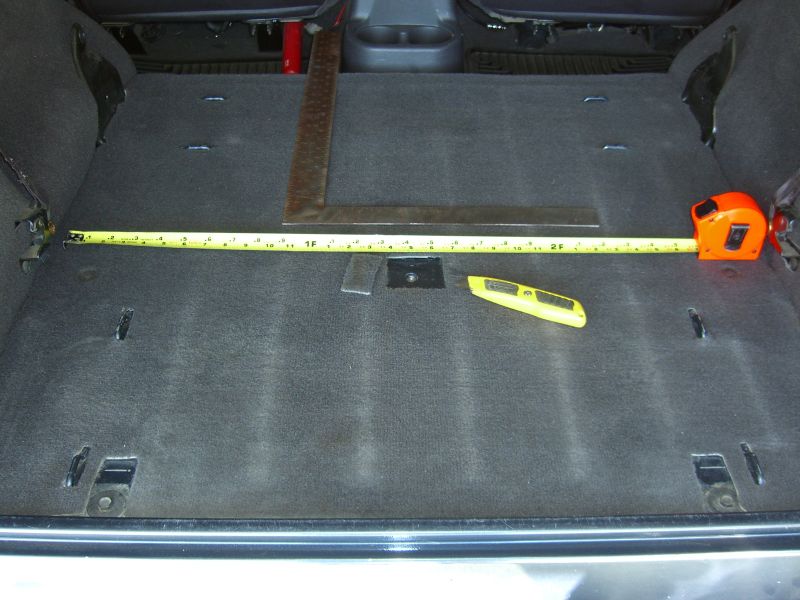
The first item on the agenda was to pull out the rear seat and the rear seat belt buckles/bracket on the TJ floor area. This threaded hole is what I’ll use to secure the camp kitchen from moving around.
I then measured between the seat brackets to see the maximum width I could build the kitchen without removing any additional hardware. The overall width came out to 2 foot 9 3/4″. I then cut out a small peace of carpet to allow access to the bolt hole.
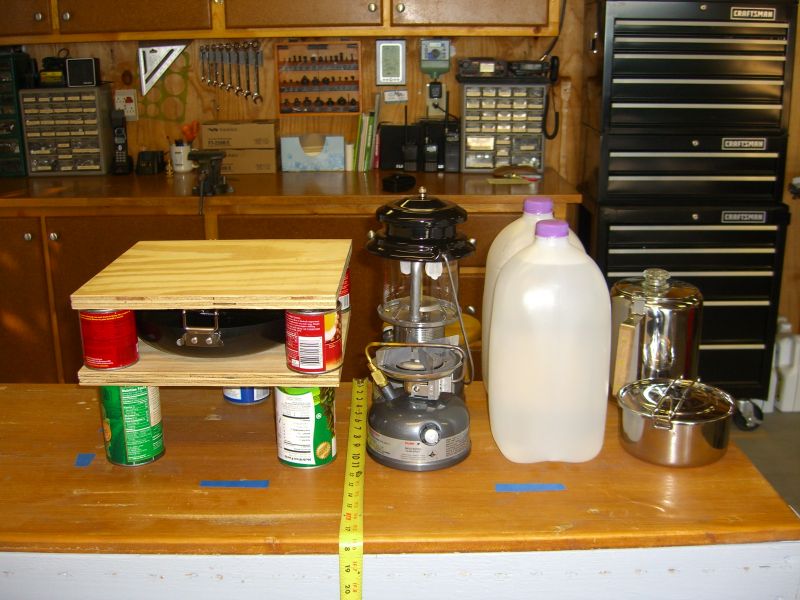
I then took the width measurement and laid it out on a workbench with all the proposed gear I thought I might need for a few days. This would determine the depth of the camp kitchen, which for me came out to an interior dimension of 13″.
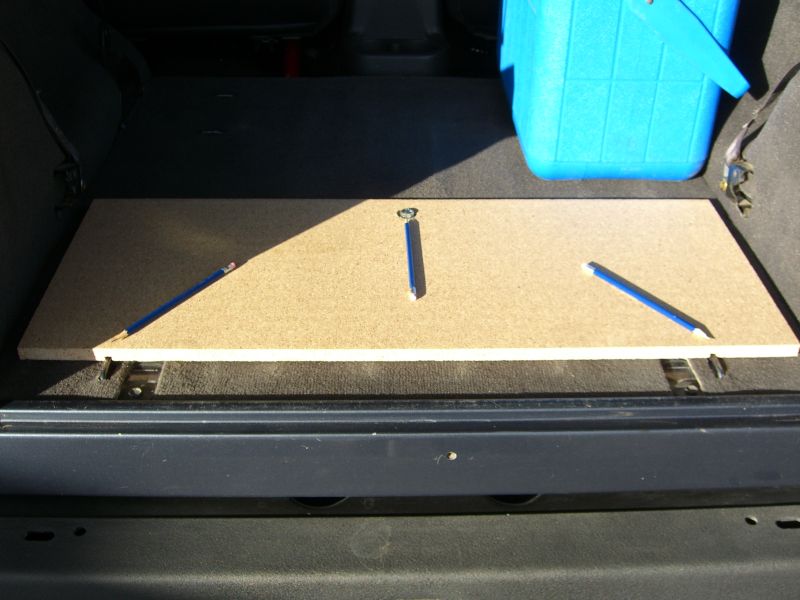
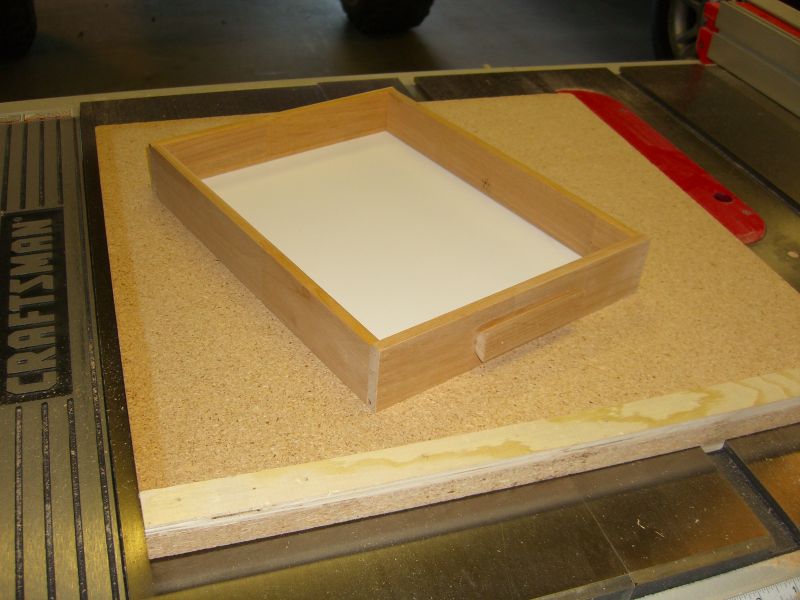
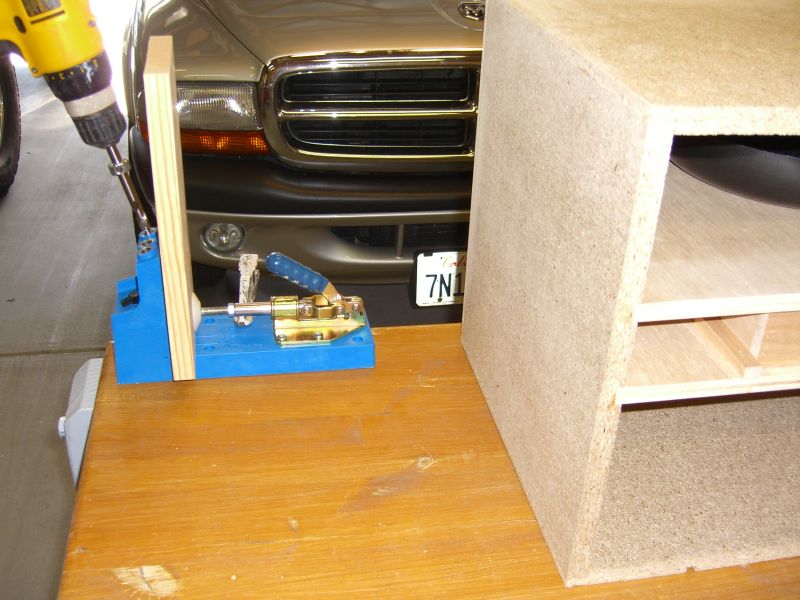
After determining the final size I needed, I moved forward and made the base and the top of the kitchen using the table saw. The base needed two grooves cut on the bottom so it would fit over the tie down brackets. It also needed a counter sunk hole to anchor the kitchen with the bolt hole for the seat belt bracket as was previously mentioned.
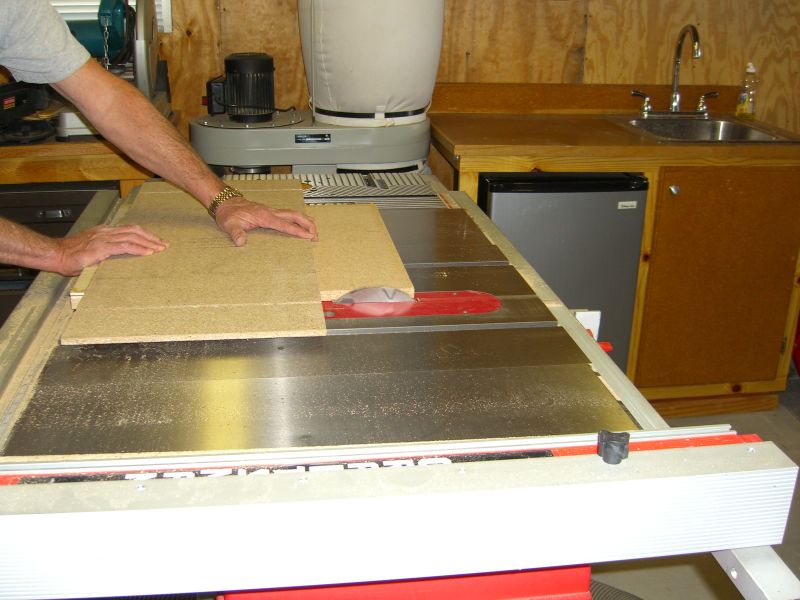
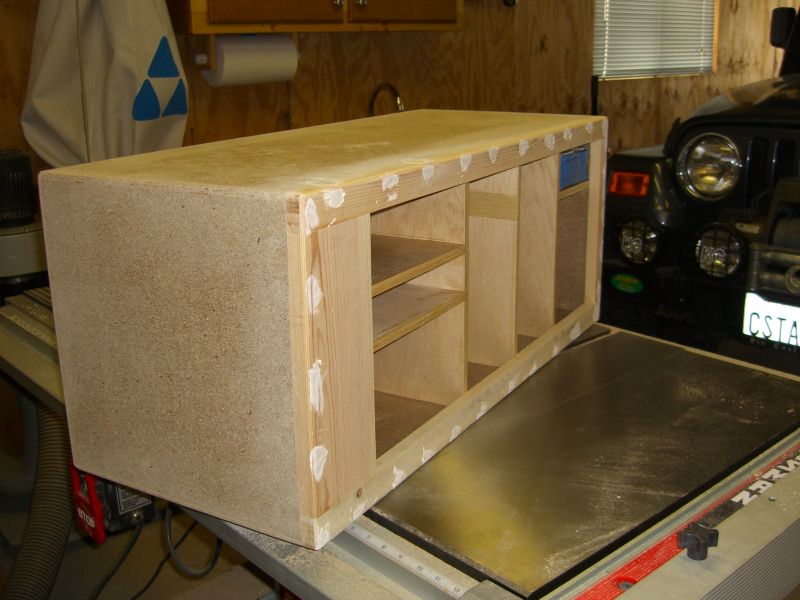
Today’s time was spent at the table saw making dado joints on the top, bottom, sides and back of all components. Vertical partitions were laid out for the equipment I wanted to take along and dado joints were made for all horizontal shelves that needed to be constructed.
More TJ Camp Kitchen
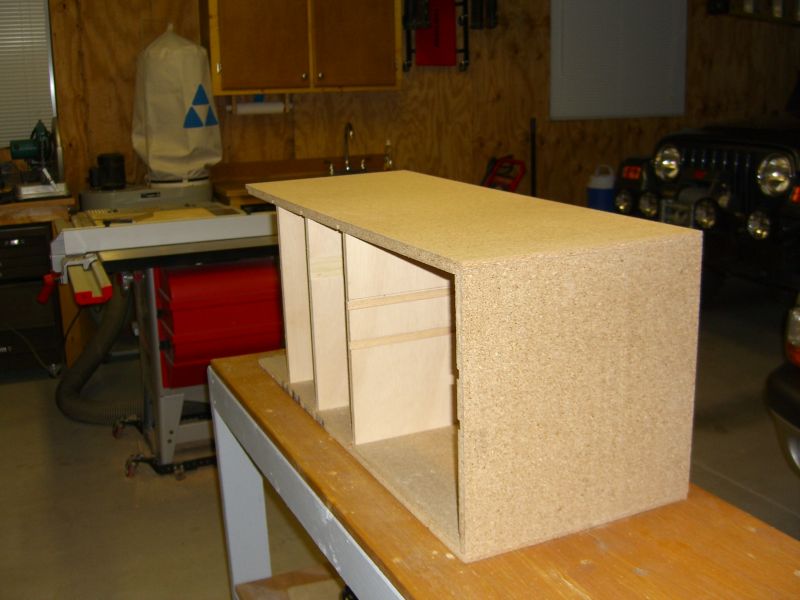
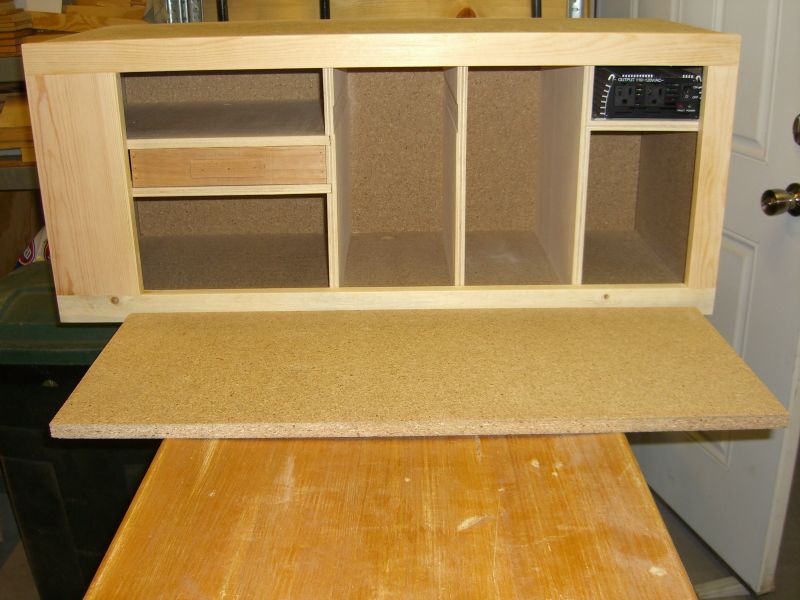
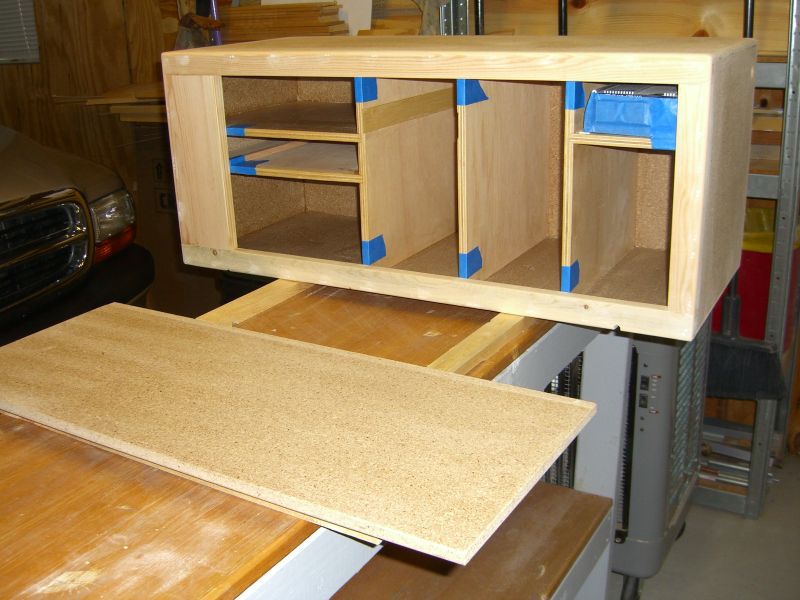
Progress views are shown (photos above and below) for a dry fit to insure every part was cut correctly on the front and back of the Camp Kitchen .
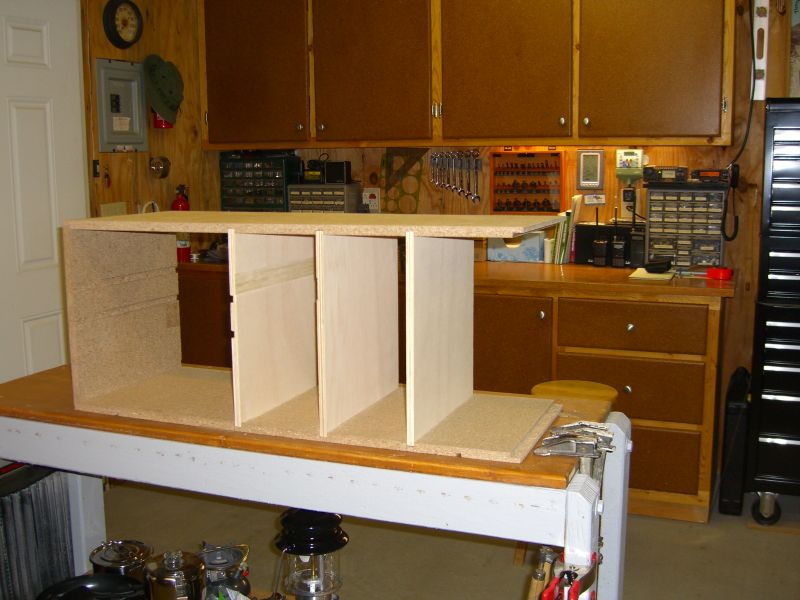
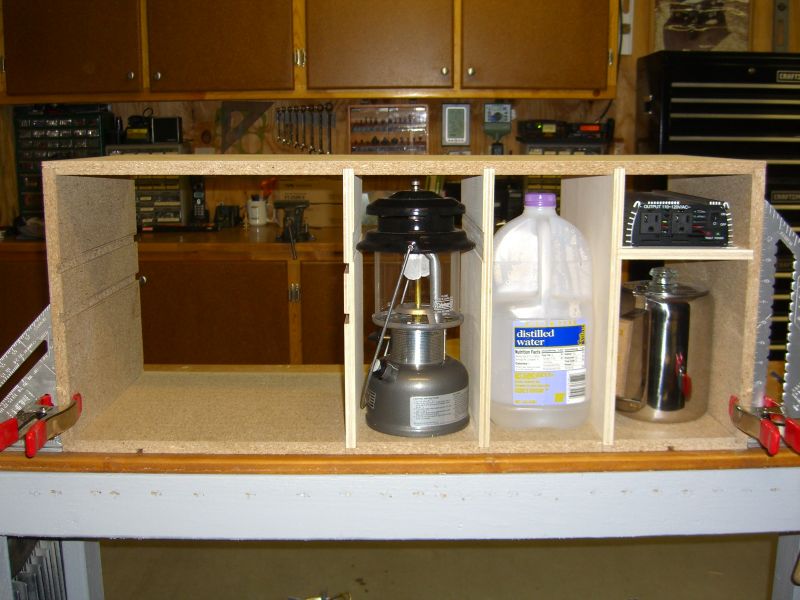
The next step was to insure the equipment I wanted to take would fit properly so another dry fit without glue and nails was necessary. In the upper right corner, I decided to add a shelf to install an 800 watt inverter which I have had for several years but never knew where to put (what not a better place than in a kitchen).
The inverter will be hooked up to the battery with No. 6 gauge wire running inside the right frame rail and terminated with an Anderson power connector over the right wheel well. It will be plugged in anytime the converter is to be used. (Even though the converter is turned off it will still drain your battery, at least the one I have will). The Anderson power connector is the connection most HAM emergency groups use in this area for a power connection so it will serve a dual purpose for me should an emergency communication situation occur.
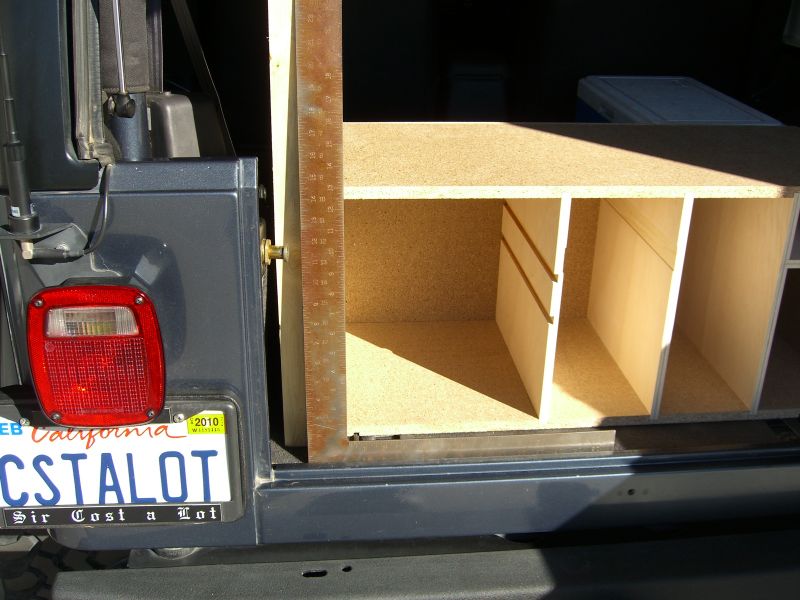
After gluing and air nailing the top, bottom, sides and back of the camp kitchen, I needed to check the offset needed to clear the latch housing on the tailgate. The future cabinet door, when open, will be the working counter surface of the kitchen.
The offset I needed came out at 4 1/4″ from the left side of the kitchen unit. A small drawer for utensils and other small items was constructed to fit between the two horizontal shelves on the left side.
TJ Camp Kitchen by Doug Simon
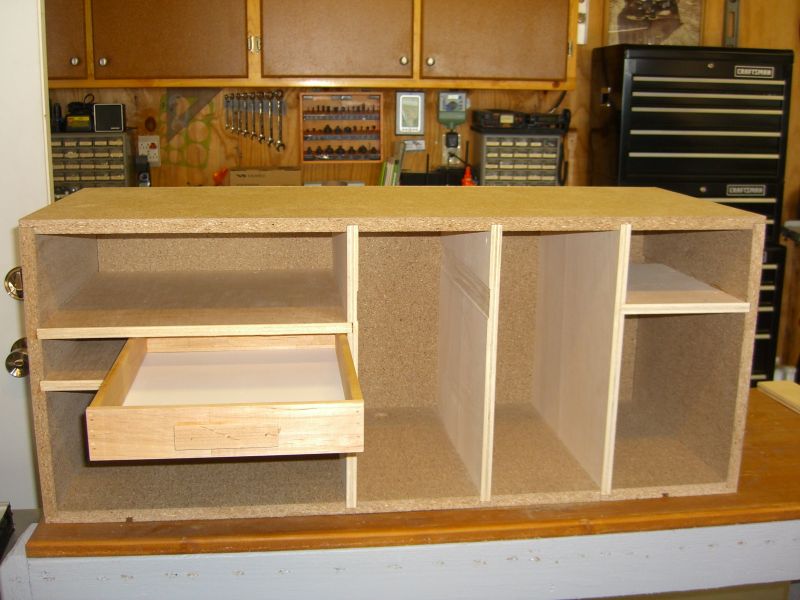
The location of the drawer was determined and then mounted based on the future of the cabinet facing and door/working surface to be built. Note that the horizontal shelf on the right that holds the inverter does not go all the way to the back so access to the back is possible for wiring connections.
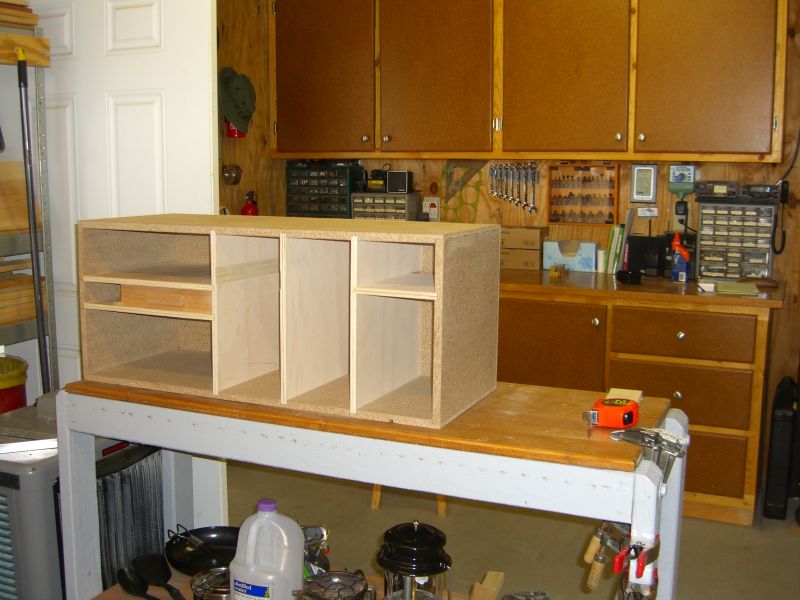

The kitchen unit is about the same height as most cooler’s and will allow for things to be stored away on top if additional space is needed.
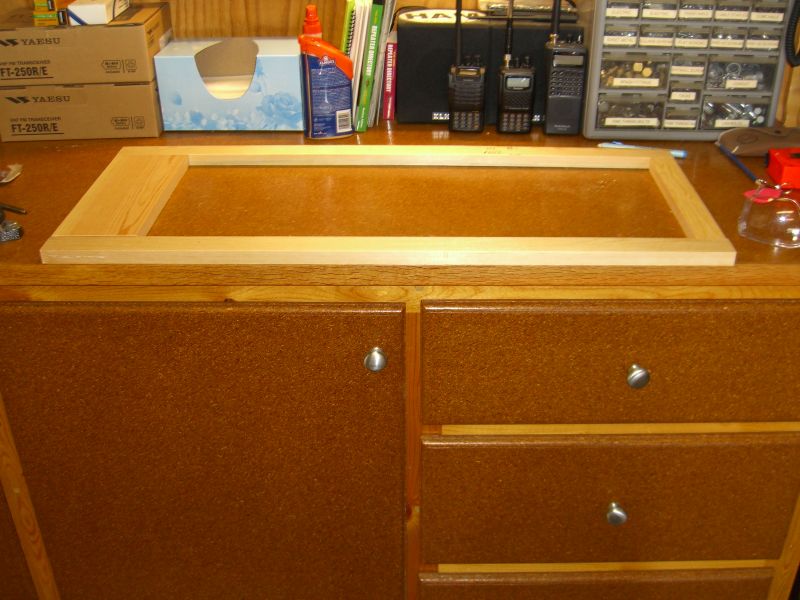
Today I laid out the cabinet facing for the kitchen. All parts were drilled using a pocket hole jig system and the parts were glued when assembled for extra strength. (see photo above and below)
TJ Camp Kitchen by Doug Simon

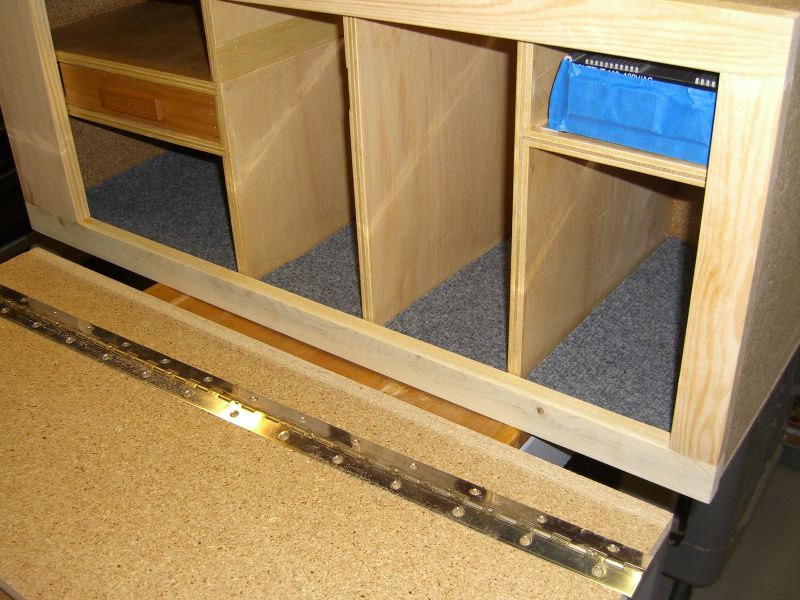
The facing for the kitchen door was now built and I was able to cut the door which will be the work counter for the camp kitchen. It will have the edges routed and attached to the cabinet facing with a piano hinge for extra strength. (see photo above and below)
Applying a coat of polyurethane to all inside shelves was next on the project list. It will help seal the wood and keep any stains from occurring. I cut pieces of indoor/outdoor carpet for the interior bottom of the unit to keep objects from sliding around. These will be removed before painting. Cutting a mortise on the door for the piano hinge will insure the door closes flat on the face of the kitchen.
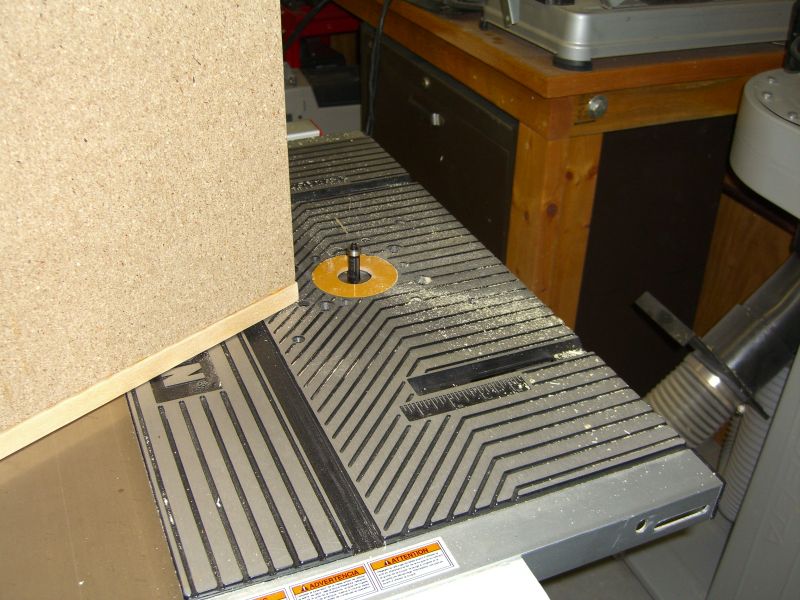
Next step is to route all corner surfaces with a 1″ flush trim bit followed by a 1/2″ round over bit. Doing this will keep the edges from getting chipped off and give a modular look to the kitchen.
All routing has been completed and now it is time to fill in all nail gun marks and any mistakes I have made with a filler. Finish sanding will follow.
TJ Camp Kitchen by Doug Simon
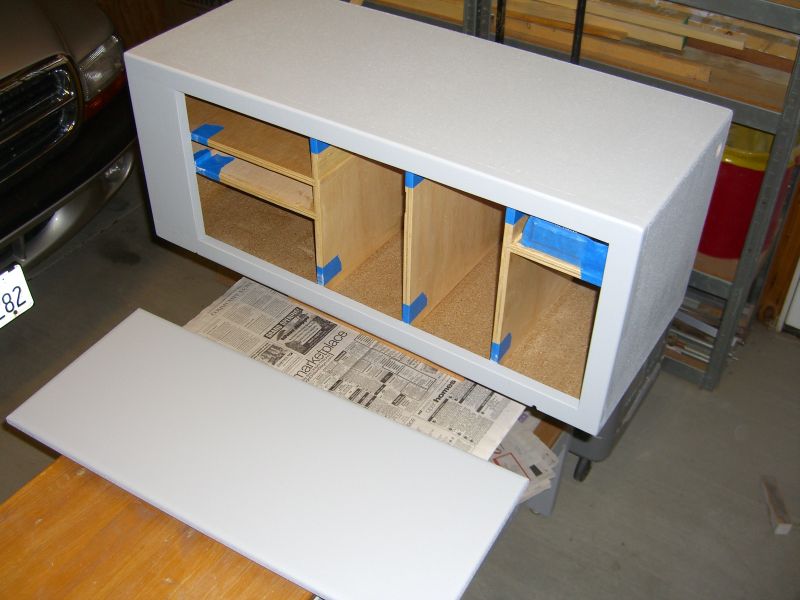
Time to prep for painting and mask off all areas which do not need paint. This includes the sacrificial inverter that can never be removed (poor planning on my part, remember that when you build yours).
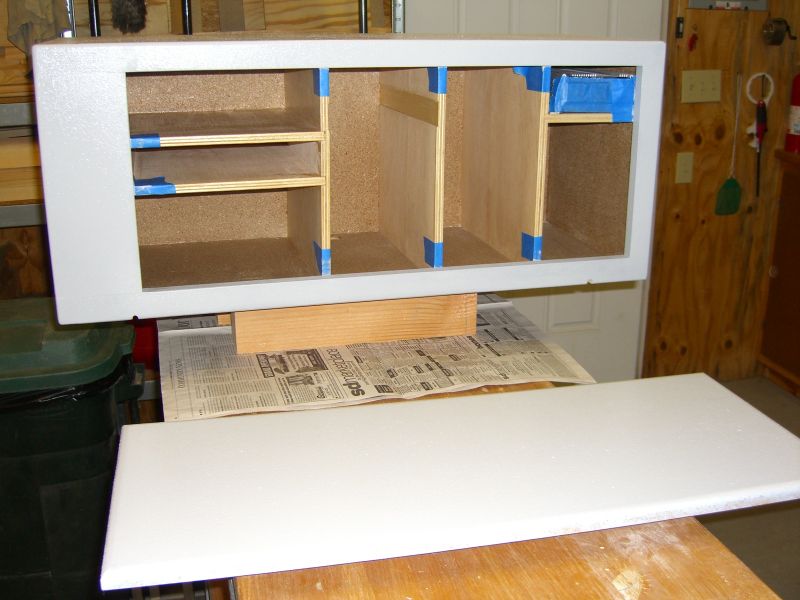
First coat of water base enamel porch paint, a great quality paint I have used on all of our decks at home and should hold up well for this project. Three more coats will follow for a durable surface.
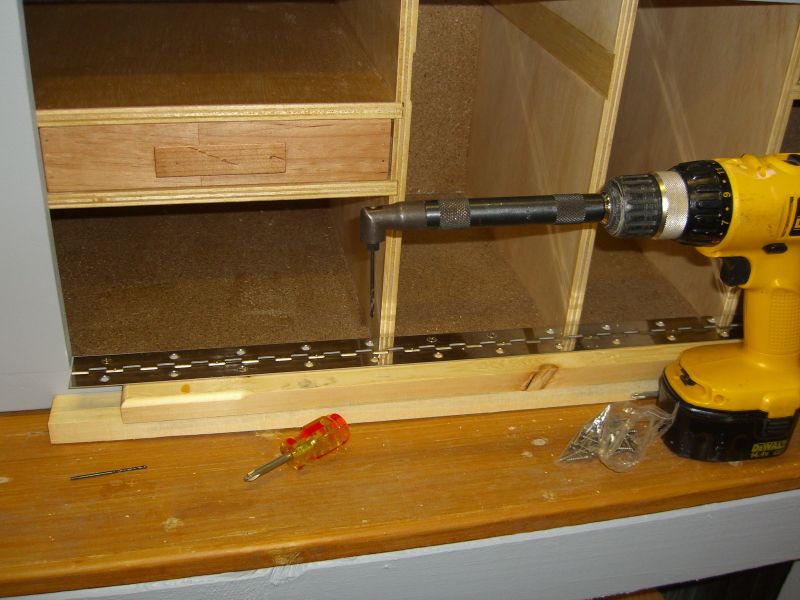
Installing the piano hinge to the Kitchen’s wood facing, I used a right angle drill so that I could drill vertical pilot holes. I would hate to get this far along in the project and split the wood.
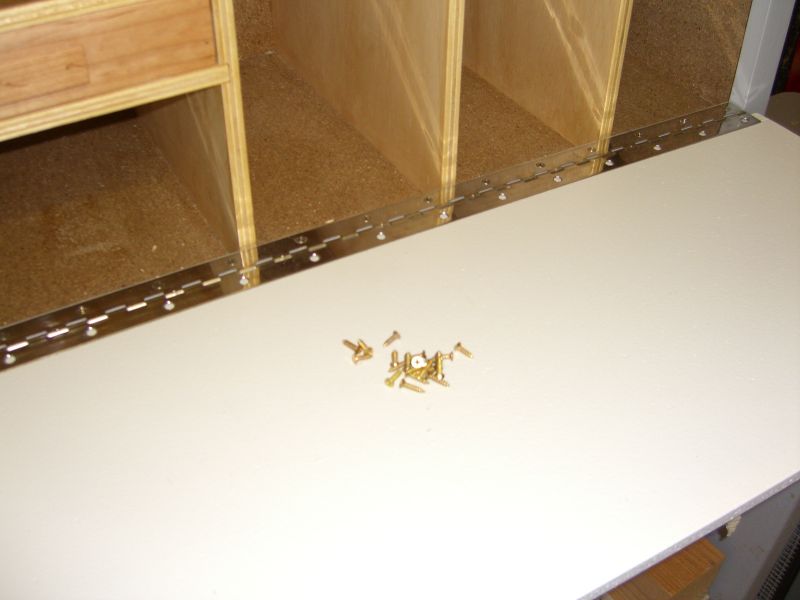
Installing the door required using shorter screws than what came with the piano hinge, I also drilled pilot holes for these too.
TJ Camp Kitchen by Doug Simon
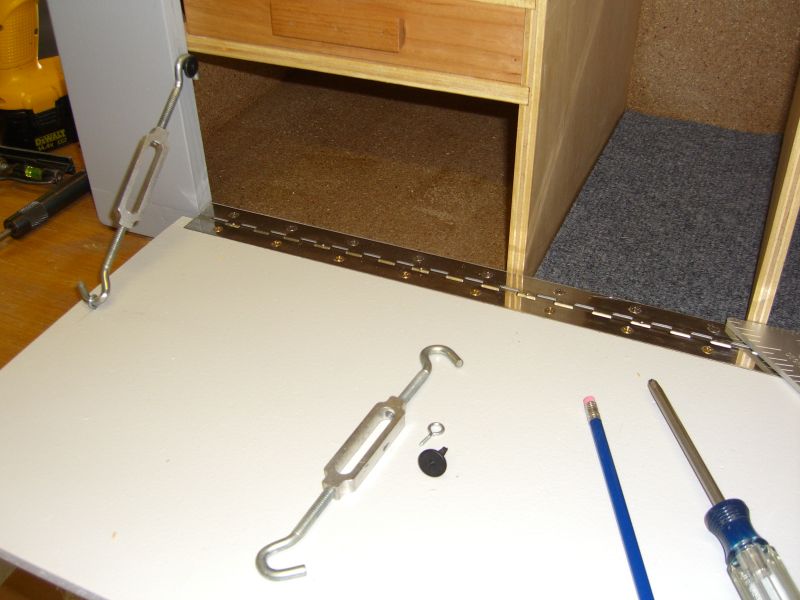
I chose to make the door stops out of some turn buckles I had in my parts bin. Since they are adjustable, using them can help you compensate for a non level surface.
For now, a magnetic latch is getting installed until I find something that will work better.
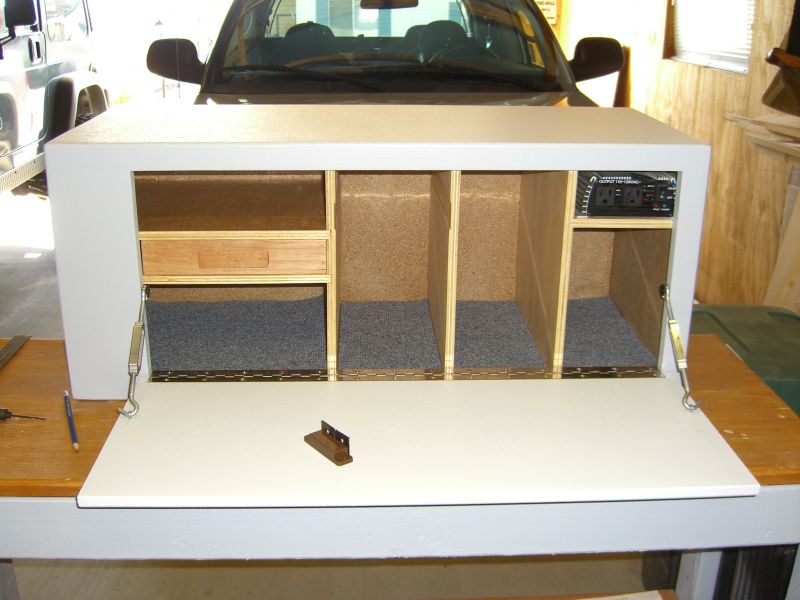
The unit is now complete except for a handle. I’m sure I’ll make some changes after the first run which is scheduled to be Bradshaw Trail on the east side of the Salton Sea. Tweaking things here and there based on actual use is all part of putting the finishing touches to the project.
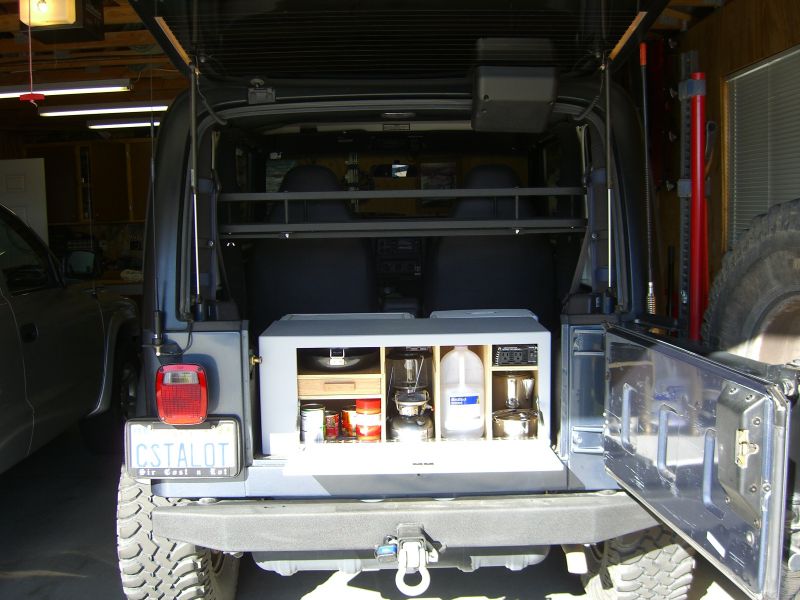
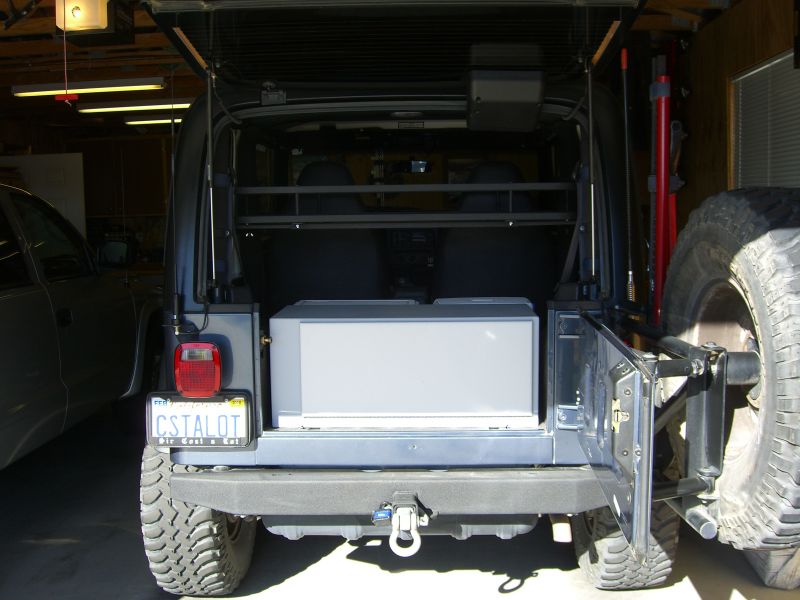
A fit test of the items, after the final coat of paint is dry and the unit is in the back of the TJ, shows the camp kitchen ready to hit the trail.
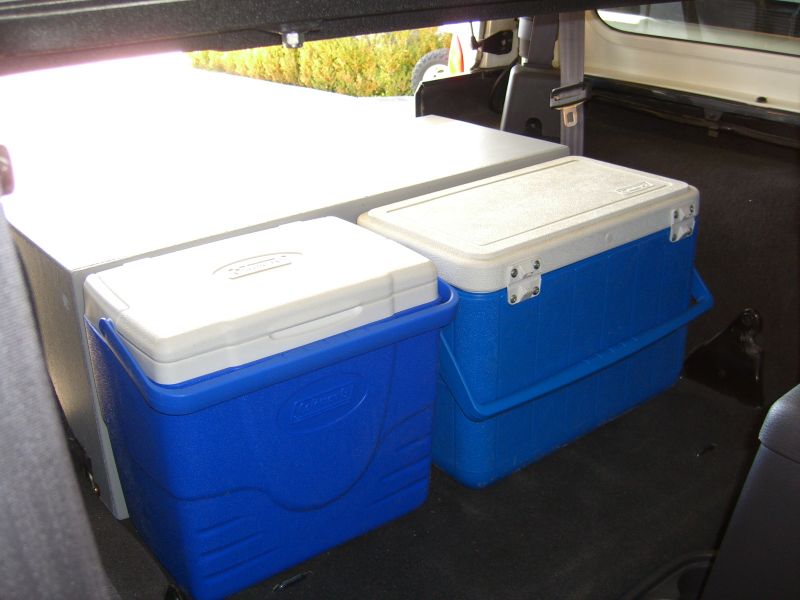
Every kitchen deserves a refrigerator or two…..and so a pair of coolers fits up nicely against the other side of the kitchen. That leaves room for food stuffs and the rest of the camping gear (tent, hammock, sleeping bag, etc.).
Closing comments from Stu: Well, there you have it. Every day or two Doug would send me an e-mail containing a handful of photos and a description of each. It was interesting to see the project come together, literally piece by piece. At the same time, it became apparent to me that I’m not a wood worker…..or at least, I don’t have any of those neat pieces of equipment that make wood working fun and interesting. With some practice, I could probably get to the point where I could make my own drop in kitchen…..(and no one gets to count the remains of the numerous attempts that didn’t turn out correctly!)
Again, my thanks to Doug for sharing this project. Putting something like this together seems less formidable now than it did when Doug first approached me with the idea.
Good luck on your next camping trip. I hope you decide to take your own camp kitchen along!