Most of you that have been following Lady’s progress over the years have come to realize that my mods provide either increased functionality or improved reliability. BUT…..(and notice that was a BIG BUT)……every now and then you gotta do something for your Jeep (especially if she is a Lady) that falls outside of the performance and functionality arena. That is what this mod is all about. Lady has faithfully provided me with more than 3 years of off-roading pleasure. She has never left me stranded on the trail and only rarely needs the winch to get me back home. So, this mod is being done purely to dress her up and make her feel like the Lady she really is. So, don’t give me no crap about “those perddy gauges” because you know it will come back around to you and you’ll be fixing a blown u-joint on the trail while I sit and watch! [insert biggest grin here]
Saturday morning arrived and I headed off to the north end of town to meet up with Jim, the guy that is JeepWhiteGauges.Com. Jim and I met by chance when I responded to his post on the local e-mail reflector. We chatted for about 20 minutes on the phone and he explained the what and why of his request to install a set of white overlays on my TJ instrument cluster. The plan was to install the overlays at his place (he has lots of room in his garage to work on a Jeep….unlike mine!), document the steps, and take some photos to fiinsh up his install instructions. Jim did his work from a ’97 instrument cluster that he got from somewhere. He is a YJ owner and so had not previously had the opportunity to take a TJ dashboard apart in order to remove the instrument cluster. That is where I figured into the equations…..one TJ and its owner that was willing to give it a try.
With that out of the way, let’s get started on the project. First step is to get the gauge cluster out of the dash.
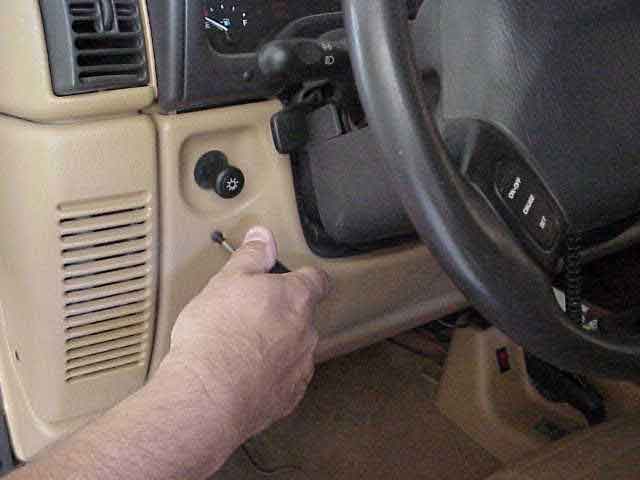
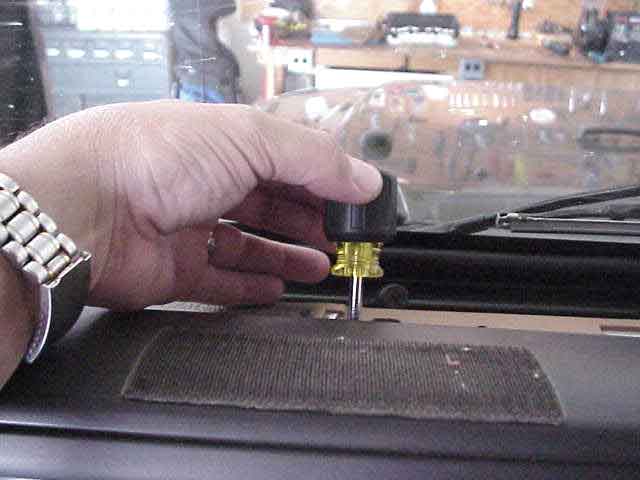
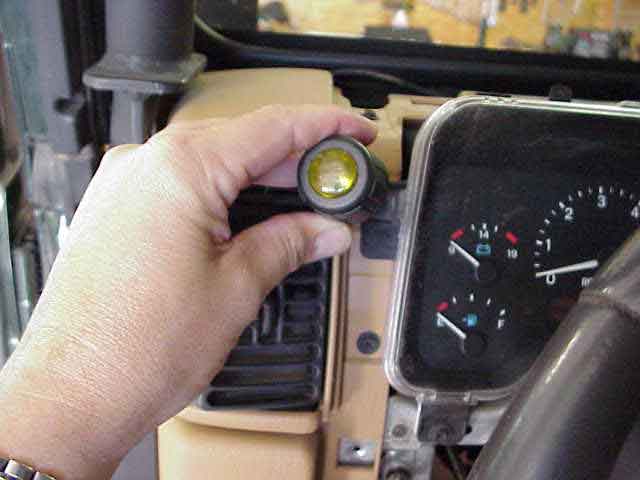
First, remove the two screws that secure the dash panel in place. Once these two screws are out, you can pull the panel straight back. There is a rubber boot that allows the headlight switch knob to pull through the panel without the need to remove anything else.
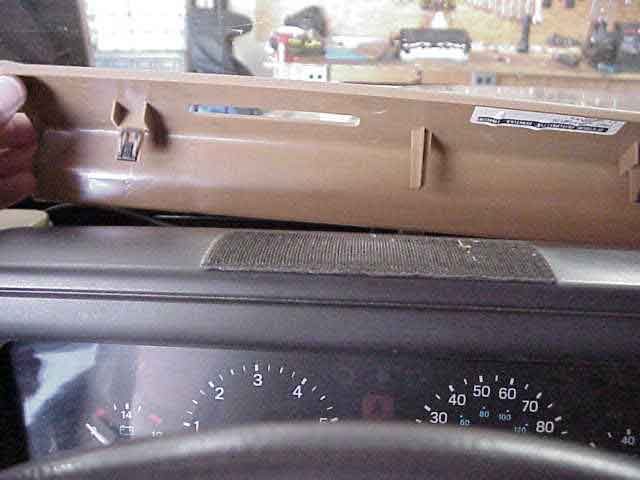
Next, remove the plastic defroster panel from beneath the windshield. This plastic panel is held in with clips (no screws). Put your fingers between the panel the windshield and pull up and back on the panel. Work the panel loose from the mounting holes and you move from one side of the Jeep to the other.
With the defroster panel out of the way, you can gain access to the three screws that secure the top of the instrument bezel in place. This bezel must be removed before you can gain access to the screws that hold the instrument cluster in place. Note the use of the stubby screwdriver. It is most handy to get these screws out.
Two screws, one in each lower corner of the bezel, must also be removed. Once you have removed these two screws, you may slide the bezel off of the instrument cluster.
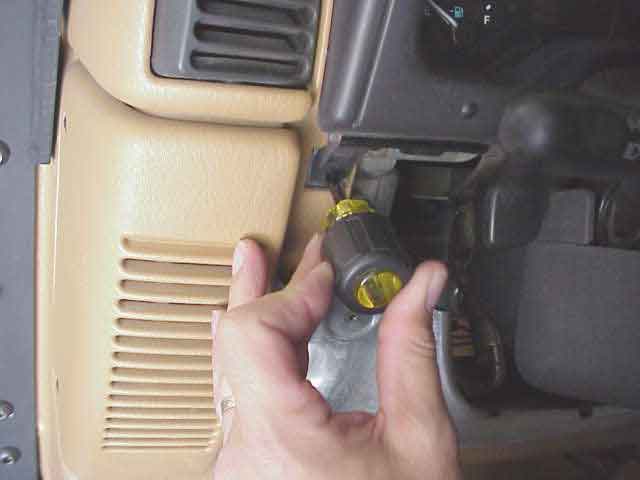
Don’t give up yet…you are almost there! Remove the four screws that hold the instrument cluster in the dash. When these screws are removed, the instrument cluster is free to be removed. The two large multi-pin electrical connects that secure attach to the back of the panel are attached to the dash too. You will feel some resistance as you pull the cluster towards the steering wheel. This is normal and is just the connectors way of letting you know that you are separating them.
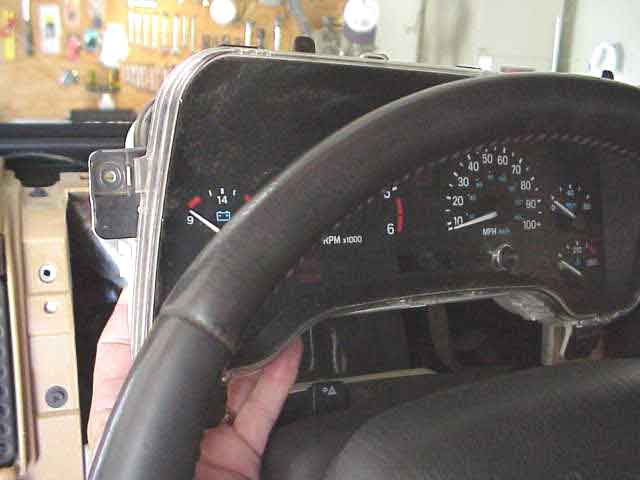
OK…that is it. With the electrical connectors now apart, continue removing the cluster from the dash. Set it over on a clean surface and grab something cool to drink. You are one third done and it is time to celebrate!
TJ White Gauge Overlays
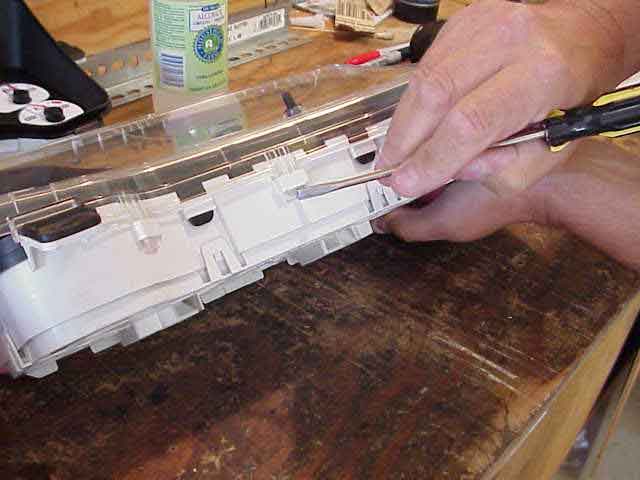
Next, the clear plastic instrument cluster cover must be removed. It clips into slots on the white housing. We grabbed a screwdriver and carefully pried them out of the slots.
Be careful, take your time, and all of them will let loose. Set the clear cover off to the side.
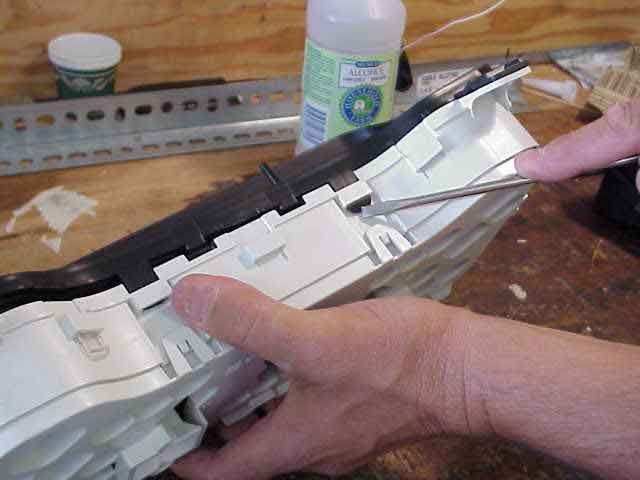
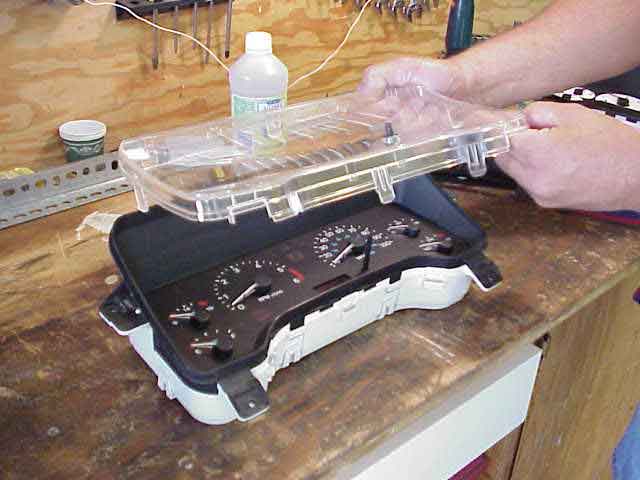
We decided to remove the black hood that is also clipped onto the white instrument assembly. The same screwdriver was again used to depress the clips and gently push them out of the slots. As with the plastic over, work your way around the cluster assembly, taking your time and being careful.
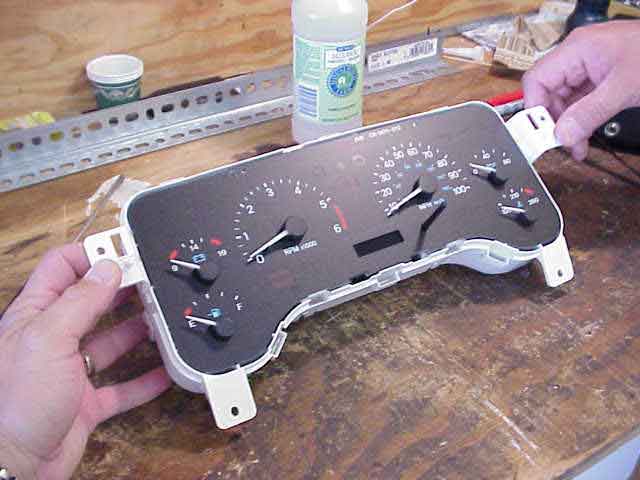
OK, you have completed the disassembly part of the project. You should have in front of you an instrument cluster that probably needs to be cleaned off just a bit (mine had some dust and such that had accumulated over the years). Jim used a soft tissue and some isopropyl alcohol (ordinary rubbing alcohol) to clean the surface of the instrument cluster. Be careful around the gauge needles. They were much more rugged than I expected them to be (that is a GOOD thing).
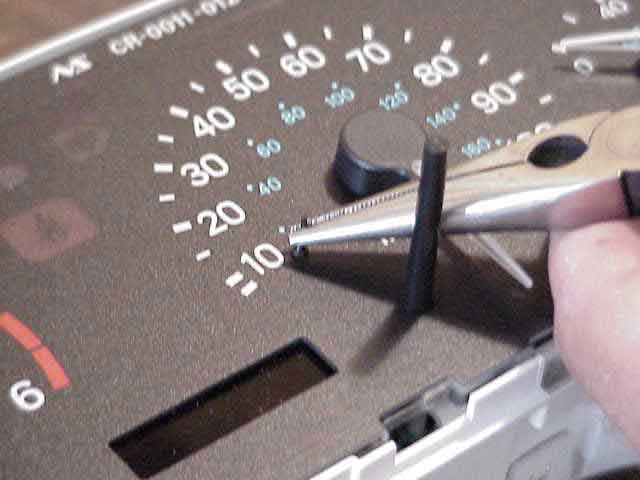
Using a small pair of needle nose pliers, carefully removed the tachometer and speedometer zero stop pins. Gently grasp the pin with the pliers and pull straight up. They are press fit into the assembly and will come out. They are pretty small so put them in a safe place since you will need to install them once the overlays are in place. I can probably comment here and say that I forgot to put mine back in and was about 2 screws away from putting the entire dash back together when I noticed my speedometer pointing towards the floor. DOH! (so I got some extra practice in taking my dash apart, again!)
TJ White Gauge Overlays
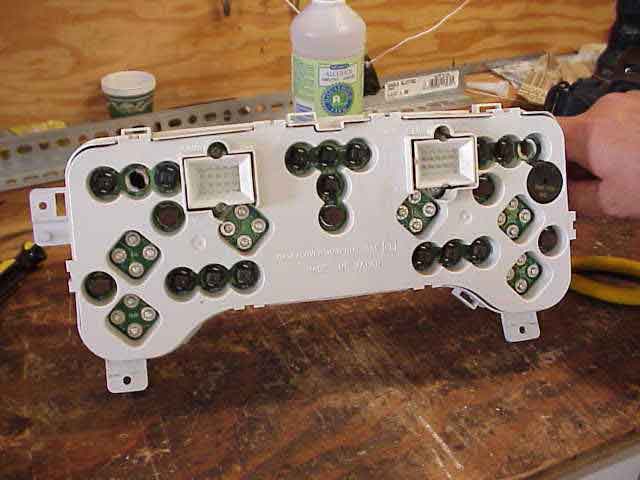
There are five light bulbs that must be removed from the back of the instrument cluster. DO NOT LAY THE CLUSTER FACE DOWN ON THE WORK SURFACE. (no, I am not saying that from experience, just passing along friendly advice) You don’t want your pointers, etc. to get messed up. The bulb assemblies can be identified by the brown base that you can see in the hole. They are removed with a quarter twist. We found the needle nose pliers to be most helpful in doing this step.
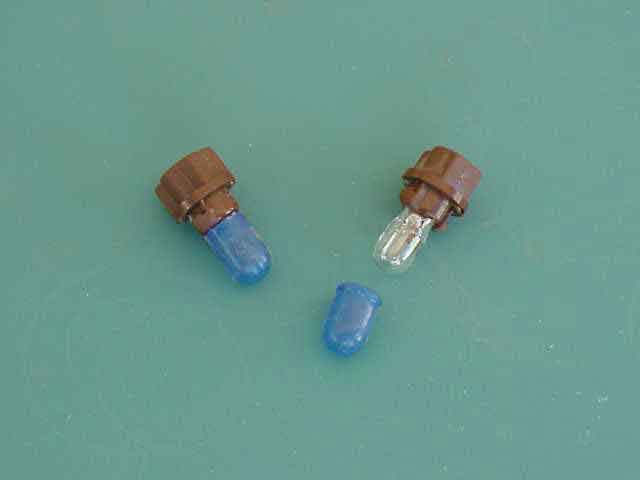
So…you are probably wondering why the need to removed the bulbs? Well, the little blue rubber covers need to be removed so the bulb’s light output is better used. We need a bit more light light up the overlays, and this is how you get it without spending any money. Jim told me the ones on his instrument panel had to be sliced off with a razor blade, as they were pretty well stuck on. I had no problem peeling the little bulb condoms off. After the blue covers are removed, install the bulbs back into the instrument panel.
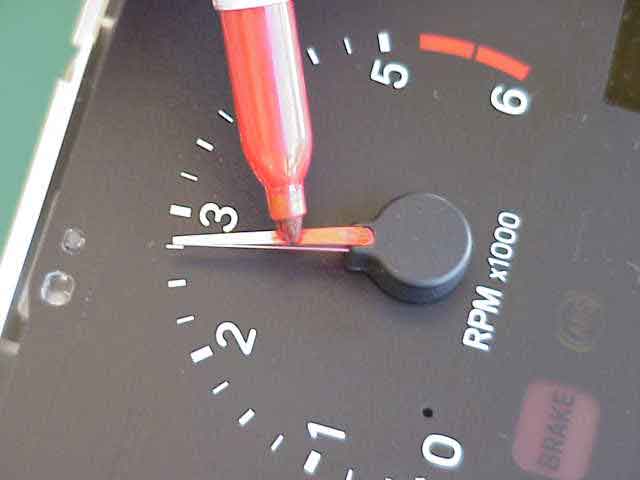
Since the overlays are white with black lettering, Jim thought I might want to accent the gauge needles a bit. He offered me the choice of either a black or red marking pen. I opted for the red as it would provide nice contrast against the white white background and went with the red markings on the overlays too. We joked around a bit around doing them in blue which would then yield a red, white, and blue color theme.
At this point, GO WASH YOUR HANDS! You do NOT want dirt or grease on your hands when you start handling the overlays. While I had not thought about doing this, Jim motioned me to come in side and get washed up (I believe he has some experience with this part of the process.)
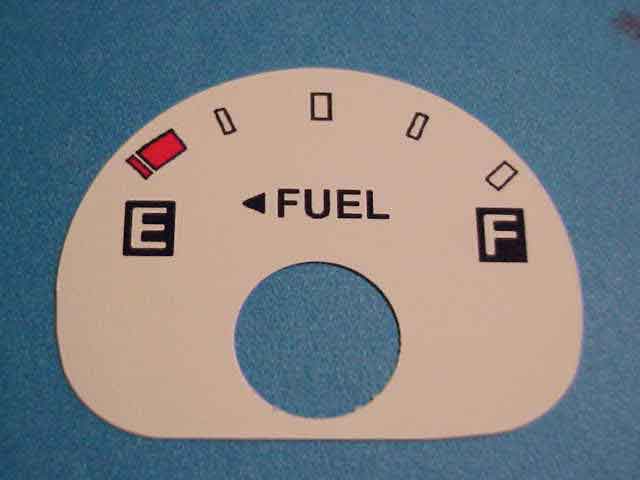
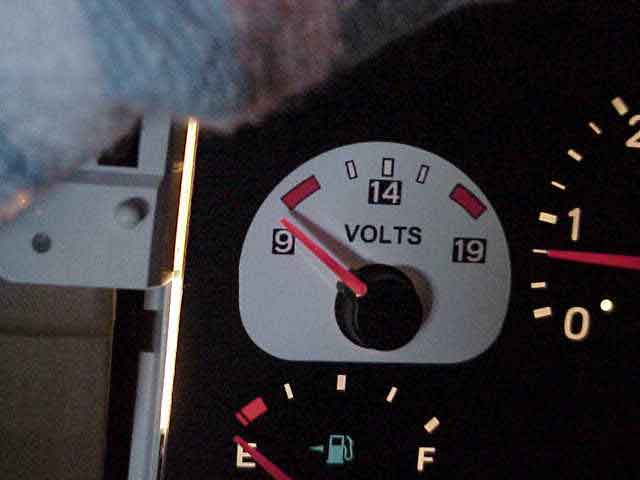
I though you might like to see what it looks like, kind of up close and personal. Also, I wanted to show Jim how my Sony digital camera did on the close up shots. Jim doesn’t have one yet but after this morning’s install session, I am thinking he is one step closer to getting one. He took me up on the offer when I told him he could copy my camera’s floppy disk with these pictures on it.
Jim and I had a good discussion about what method I might want to use to attach the overlays to the black panel. There is always the chance that one may wish to reverse this process and restore the instrument cluster to its original configuration. The black coating that is on the instrument panel, when removed, allows the light from beneath to shine through. Hence, I didn’t want something that might eat into the coating, or pull it off, should the overlay be removed at a later time. Jim had experimented with a number of methods and he passed along the details as we spoke. I quickly realized I did NOT want to use rubber cement. He had experimented with some Scotch double-sided adhesive tape and it met the “non-destructive removal” criteria that I wanted. I decided to give it a try.
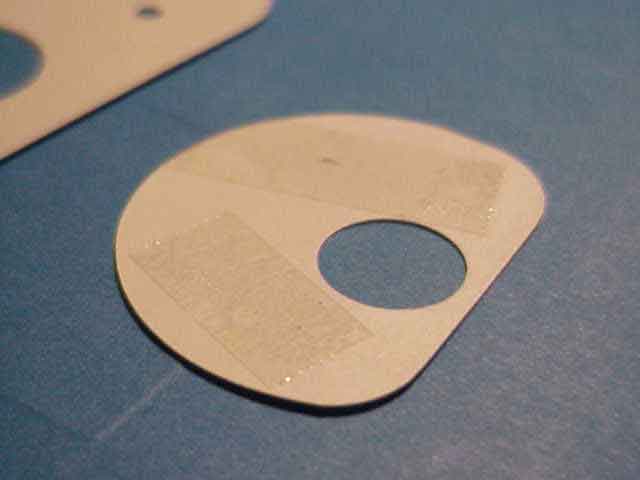
Jim flipped an overlay over and applied a couple of strips of tape. If you get the tape over the edge, don’t try to peel it off…..take a small, sharp pair of scissors and carefully trim the excess tape. We did this a couple of times and it worked just fine.
TJ White Gauge Overlays
NOTE: At this point, you need to carefully push the instrument cluster back into the dash board mounting brackets. You do NOT need to put any of the screws, etc. back into position. You do need to firmly seat the cluster so the electrical connectors make contact since we need to light up the instrument panel before we put the overlays in place.
To properly position the overlay, you need to darken the area so you can clearly see your dash lights when you turn them on. You can do this step in the evening, once the sun has set or you can cheat like Jim and I did. Jim closed the garage door but we still had some light from the door’s windows. He grabbed a blanket and positioned it so that it blocked the light that was spilling in from the windows. That was just what was needed to illuminate the back of the overlay. Carefully slip the overlay over the needle, being careful to not bend for fold the overlay. You want it to lay perfectly flat on the instrument panel so putting a little crease in it is not recommended.
Although you may not be able to clearly tell it in the above picture, the light from the panel will show through the overlay. Align the marks and numbers with the those showing from behind. Take your time and you will get everything to line up nicely. Jim did a good job getting the overlays to line up with the factory lettering. You will be able to see when you are properly aligned. When you are, then carefully press on the overlay so the tape will adhere. You can move the needle around so that you can press the overlay onto the panel. Congratulations, you just installed your first overlay! Piece of cake!
Proceed with the remaining overlays in the same fashion, taking your time and being careful to get the overlay properly aligned over the marks and numbers that lie beneath it. Be careful that you do not push on the overlay before you have it in position.
Three down and three to go. So far, so good. By now, I was starting to get the hang of this alignment thing. Jim would hold up the blanket each time so I could clearly see the lettering that was shining from beneath the overlay.
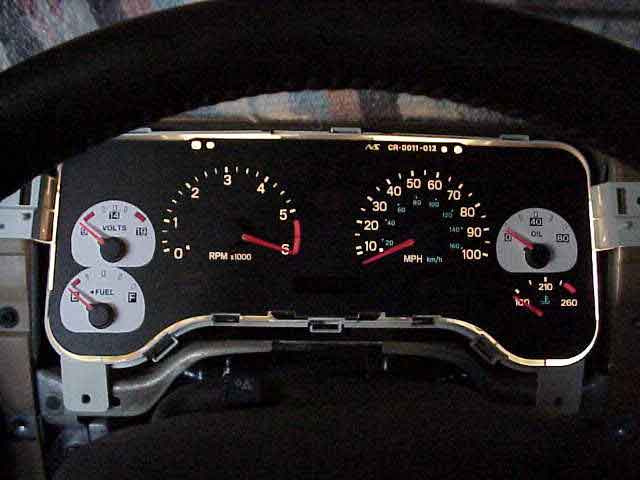
Here is a pic with all of the overlays in place. As you can see, there is not screws holding anything in place. Oh, don’t forget to install those little zero stop posts for the two big gauges. I figured if I reminded you here, again, maybe you wouldn’t forget to do it like I did.
After the little posts were put back into position, it was just a matter of back tracking the steps we did when taking everything apart. If you end up with an extra screw, you obviously forgot to put them all back into their respective holes! Yes, I can speak from experience on this issue. I’m glad I had Jim around to keep me honest (and to help me count those crazy screws!)

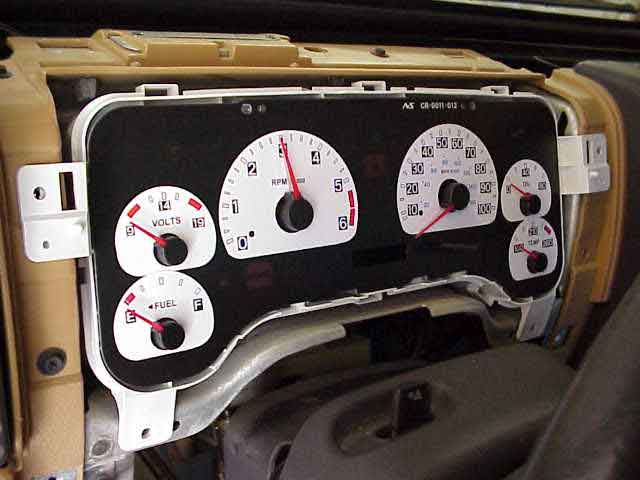
Here is another picture of the finished project, all wrapped up and ready to be driven home.
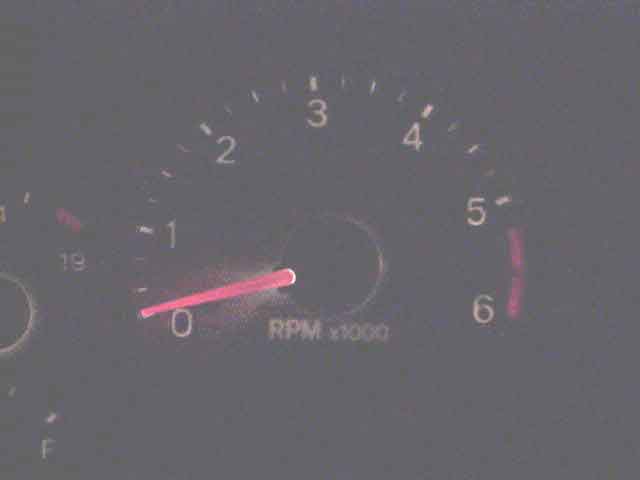
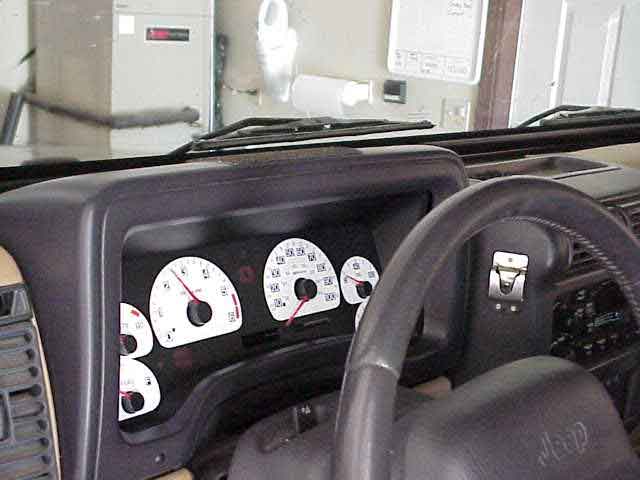
OK….so my digital camera does NOT take good pics in the dark. I used Photoshop and ramped the brightness way up on this pic in order to see some detail. I took the pic in my garage after I got home. With no windows, I had no problem with it being dark As you can see, the overlays do light up from the back side, as they should. As I said, if you take your time while applying the overlays, you will get everything lined up and looking as good as I did. (oops, I think I just patted myself on the back!) Anyway, it does look a lot better, in the dark, than the above pic shows.
So, Lady has a new look. I feel confident that my overlays won’t bump her horse power by 20% like the K&N filter did, nor will it make me virtually unstoppable on the trail (like my new MT/Rs did). But one thing is for sure, I am very happy with the new look and I know that Lady won’t mind showing off her new instrument panel to anyone that wants to see it.
A big thanks to Jim for the assistance in helping me install these. I’m always glad to see people like Jim filling the niche markets that the big companies don’t wish to be bothered with. Thanks Jim for a fine product!
Happy trails and TREADLightly!