Although it may sound like the opener for a wine commercial, it is about the TJ’s 4.0L engine. I was on my way to Death Valley (well, it was the weekend before I was leaving for a DV Jeep trip) and I knew my air filter was in need of replacement. I had stopped by the local PepBoys and suffered sticker shock when I saw what an off-the-shelf TJ air cleaner was selling for. Prior to that, I had kicked around the possibility of getting a K&N filter but due to the price, it didn’t make it on my “Top 10” list. After seeing the price of that filter in PepBoys, (and verifying it was not mis-marked), I decided a K&N was certainly the better choice.
So….I guess the story goes like “A funny thing happened on the way to 4×4 shop….”. I had heard some positive comments about the Airaid High Flow filter so I decided to give it a try. The splash shield that covers the really large filter was one of the things I wanted if I was going with an after-market filter system. The Airaid comes with one so I decided to give it a try. I also opted to try the Poweraid spacer that bolts in between the throttle body and the intake manifold. It claims to create more turbulent air flow, giving a better air-gas mix in the intakes. I am not completely certain of this….but time will tell. If I can sneak some gas mileage improvement out with this combination, I’ll be happy. Improved performance and better engine response will be frosting on the cake, as far as I am concerned.
The installation is a no-brainer. Common hand tools, consisting of a couple of wrenches and small sockets (both SAE and metric) are used, along with a screwdriver. I think that was all I got out of the toolbox for this project. There is no splicing, cutting, or wiring involved, so it has to be easy! Just follow the instructions and you shouldn’t go wrong. In a nutshell, you remove the stock air filter box from the TJ (3 bolts and a hose clamp). It is replaced with the new filter and splash shield, using the new hardware. As far as the Poweraid is concerned, remove the 4 bolts that secure the throttle body to the intake manifold. Remove the old gasket. Install the supplied gasket, the Poweraid, another supplied gasket, and then the throttle body. Secure with the new hardware. Install the 1″ tall spacers under the cable bracket with the supplied hardware and you are done. Check everything over twice to make sure nothing is binding, your cables move freely, etc.
The instructions for both the air cleaner and the Poweraid were adequate to get the job done. I have a phone call in to their tech support concerning the Poweraid parts. It includes a couple of bolts and two spacers to relocate the bracket that supports the end of the throttle and cruise control cables. The odd thing is that my bracket mounts with 3 bolts, not the two that their instructions indicate. Maybe the one they prototyped only had two? I left them a message about the problem and I’ll comment here after they call me back with a solution. (always like to see how the customer support side of the world works in these companies). The nice thing about it is that the company is in Scottsdale, AZ, which is across town from my place in Phoenix. At least I don’t have to worry about long distance charges (no 800 number provided either).
Here are a few pictures, after the install. I would have snapped some of the components before I put them in but I was at my friend’s house and did not take my digital along. So, you’ll have to put up with the “after” shots.
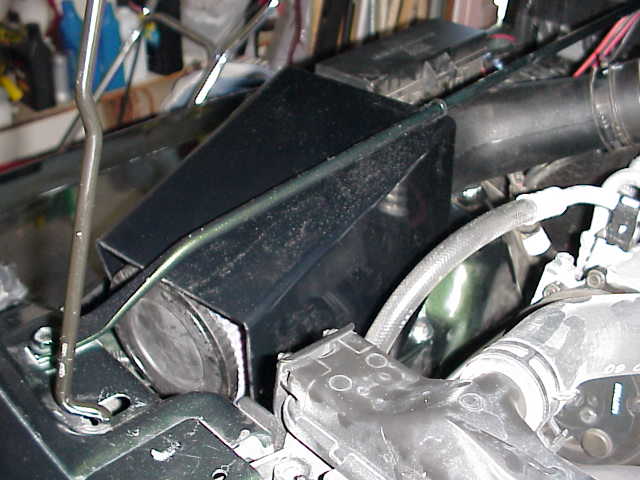
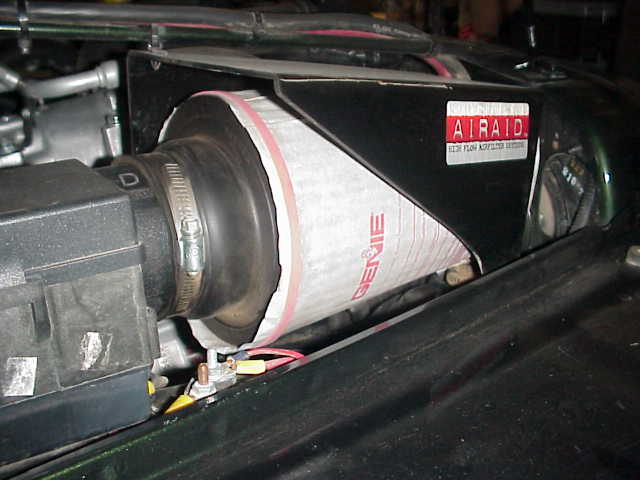
The splash shield covers the sides and top of the filter and leaves the forward facing rubber end exposed. An adapter is supplied to properly adapt the large air filter to the smaller stock air tube. The fit is nice and snug and should provide a good seal. The rigid adapter serves as an attachment point for two brackets that mount the filter assembly to two of the old airbox mounting holes.
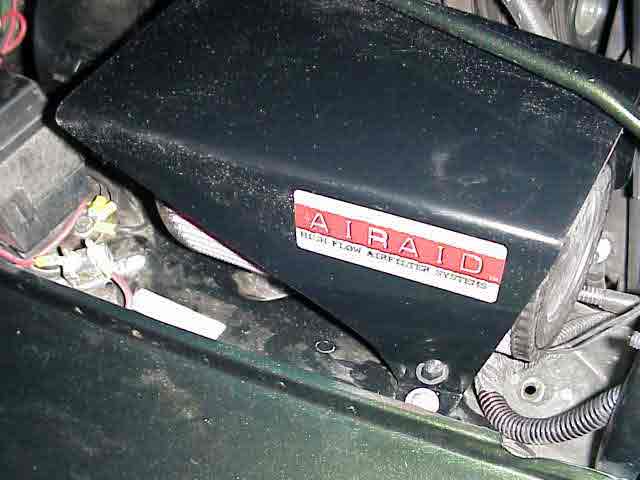
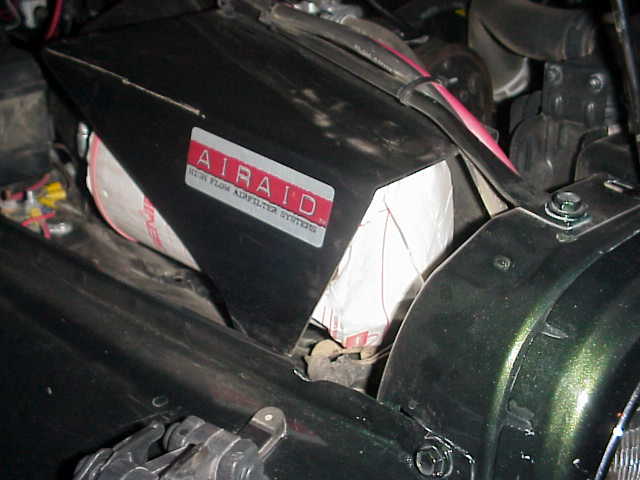
Another view of the air filter system. You do not have to drill any new holes, but rather you recycle the ones from the old air box.
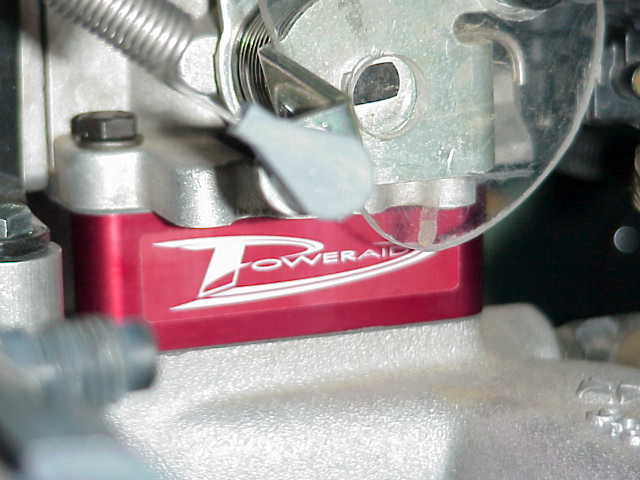
Here is the Poweraid installed under the throttle body.
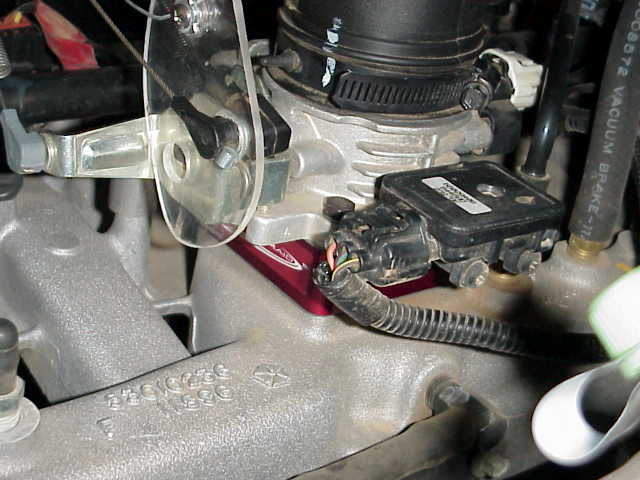
As you can see, there is not much too it. It just slipped in under the rest of the parts.
Well, that is about it. Time will tell just how much of an improvement any of this made. I am certain that these add-ons would do better if I also replaced the exhaust system with a high-flow system as well. One mod at a time for now! Gosh…the gears and Detroits took a heavy toll already this year!
April 2000 – The Death Valley trip has come and gone and Moab is just two weeks away. I checked my mileage on the way going to Death Valley using the first two fill ups. One was 16.5 MPG and the other was 17.5 MPG. So….17 MPG average was pretty good as far as I am concerned. I had the back end of the TJ loaded with the usual stuff and was pulling my heavy duty custom made off-road trailer. It is a 4’x6′ trailer that runs on a pair of Goodyear Wrangler GSAs. It was loaded heavy for the trip. I was carrying 200 lbs of gas and 150 lbs of water. I had about another 50 lbs of fire wood along and then my regular camping equipment, couple of coolers, tents, 20 lb. propane tank….well, you get the picture. I ran about 55-60 MPH on that part of the trip. All in all, I think the new air equipment is doing a pretty good job. I’ve mentioned my results to others and they were quite impressed with 17 MPG on a Jeep with 4.56 gears and towing a trailer.
May 2000 – Moab has come and gone as well as several local AZ trips and last week’s excursion into the Cinders off-road recreation area near Flagstaff, AZ. Perhaps this last trip at the volcanoes was more of a test than the previous ones. The major difference…..red-line on the 4.0 was hit on a few occasions while attempting to climb out of the craters. Much of the driving was done at about 3000 – 4500 RPM. You could really hear the engine gulping air. I had never ran here before, so am unable to do a before and after comparison. However, considering I was not running paddle tires, and I was running my 32″ MTs, Lady made quite a showing for herself. (not exactly the tire of choice for volcanic cinders).
May 2001 – I had a chance last month to check my mileage while going to/from Moab, Utah. My wife was with me and we had the back of the TJ packed pretty well….about as much as I would ever carry in it. I checked the mileage on a stretch of highway in northern AZ….going both directions in hopes of canceling out any elevation changes that might make a difference if checked just one way. I got 17 MPG going one way and 19 MPG going the other way. So….18 MPG is the number I’ll post here. Now…considering Lady is turning 35″x12.5″ tires with 4.56 gears….I can live with 18 MPG on the highway (speed was about 60~65 MPH).
Note: The K&N filter has been removed.
October 2000 – I noticed that when I would pull the filter off to clean it, I found just a bit of very fine dust inside of the air tube. Obviously, the K&N filter is not taking all of the dust out of the air. I searched at several parts stores and the local 4×4 shop I frequent. No one had a K&N pre-charger. (several didn’t know even know what it was.) So, I opted to try my own pre-charger and see if it makes a difference.
I stopped by the Home Depot store and picked up some 25 gallon wet/dry vac paper filters. After cleaning the film of dust in the air tube, I put everything back together and slipped the paper filter over the K&N filter. The filters came with a big rubber band which worked just fine in holding the filter in place. I’ll post my findings in a few months and let you know how it turns out. With luck, it will eliminate the very light film of very fine dust that was in the air tube.
Here are a couple of pics of my pre-charger.
December 9, 2000 – So far, so good. I ran a mileage check the other day when coming back from a wheelin’ trip near Tucson. Doing 60 MPH on the highway, I averaged a bit over 19 MPG. I am still running the first filter bag. It is starting to get dirty but the mileage check indicates I am not starving for air, so I am not going to change it for a while.
December 28, 2000 – Today was maintenance day on the TJ, oil change, grease job, etc. I decided to pull down the air filter setup and see if my pre-charger has been keeping that ultra-fine dust out of the air tube that I noticed back in October. After I got the oil and lube chores taken care of, I removed the filter and the air tube.
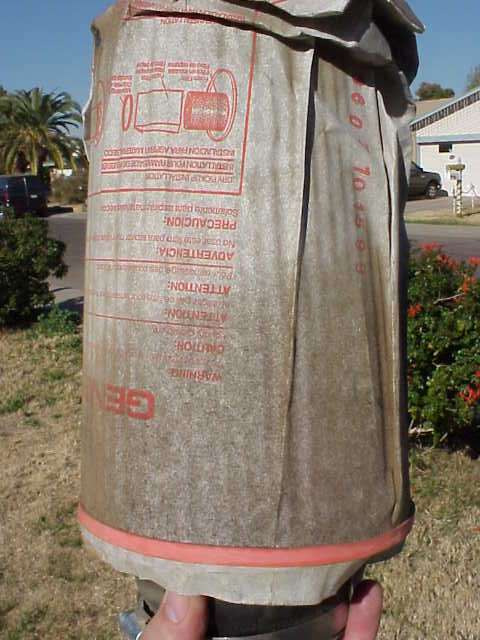
The bag looks like it has seen better days, but it is just dirty. The rubber band that came with the bags is still holding the bag securely onto the outside of the K&N filter. I am sure I could have let it go longer (based on the mileage check from earlier in the month), but I really want to see what the air tube looked like on the inside. The last month’s worth of trails that I had run were all nice and dry so we had the typical dust that I was seeing during the summer runs.
Here is the new bag that will be going on the filter. A side by side comparison gives you a better idea of just how much dirt was trapped by my $.50 pre-charger (or maybe it was less than that). But….the real question still lies in the air tube. Will it have that same fine coating of dust like I found back in October, or will it be clean?
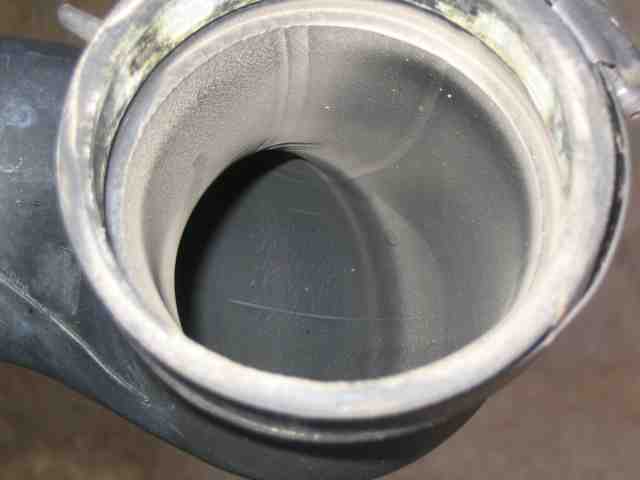
Well, here is the answer. Clean as a whistle it is! This is the end of the air tube that is clamped into the K&N filter. There was no dust inside the tube! In October, this was cleaned out. So that I would have a reference to compare it to, I did NOT clean out the section of the air tube that connects to this part and goes all the way to the throttle body. I removed that part (the stock factory tube) and checked it. It still had the fine little coating of dust. I then washed it out with some soapy water since my experiment is now done!
The K&N filter had a little bit of dust in a couple of areas. One of these is where the paper pre-charger rubbed against a wire loom enough to make a small hole in it. This would make sense since the K&N didn’t have the full effect of the paper filter.
So….as I had discussed with the old off-roader….you don’t run a K&N filter in a dusty environment without using a pre-charger. I can handle that. Shop vac paper filters are cheap and easy and disposable too! I am guessing I’ll use about two per year….yeah, I think the Jeep budget can handle the extra dollar!
The K&N Filter is History!
More than a year ago, I decided to remove the AirAid adapter and K&N filter and go back to the factory air box and filter. A local Jeeper offered to buy it as he needed it for some project. Anyway, it is now history. I had read enough reports and from personal experience, saw the amount of dust that an unprotected K&N filter was letting through (hence the filter bag on the K&N).
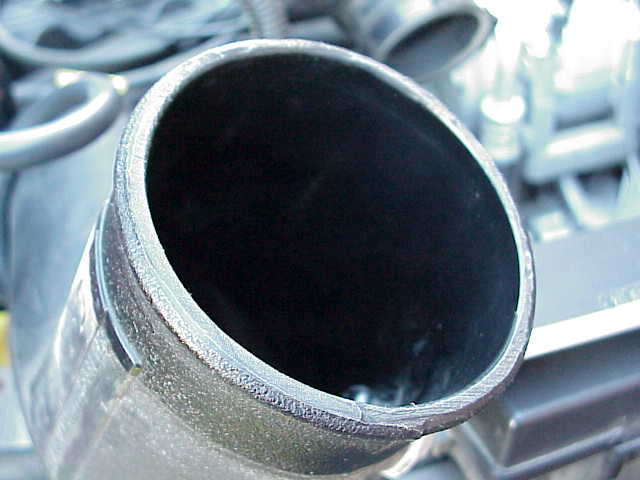
Today, I was doing a tune up on the TJ. I was near the 66K mile mark and thought it would be a good idea to do some maintenance on the ignition components and clean up the throttle body a bit.
I had never bothered to check the other end of the factory air tube when I had discovered the dust getting through the K&N filter. The above pic shows the remains of the dust that had accumulated in the air tube from the K&N.
You know, it is pretty bad when the inside of the air tube is dirtier than the outside. Enough said……