Stu’s comments: I received an e-mail about mid-February regarding Shad’s AW-4 swap into his YJ. While he knew my site’s focus was for TJs, we both agreed that beefing up the site’s AW-4 content, in this case for the YJ folks, would be a good thing. Because the other AW-4 transplant write-ups come up pretty high in the Google search engine, lots of folks end up on the site even though they may not have a TJ. Well, now there is some very excellent information, thanks to Shad. He wasted no time putting together the write-up and photos and sending them along in a few e-mails.
I’ll admit that I wasn’t totally up to speed on the Renix AW-4. A quick spin through Wikipedia filled me in on most of the highlights. In many ways, I believe Shad had more of a challenge than I did when I did my AW-4 swap.
So…..without any further delay, here is Shad’s write-up about his AW-4 project.
I have been thinking about an automatic for a while now. When I’m climbing boulders and steep terrain or sitting in stop-and-go traffic, my right arm and left foot get quite a workout. I also have a short throw shifter that requires some arm strength so that probably doesn’t help much. An auto would greatly benefit when I’m out climbing rocks. Balancing the clutch, gas and brake while at extreme angles doesn’t quite produce the nice, smooth ascent I would like.
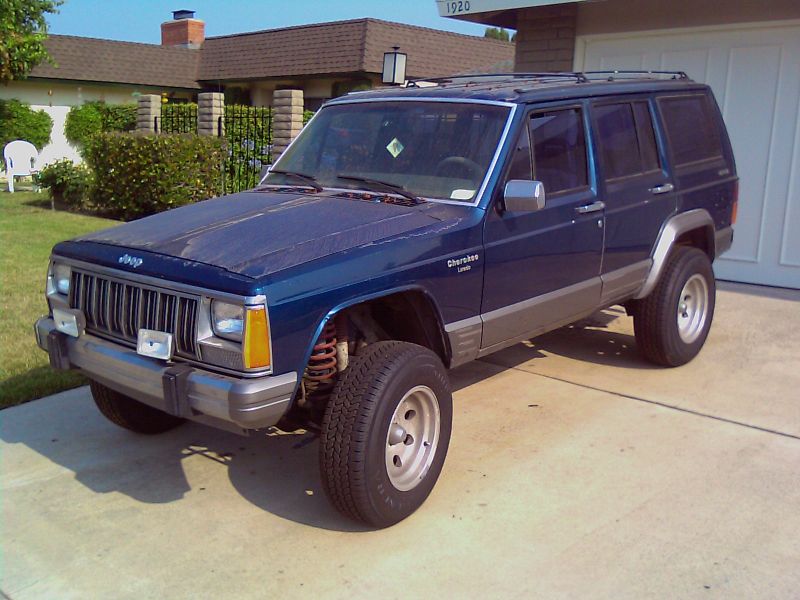
I happened across a buddy’s ’87 Cherokee Laredo with some nasty electrical problems. Problems so severe that it has been sitting in a parking lot for 2 years because that’s where it died. He gave it to me before it got towed away. I jumped and spliced what I could and it started.
I limped it all the way home and into my driveway and there it gasped its last breath. I did everything imaginable to get that sucker to fire but the electrical gremlins won. It’s a RENIX system so the parts are a bit hard to find. The cost to replace the yet unreplaced sensors, ECM, injectors, coil, tires, body pieces and a cheapo coat of paint would have pushed the repair bill to double the Blue Book value. Even then, I’m just not an XJ guy.
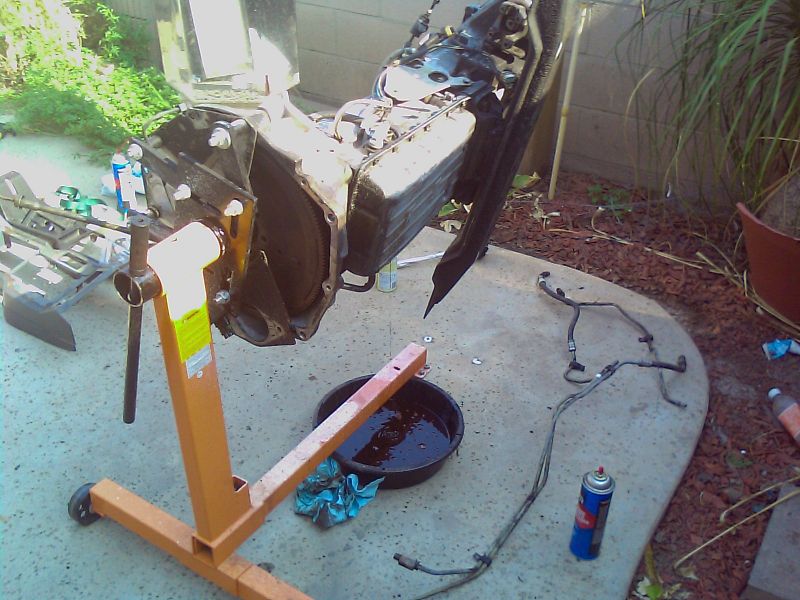
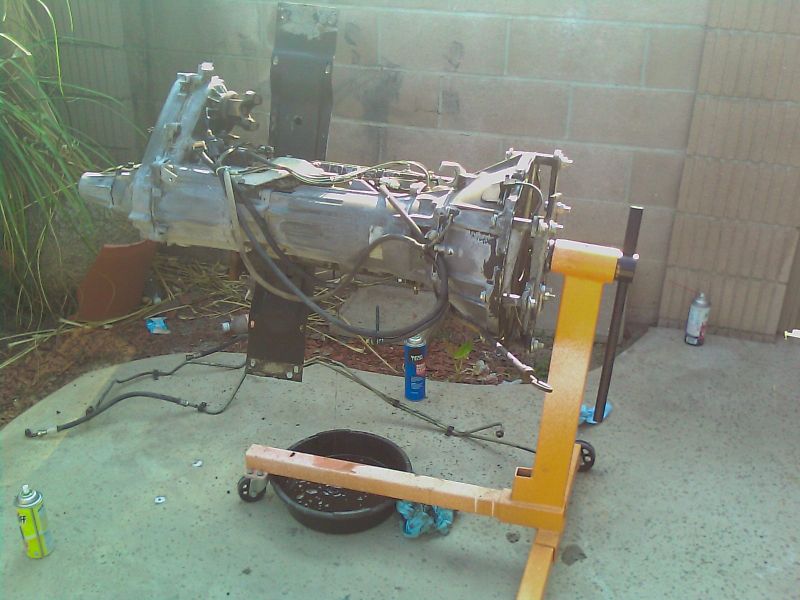
I took the transmission, torque converter, flexplate, dust shield, transmission control unit, plug ends, shifter, shifter cable, crossmember, cooler lines, trans mount, transfer case, linkage, transfer case lever, TV cable, wheels and the brake pedal.

The local wrecking yard came for the rest. Hopefully the other useable bits have found a good home.
Renix AW-4 Transmission Swap into a YJ
’87 XJ AW-4 into ’93 YJ
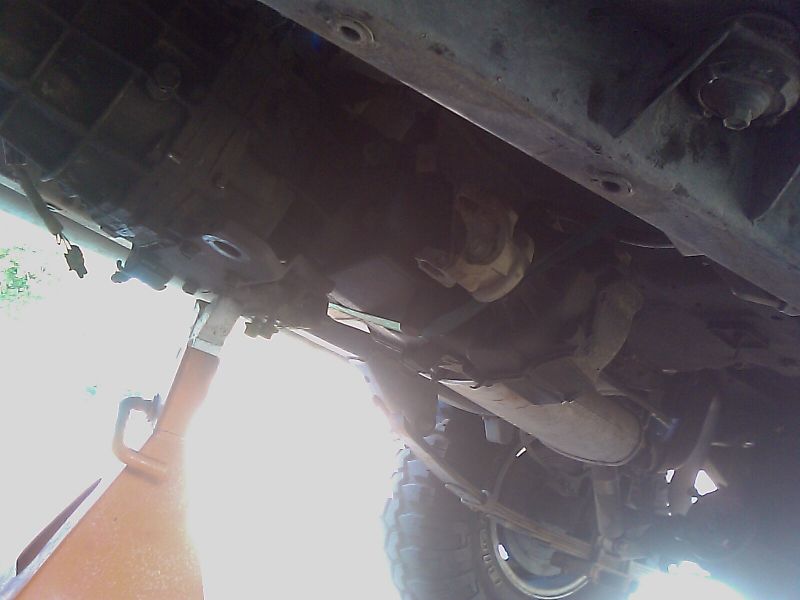
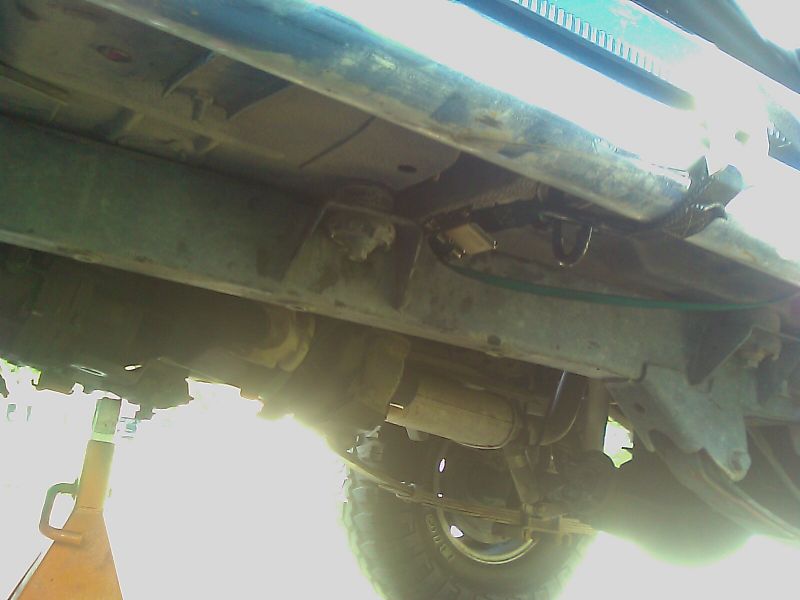
I used a very small flat blade screwdriver to rotate the torque converter through the bolt holes in the flexplate until the threads lined up. I twisted one bolt in there finger tight. I used a larger flat bladed screwdriver to rotate the flexplate tooth by tooth until I got all 4 bolts in finger tight. I torqued them down using the screwdriver to resist rotating the whole flexplate. The transmission cooler plumbing was a pretty close match between the XJ and the YJ. I had recently replaced the radiator and Radiator Barn was nice enough to add hose nipples to the bottom of the radiator for me. The output line had a quick connect fitting right near the passenger side fitting. I used the short quick connect end to go straight into the radiator. I had a B&M Supercooler to install so I didn’t need any of that
quick connect stuff for the other end. I mounted the Supercooler in front of the AC condenser right behind the grill using the metal straps in the B&M kit. I plumbed the hose out of the radiator and into the bottom of the Supercooler. From the top of the Supercooler, I ran a hose to a barbed splice in the factory rubber hose. From there, it returns to the transmission. I needed to create a hanger from the oil pan to hold the lines tight.
I bolted the skid plate back on and bolted the trans mount to the skid plate. I cut the exhaust hanger off the pipe and installed it. I then took care of the rest of the wiring, minus the park/neutral switch and the reverse lights.
This TCU requires a reversed signal from the throttle position sensor. What I mean is, the engine’s TPS is a 5v system. At idle, the engine’s TPS sends out 0V and gradually sweeps up to +5V at full throttle. This particular transmission control unit (’87-’90) has a reverse sweep. +5V at idle and drops as the throttle is opened. I attempted to build a voltage reverser with various resistors, condensers and a 555 timer but all I could come up with was a logic circuit. +5 volts or 0 volts with no sweep. I gave up after a few hours of playing with this. If anybody knows how to do this properly, I’d love to know.
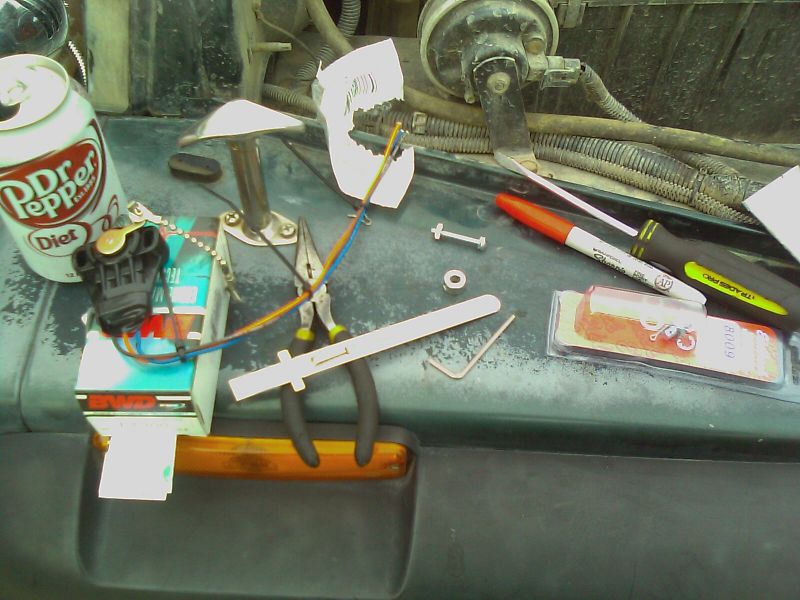
I bought a GM style TPS from the local auto parts store. It’s from a 3.8L V6. I chose this one because it’s cheap, adjustable and comes with an arm as opposed to a socket.
I bent some steel to form a bracket that bolted to the throttle body and added some ball chain to connect the two.
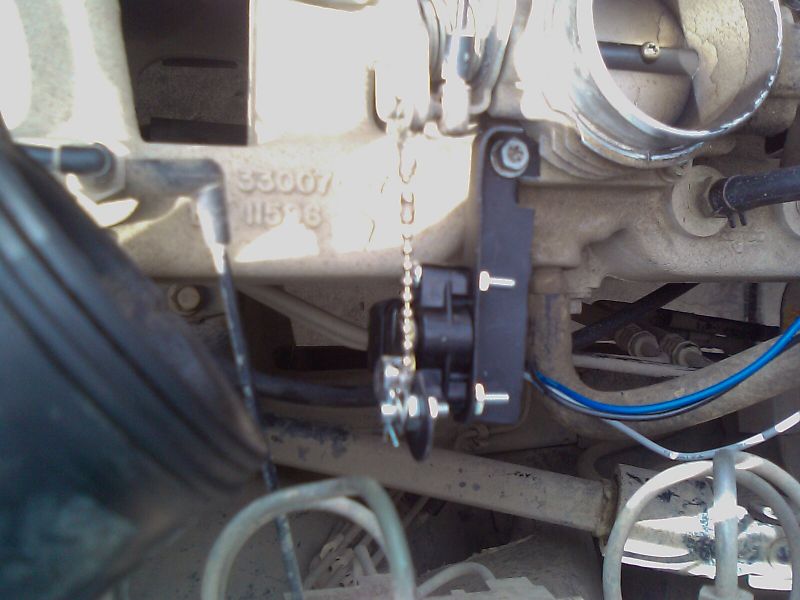
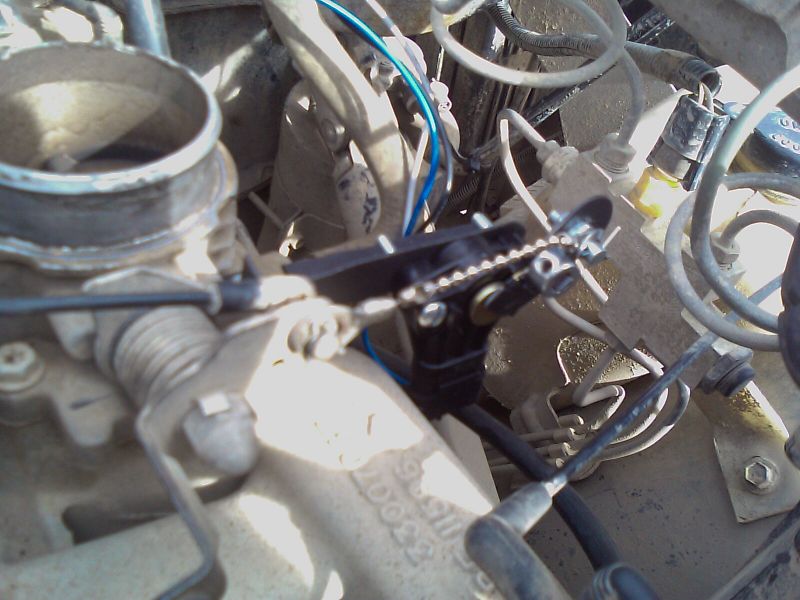
The sweep from the throttle linkage was a little greater than the sweep from the TPS so I needed to build a little bracket to prevent the ball chain from snapping at wide open throttle. After a little tweaking, I was able to get +5.1V at idle and +1.8V at wide open throttle. It’s not 0V but it will do for now. I’ll come up with a better system later on. I added about 1.5 quarts of transmission fluid to the transfer case and 6 more quarts to the transmission (8 total). Then I went back over every single bolt I touched to make sure I torqued everything. I set the TV cable by pressing in the button, twisting the throttle to wide open and releasing the button. This is supposed to set it automatically. I put the negative cable back on the battery and turned the ignition to ON. I looked over everything and it all seemed to be OK. No fuses blown, TCU is staying cool. Time to go for it! I turned the key to start. It cranked but no start. It’s acting more like an XJ already…
Renix AW-4 Transmission Swap into a YJ
’87 XJ AW-4 into ’93 YJ
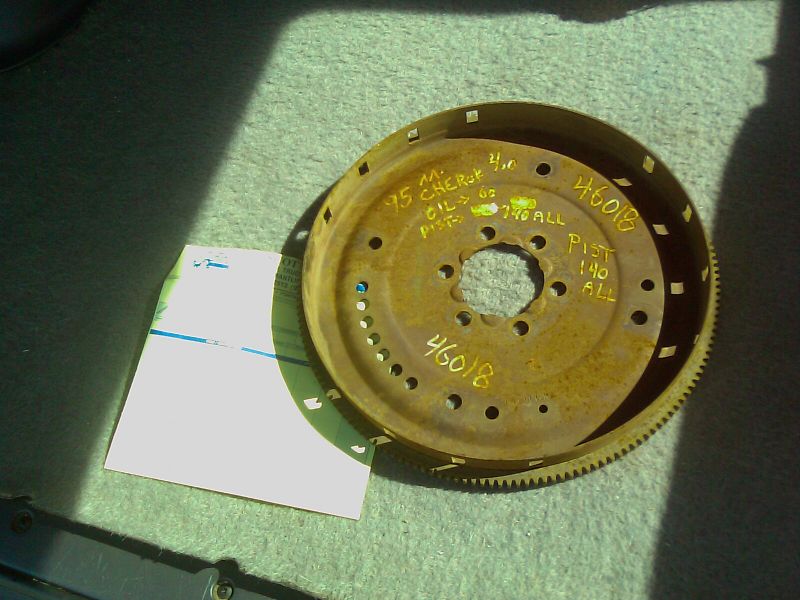
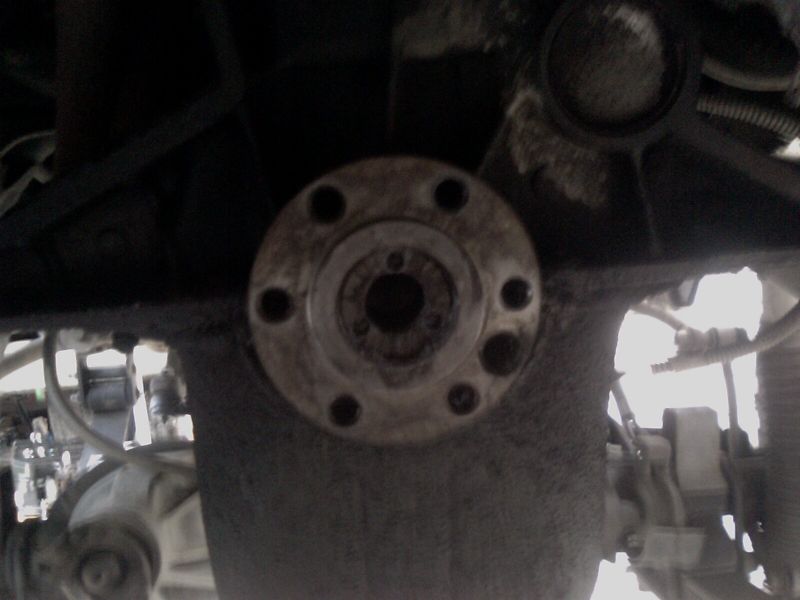
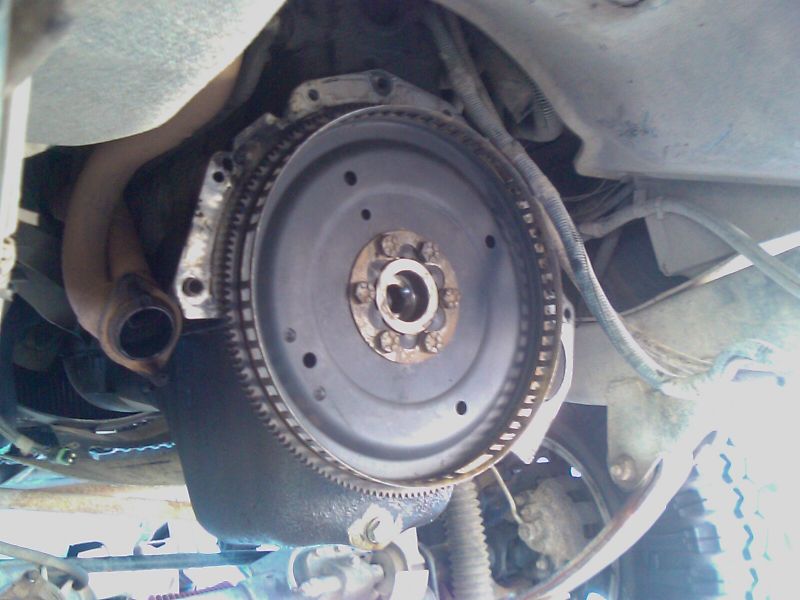
That night I retraced all my wiring diagrams and decided it was related to the crankshaft position sensor. I went back to the AX-15 flywheel and counted the teeth that trip the crankshaft position sensor. I counted 3 sets of 4 gaps with the rest solid. The XJ flexplate did not look like this. It had a bunch of holes and gaps throughout the diameter. I did a search online and found out that the RENIX system used a different flexplate than the OBD-I and OBD-II systems. It didn’t dawn on me until just then that the flexplate is an engine component, not a transmission component. I borrowed a car and drove to Scotty’s in Fresno and picked up a flexplate off a ’95 Cherokee. This one looked much better. Mostly solid ring with 3 sets of 4 holes. 4 hours later, I had the new flexplate swapped in. I turned the key and it fired right up!
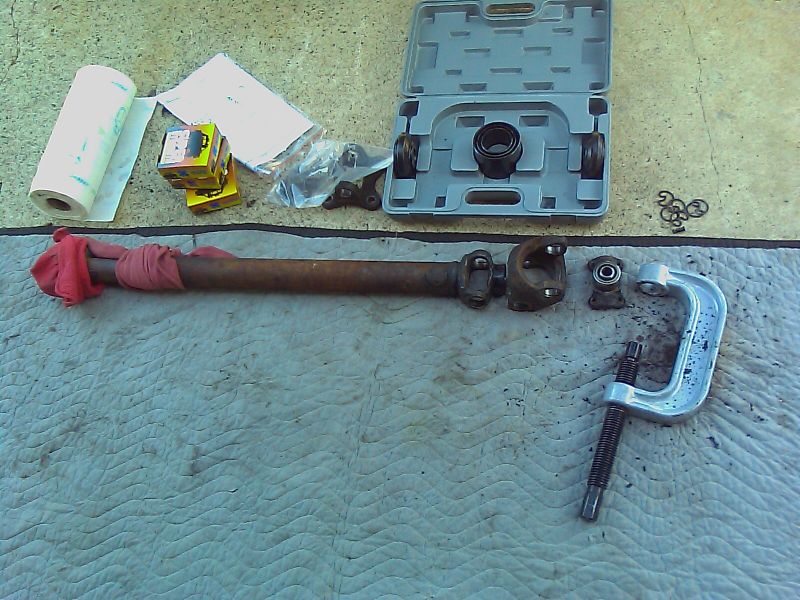
I’m using the XJ’s front driveshaft as a rear driveshaft but I’ll need to shorten it. I installed mounting plate to the flange on the 8.8 rear end. I bolted in the CV end of the driveshaft to the yoke and held the shaft up to the side of the mounting flange. I placed marks on the driveshaft at the front and back of the u-joint mounting hole. Measuring from the center of the marks to the center of the front u-joint gave me the ride height length. I had 15.5�. I was almost directly lined up with the rear end so I didn’t need too much room to compress. I estimated about a half inch. I added a quarter inch for good measure. My new compressed measurements were 14.75�. Since the XJ’s front shaft measured well over 30�, a pretty good chunk would have to be taken out. I called OC Driveline and talked to Roy. He told me that since I was planning on replacing the u-joints, I should do it now so he can get a better balance out of it. He also told me to install the flange at the rear so it’s complete when he gets his hands on it. I had 3 sets of Super Strength Precision U-Joints with flush mount grease fittings in the cap ends(#280) and a u-joint/ball joint press ready to go. I took the old u-joints off and inspected them. They were rusty and a bit dry but still functional. They could have been originals. I popped the CV knuckle apart to inspect the parts inside. This was my first CV joint so I was taking mental notes as I was going along. The parts were pretty dry but functional. The rubber was still intact and the needle bearings were in good shape after a cleaning. I packed the needle bearings in with grease to hold them in place and slid the shaft in to check its movement. It felt pretty good. I separated it again and installed both u-joint crosses. I pressed the hats on from the outside while holding the CV portion tight to compress the spring on the inside. This is a pain in the butt! There was probably an easier way to do this but I don’t have this mastered yet. Once everything was together, I installed the clips at the ends making sure that the shorter clips went in where the grease fittings were going to go. Since I didn’t have the right fitting for my grease gun yet, I squirted as much grease as would fit into the open hole with my small needle fitting. I capped the hole with the flush mount fitting and that seemed to do an adequate job of pressing the grease in for now. I tucked the end of my needle under the rubber boot inside the CV knuckle and packed it full of grease. I spun the shaft around to the non-CV side and pressed out the u-joint. I replaced this u-joint with the same style that went into the CV portion. It wasn’t necessary but it looked good and I’m starting to really like the idea of flush mount grease fittings. As soon as I can find them in the right thread pitch, I may replace all the zerks around the jeep with these. They look MUCH harder to snap off on a rock.
I popped the transfer case into 4 high and drove to the driveline shop which was about 10 miles away. Driving only on the front axle is a very scary experience, especially in Southern California traffic. This was my first real test of the Jeep. The first thing I noticed was that the shift points were too high. I was trying to gingerly drive the thing so I didn’t screw up my front shaft or transfer case. I gave the shop my specs and the driveshaft. He was going to have it for me by the same time tomorrow. On the way home, I hit some major traffic. The engine and transmission got pretty toasty. I could feel it through the clutch master hole in my firewall that I had yet to cap off. Once I was past the freeway obstruction, I got into the throttle a little. When I got up to about 70mph, smoke started pouring out the back of the Jeep. I slowed down and got into the right lanes and the smoke stopped. I followed some big trucks home so I didn’t have to worry too much about my speed. Once at home, I checked the transmission fluid level and it was a bit over full. Strange. I checked it cold before I left and it was barely on the add mark. The transmission only had 8 qts in it and to my knowledge held 9.5qts. This was something other than too full I think. Air bubbles in the lines? Foaming in the transmission? Don’t know. The vent tube was a little on the short side. It went from the top of the transmission to a little metal fitting on one of the bell housing bolts. It couldn’t have gained more than 2 inches in height from the top of the transmission. My old vent tube went all the way up to the top of the firewall. I added a section of hose to the little metal fitting and clamped it down. I looped the other end to an empty bottle just to see if I could get it to cough out any more fluid. It was behaving now. I clipped the hose just before the top of the firewall and capped it with an anti-siphon valve.
Renix AW-4 Transmission Swap into a YJ
’87 XJ AW-4 into ’93 YJ
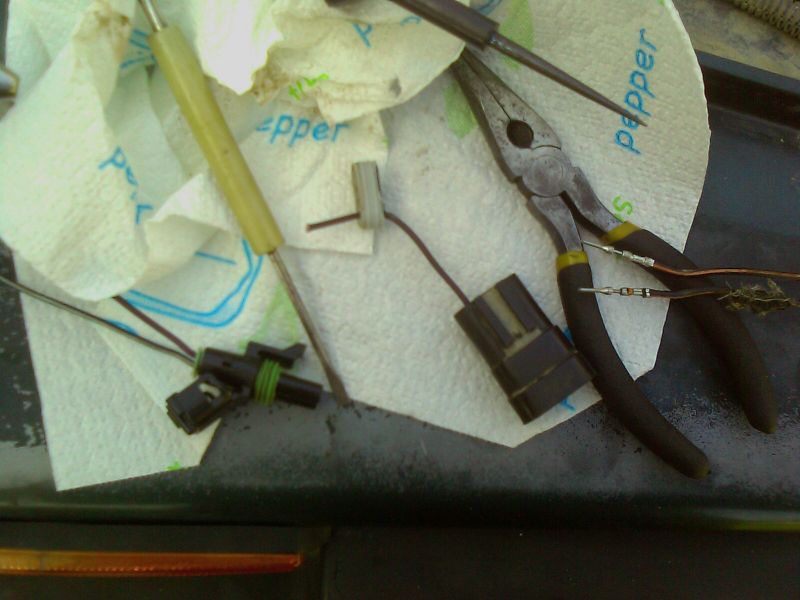
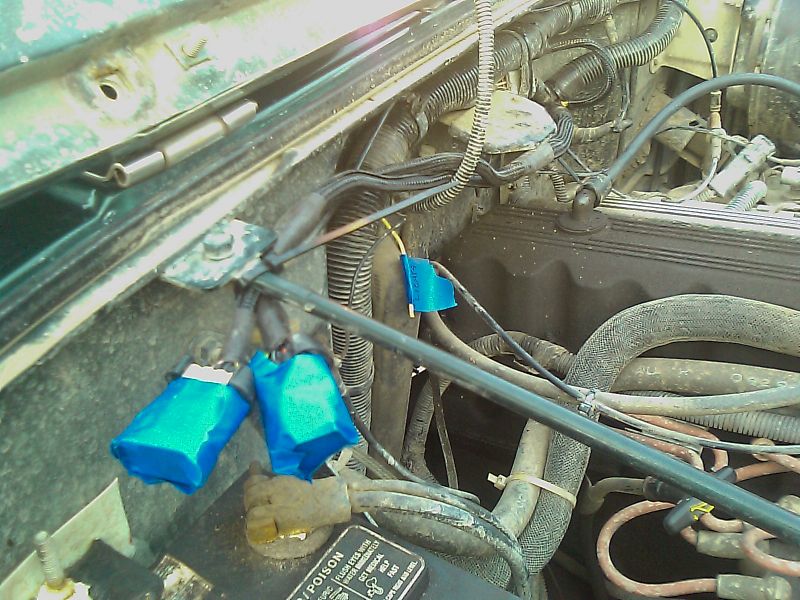
Manual YJs have a pigtail near the transmission that supplies power to the reverse lights from a switch and provides a ground loopback for the starter relay. I unplugged this connector and spliced the reverse light lead from the TCU. I removed the loopback ground wire since I already spliced the start/neutral safety switch from the TCU to the YJs wiring harness. I basically just activated the circuit by removing the loop. I filled the extra holes with silicone and plugged the connector back together.
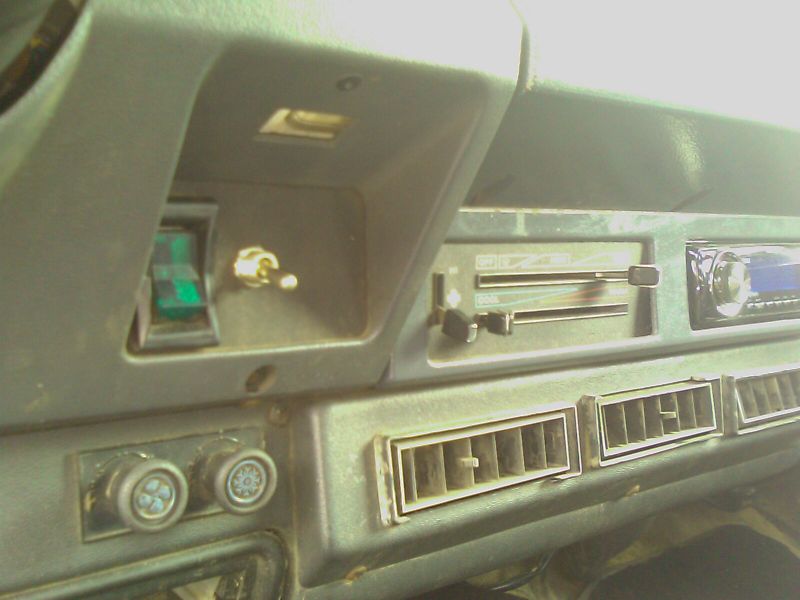
The Cherokee had a switch in it for POWER or COMFORT. These are pretty vague terms but I knew they were related to transmission valve pressures and whatnot. The switch applied +12V to the C11 pin of the TCU for POWER mode and 0V for COMFORT. I unplugged the C11 pin from the TCU just to see the difference. On my test drive, the 1-2 up shift point was dropped to about 1700RPM. I didn’t feel a 2-1 down shift but for all I know, there may not be one. I didn’t feel one in POWER mode either but it may just not be as pronounced as the 3-2 down shift. I added a switch to the dash for good measure but I know I’ll drive around most of the time with it in POWER mode.
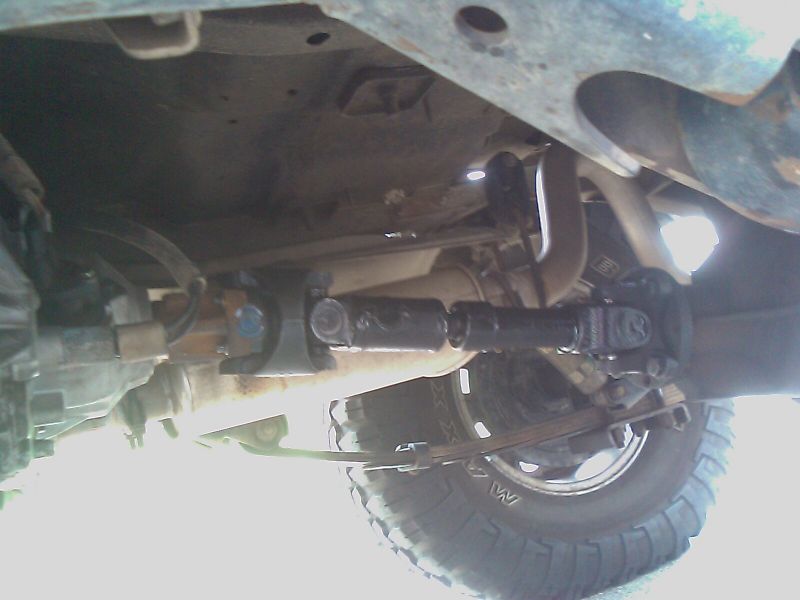
I went to pick up the new driveshaft and it wasn’t done yet. That’s fine, I wasn’t in a huge hurry. I was invited into the shop to watch the process. I was so jealous of the tools in that place. Roy put the shaft onto a lathe and ground the ends of the solid portion to spec. He chopped the tube down to the right size on a cold saw. I kept my distance for this part but there were some sparks and banging and the glow of a very large welder coming from the back of the shop. He walked it over to me and it looked GREAT! He popped it on his balancer. This thing is monstrous! It had to be 20ft long. I only needed the first foot and a half of it. He spun it up and it looked straight to me. He rotated it to a certain point and used a torch on it and then immediately quenched it with water. He did that about 5 more times and spun it up again. He then added some weight to the front and back and a wire to hold it on. After some adjustment of the weights, he welded them on and applied a coat of paint. I didn’t fully appreciate his attention to detail until I got it back on the Jeep and got it up to speed. I’ve never felt such a smooth ride. I’m sure my old shaft was out of balance from all the banging around on rocks.
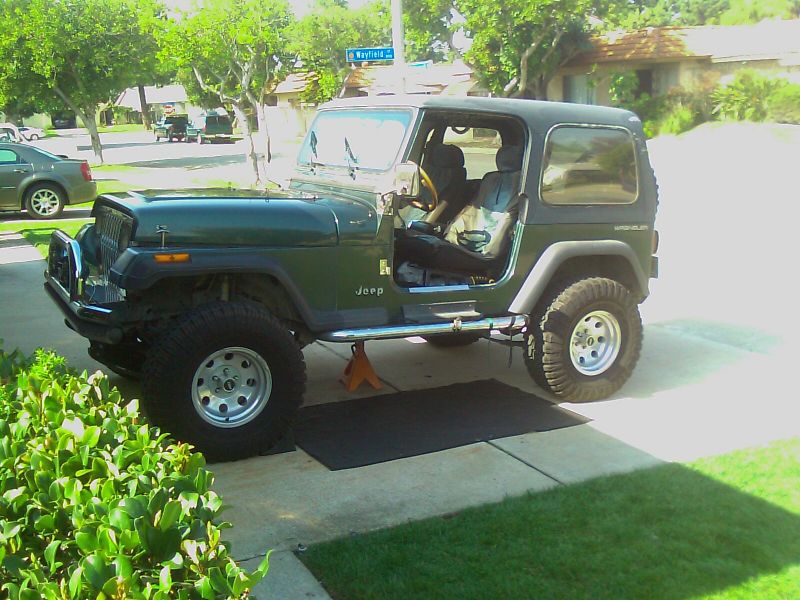
So now I have an AW4, beefy driveshaft and a bulletproof rear end. Everything is maintained, freshened up and in good shape. I now have no idea where the weak point is in my drive train. I hope it’s not that crankshaft I nicked.
Renix AW-4 Transmission Swap into a YJ
’87 XJ AW-4 into ’93 YJ
| 1993 YJ and 1987 AW4 Swap Wiring Diagram |
||||||
|
FROM |
TO |
|||||
| Connector | Pin | Color | Description | Connector | Pin | Color |
| Trans Range Sensor | A | YEL | 12V Ignition (15A Fuse) | PCM | 9 | DK BLU |
| B | BLK/WHT | P/N Safety Switch Conn | PCM | 30 | BRN/YEL | |
| C | BLK | P/N Safety Switch Ground | PCM | 11 | BLK/TAN | |
| Black | E | WHT/BLK | Back-up Lights | Trans Pigtail | VIO | |
| G | GRY/WHT | TRS D | TCU | C9 | GRY | |
| H | GRN/WHT | TRS 1-2 | TCU | C8 | LT BLU | |
|
FROM |
TO |
|||||
| Connector | Pin | Color | Description | Connector | Pin | Color |
| Trans Control Assm | B | BLK | TCA | PCM | 11 | BLK/TAN |
| C | WHT/BR | Road Speed Sensor | TCU | C3 | TAN | |
| E | WHT/BLK | S3 (Converter) | TCU | C14 | WHT | |
| Grey | F | VIO/WHT | S2 | TCU | C15 | VIO |
| G | BLU/WHT | S1 | TCU | C16 | BLU | |
|
FROM |
TO |
|||||
| Connector | Pin | Color | Description | Connector | Pin | Color |
| Trans Control Unit | C3 | TAN | Road Speed Sensor | TCA | C | WHT/BR |
| C4 | YEL | Trans Diag Data | (not used) | |||
| C5 | BLK | Ground | PCM | 12 | BLK/TAN | |
| C8 | LT BLU | TRS 1-2 | TRS | G | GRN/WHT | |
| C9 | GRN | TRS D | TRS | A | GRY/WHT | |
| C10 | LT BLU/YEL | Brake/Torque Conv Signal | PCM | 29 | WHT/PNK | |
| C11 | TAN | Power Input Signal (Switch) | PCM | 9 | DK BLU | |
| C14 | WHT | S3 (Converter) | TCA | E | WHT/BLK | |
| C15 | VIO | S2 | TCA | F | VIO/WHT | |
| C16 | BLU | S1 | TCA | G | BLU/WHT | |
| D1 | RED | Throttle Position Sensor (5V PWR) |
TPS | C | ||
| D2 | GRY | Throttle Position Sensor (Input) |
TPS | B | ||
| D3 | TAN-ORG | Throttle Position Sensor (Ground) |
TPS | A | ||
| D7 | BLK | Ground | PCM | 11 | BLK/TAN | |
| D14 | RED | 12V Hot | PCM | 3 | RED | |
| D16 | YEL | 12V Ignition (15A Fuse) | PCM | 9 | DK BLU | |
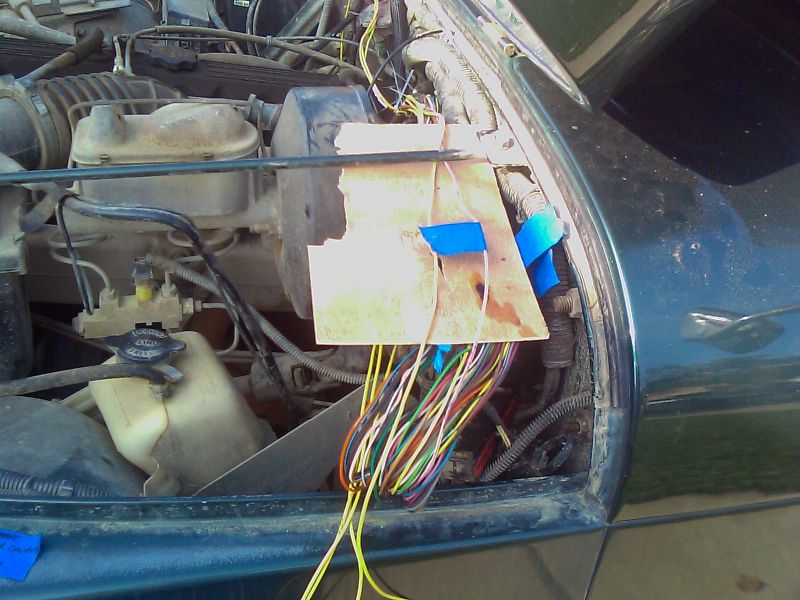
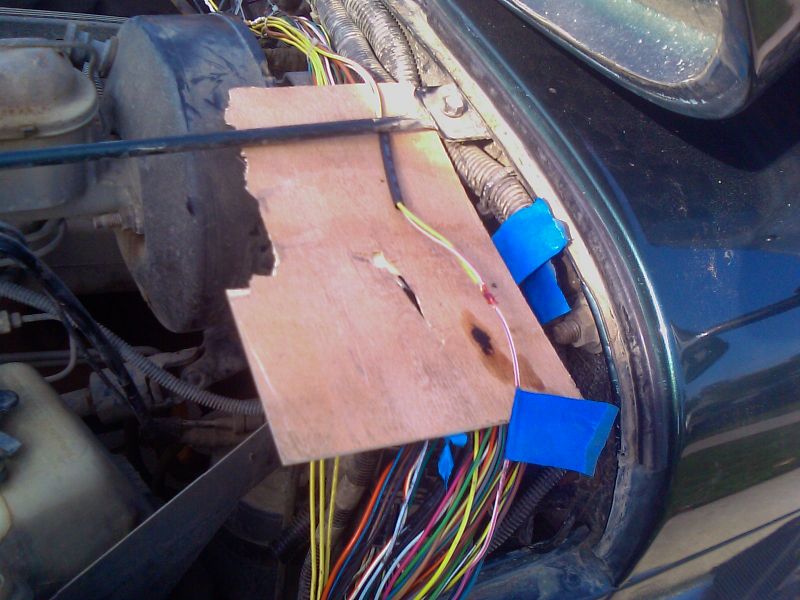
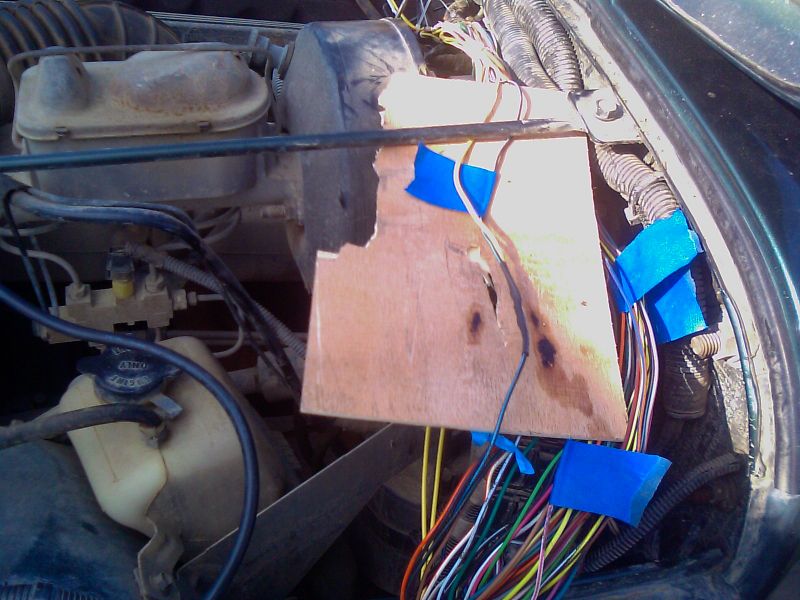
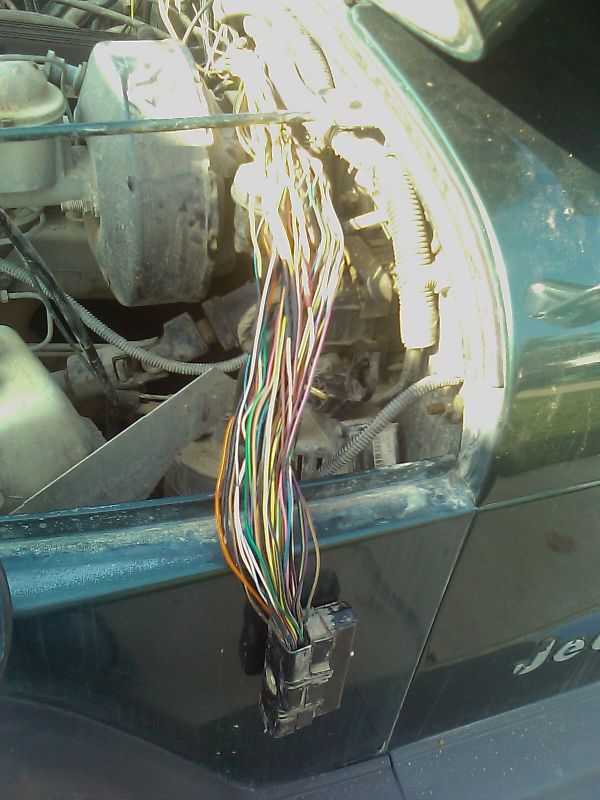
First thing I did was write up a wiring schematic. The RENIX system was much different than the OBD-I based YJ. I had to get my hands on a factory wiring diagram for an ’87 Cherokee and a ’93 Wrangler.
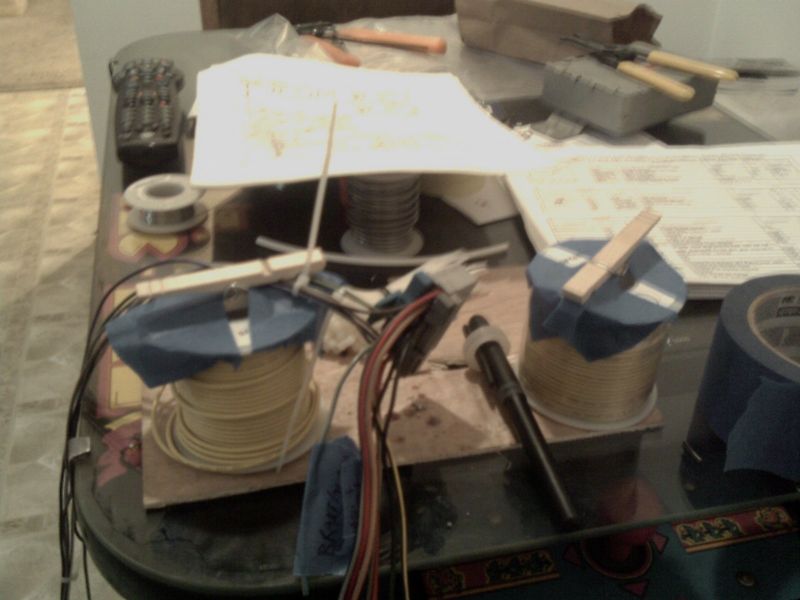
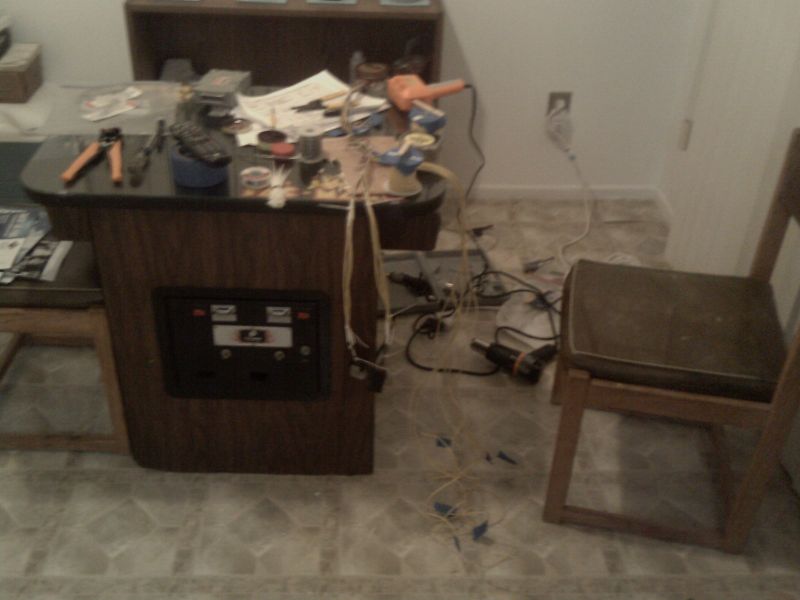
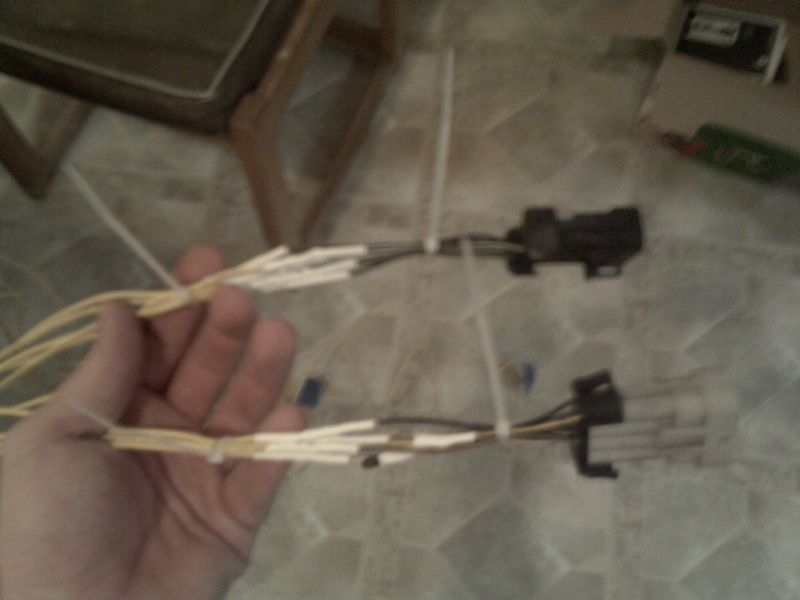
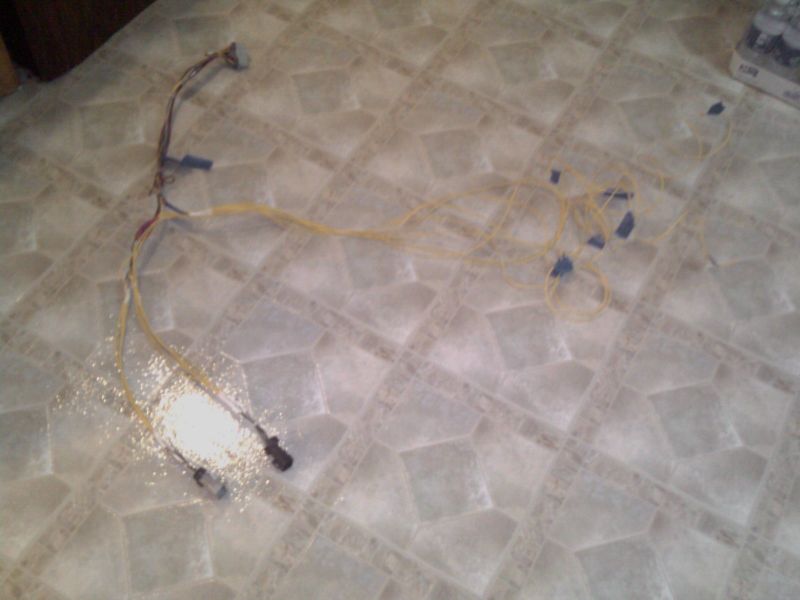
I placed the components approximately where I thought they should go and measured out the distances. I picked up a roll of 18 gauge wiring and spliced everything together using solder and heat shrink tubing.
Renix AW-4 Transmission Swap into a YJ
’87 XJ AW-4 into ’93 YJ
I knew the XJ had a 21-spline shaft from the transmission to the transfer case and I had a 23-spline on my YJ. I decided to use the transfer case off the XJ. There was nothing wrong with the one I had but I really didn’t want to go swapping shafts and splines if I didn’t have to.
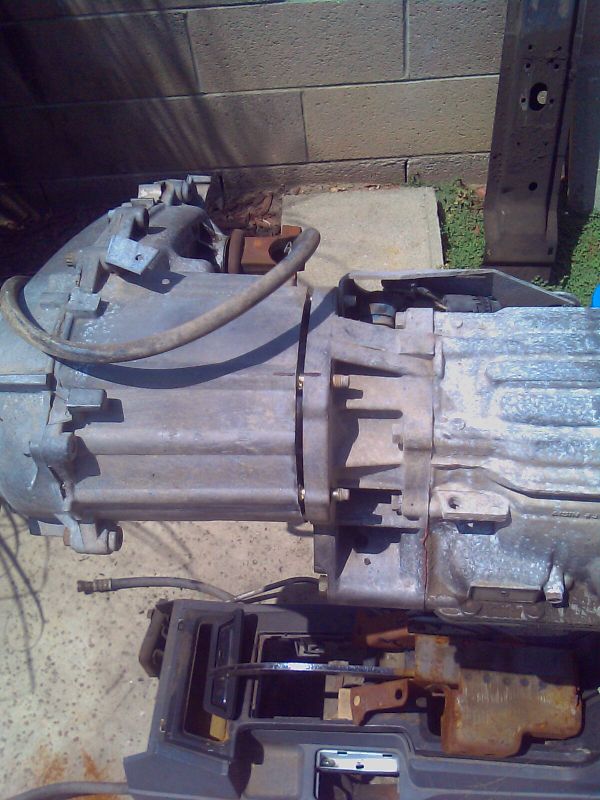
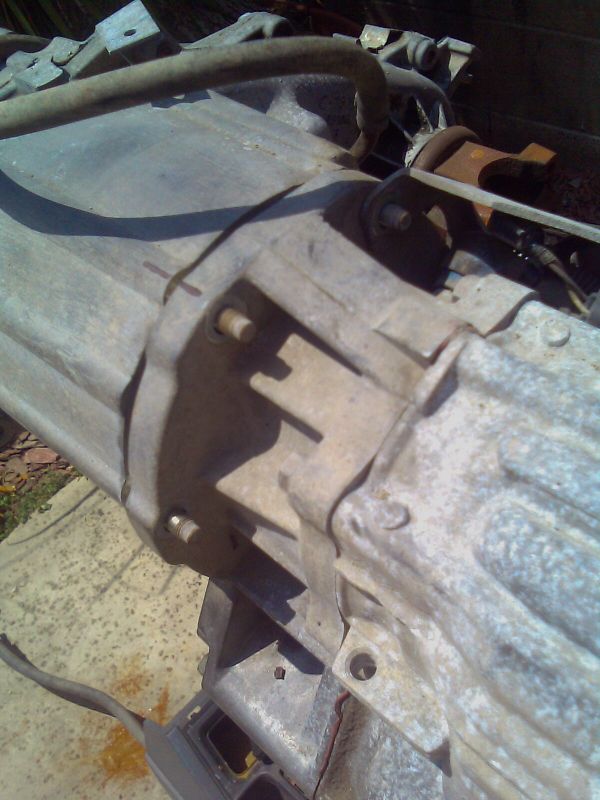
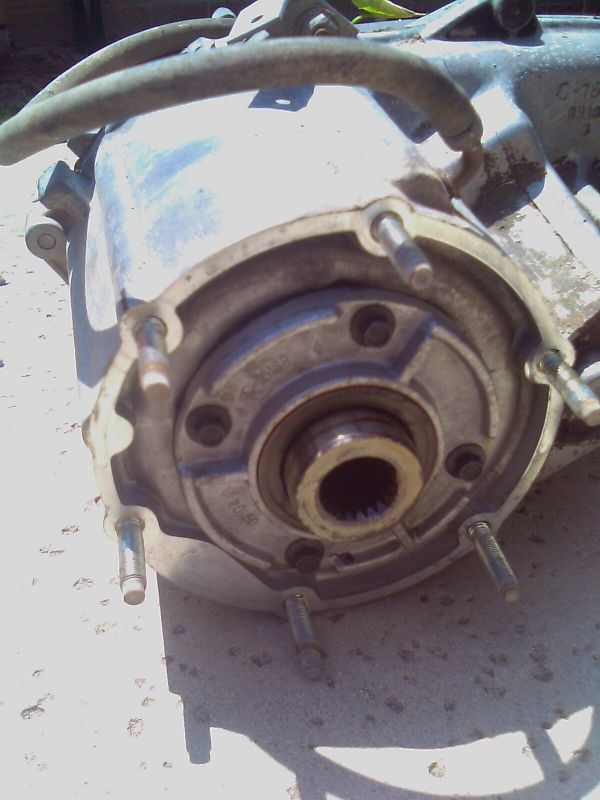
I removed the transfer case from the transmission and it was pretty obvious how far I could clock it.
Oh Oh…..but don’t worry!
This website started back in the late 1990’s and has experienced several makeovers since then. At the same time, thousands of site readers left their favorite links all over the internet pointing to their favorite pages here on the site. While I’ve tried to keep things in order, some pages were ultimately relocated in order to make more sense of the site’s content and keep it more organized. Rest assured, the page was not deleted but just moved.
To find your page, click on one of the above navigation links to take you to the topic area you were looking for.
Or….you can use the dedicated site search feature below to quickly find it too. If you were following an old link to get information, perhaps about control arms, enter control arm in the search window.
Renix AW-4 Transmission Swap into a YJ
’87 XJ AW-4 into ’93 YJ
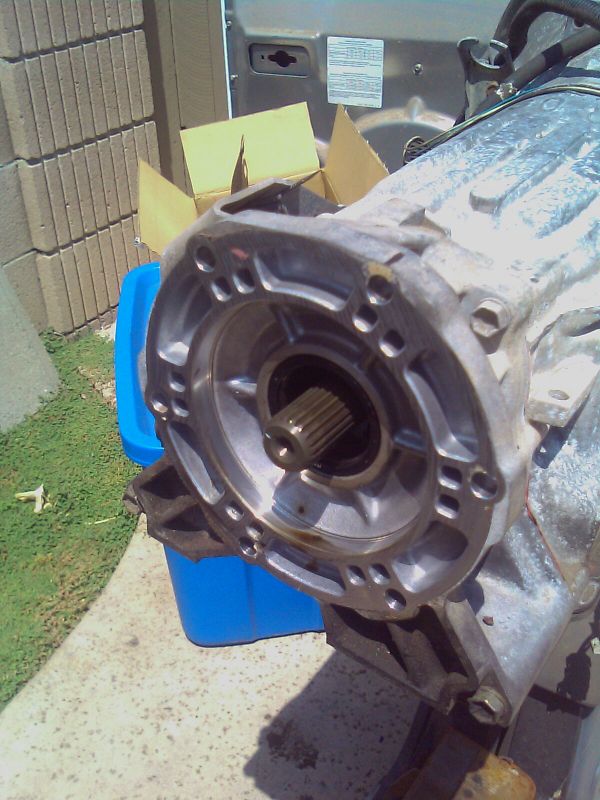
I ordered a Slip Yoke Eliminator kit and mounted it up. I had to press off the inner needle bearing and throw it out. The new housing didn’t fit with the old 4WD shift lever. I had to chop off a little over an inch. Luckily, I had a very accurate tire tread depth gauge that gets pretty precise. I use that sucker for everything. The XJ had a 4WD shift lever that started on the transmission tunnel and went to a pivot between the transmission and the bottom of the transmission tunnel. This setup is similar to a TJ. I had no idea how to get this to work with my YJ since the 4WD stick never touches the transmission tunnel.
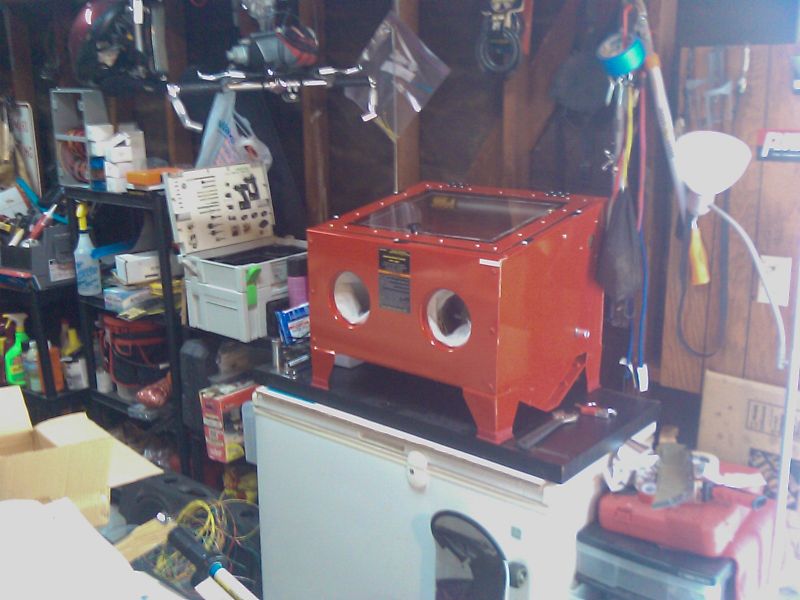
I scheduled the heavy work for a holiday weekend just in case I ran into problems. I also wanted to avoid city code enforcement rolling by since I was doing this in my driveway. I’ve had a run-in with them in the past when I was doing my 8.8 rear end swap. A few days prior to the swap, I sandblasted the rusty parts and cleaned the greasy parts.
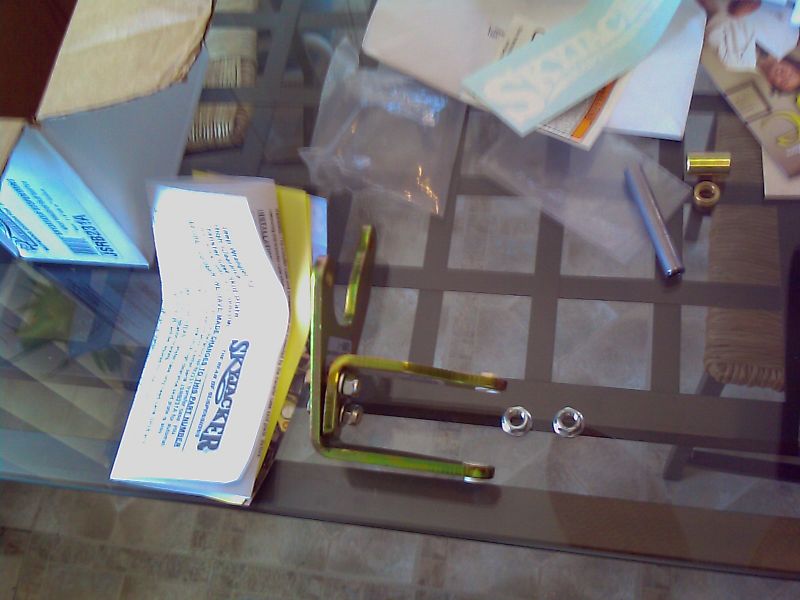
I ordered a Skyjacker TJ Transfer Case Shifter Relocation Kit just to be on the safe side. It moves the pivot off the body and onto the transmission only. I knew I wasn’t going to figure this out until I actually got the swap done. The angles are just so precise that a binding situation was a definite problem.
I ran all the wiring throughout the YJ but left out the splices that would affect drivability.
Renix AW-4 Transmission Swap into a YJ
’87 XJ AW-4 into ’93 YJ
Renix AW-4 Transmission Swap into a YJ
’87 XJ AW-4 into ’93 YJ
 I took the pan off the AW4 and changed out the filter. The night before the swap, I parked in position on the driveway, chocked the wheels, locked the e-brake and sprayed SeaFoam Deep Creep on all the bolts I was planning on removing.

Here it is… D-Day. I removed the ground cable, exhaust pipe bolts and strapped the transfer case to the frame rails with ratchet straps. I love those things!
I unbolted the trans mount bolts and took off the skid plate. Then I took off the drive shafts.
I couldn’t seem to get the clutch hydraulic line out of the AX-15 so I just unbolted the clutch master and I’ll take it with me. I unplugged the reverse lights from the switch and then removed the starter. I removed the shift boot, 4WD shifter handle and unbolted the stick. It’s an aftermarket shifter so it didn’t have that twist-off lock like stock ones do. I disconnected and removed the hand throttle.
Renix AW-4 Transmission Swap into a YJ
’87 XJ AW-4 into ’93 YJ
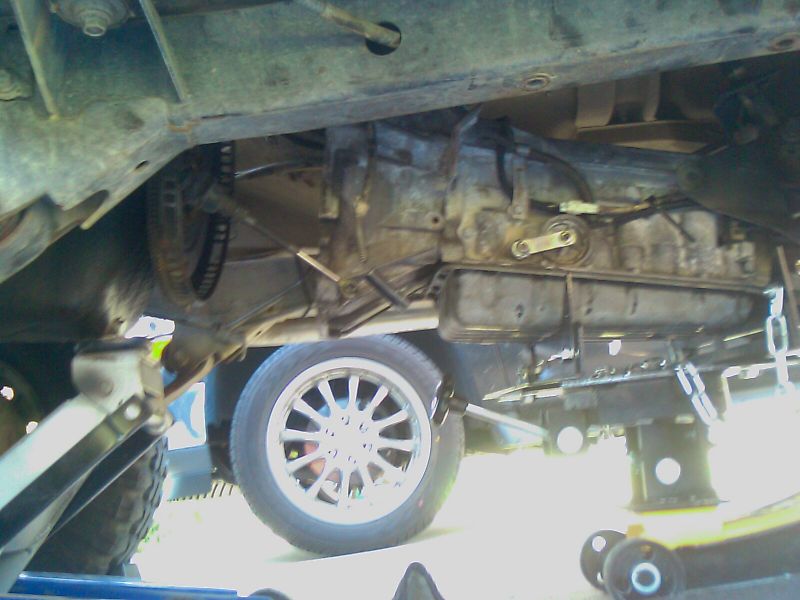
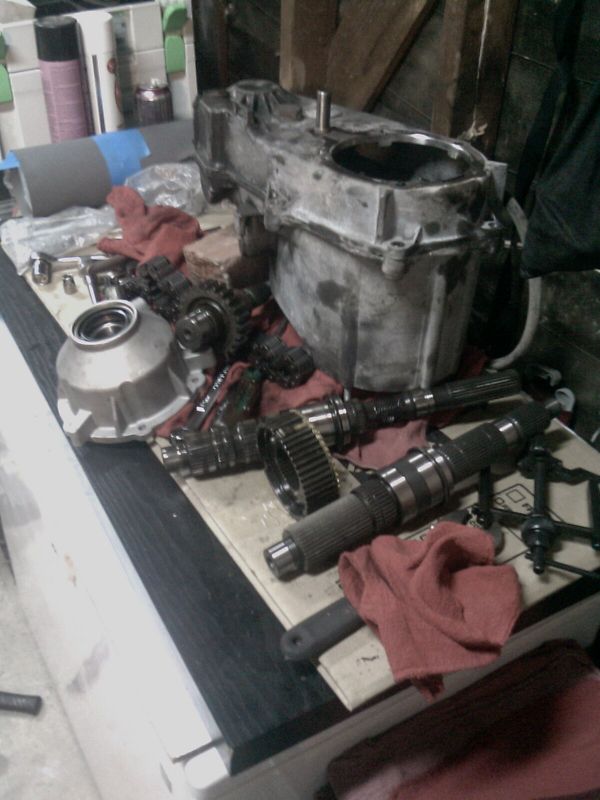
I moved the trans jack under the transmission and removed the ratchet strap. I unbolted the transmission from the engine starting with those nasty little E12 reverse torx bolts. I’m glad I bought that reverse torx socket set. Those things were in there tight! I took off the two big bolts at the sides and the transmission didn’t budge. There were a couple smaller bolts around the perimeter of the plate that I didn’t see. Once those came off, the transmission still didn’t budge. I lightly pried on it with a pry bar and got nothing. I wiggled and pushed and nothing happened. I couldn’t think of a single thing that could be holding it back. I wrapped a ratchet strap around the rear axle and the other end to the transfer case. I torqued down on that thing hard and it still didn’t budge. With a considerable amount of tension on the ratchet strap, I gave the transfer case a good, solid kick. It popped out about an inch and sat a little cockeyed. I guess I had the angle just a little bit off. I used another floor jack to lift the back of the engine a little to improve the angle and the transmission slid out the rest of the way. I unbolted the clutch plate and the flywheel and slid the dust plate off. I pulled out the pilot bearing with a puller. I tried to pull the bushing with the puller but no luck. I ended up drilling it and punching it with a chisel. I over drilled 2 of the holes and scored the crankshaft. I really hope that doesn’t come back to haunt me.
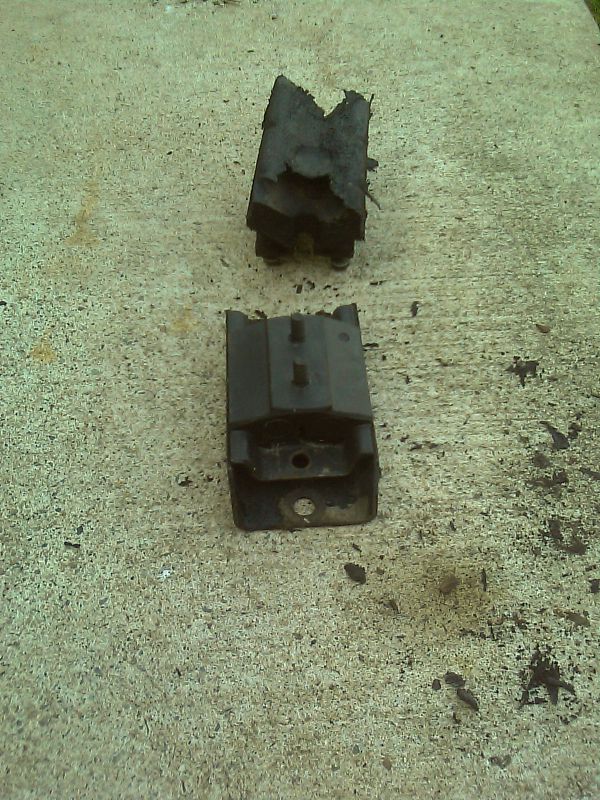
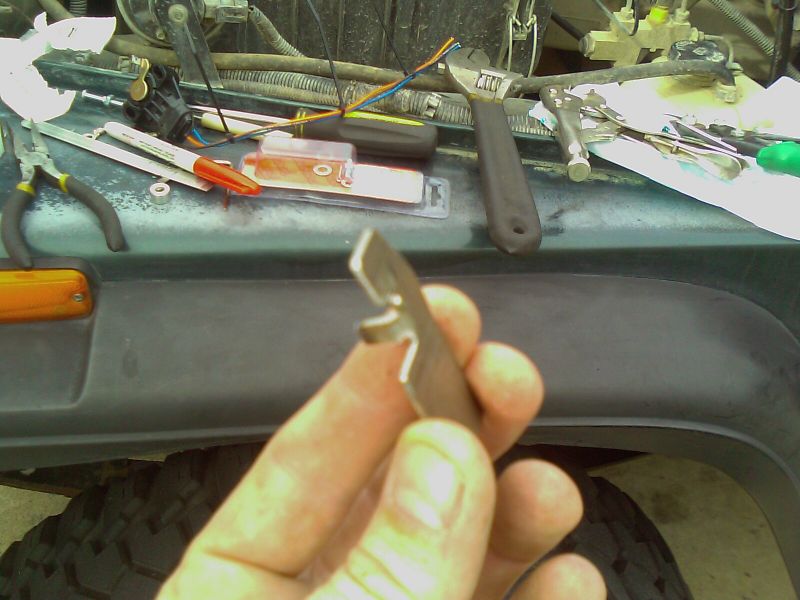
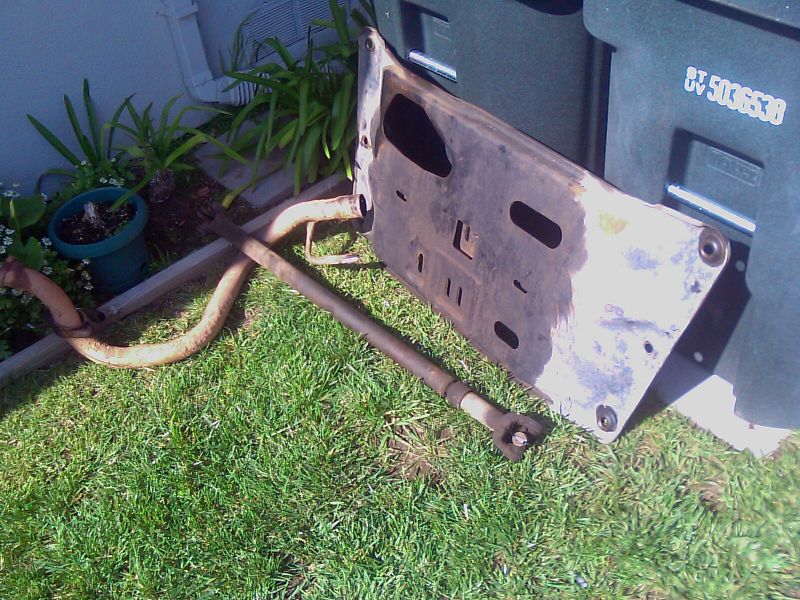
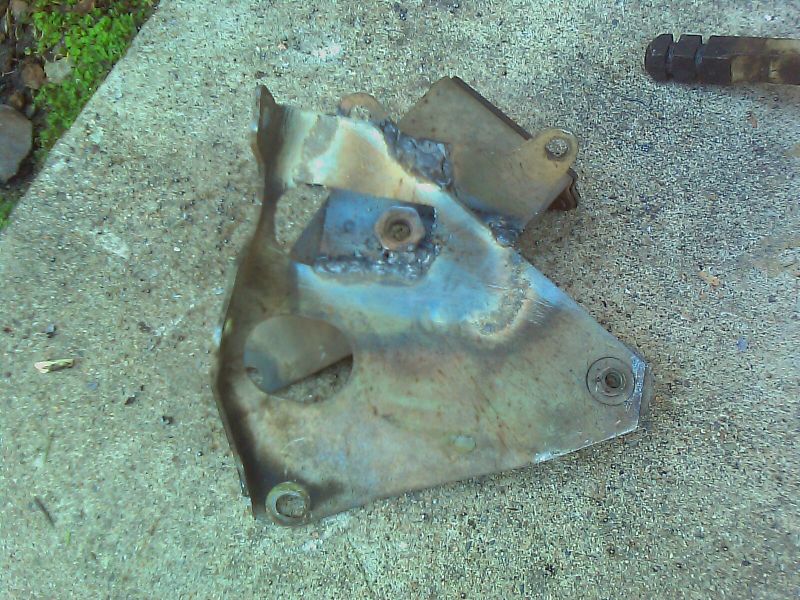
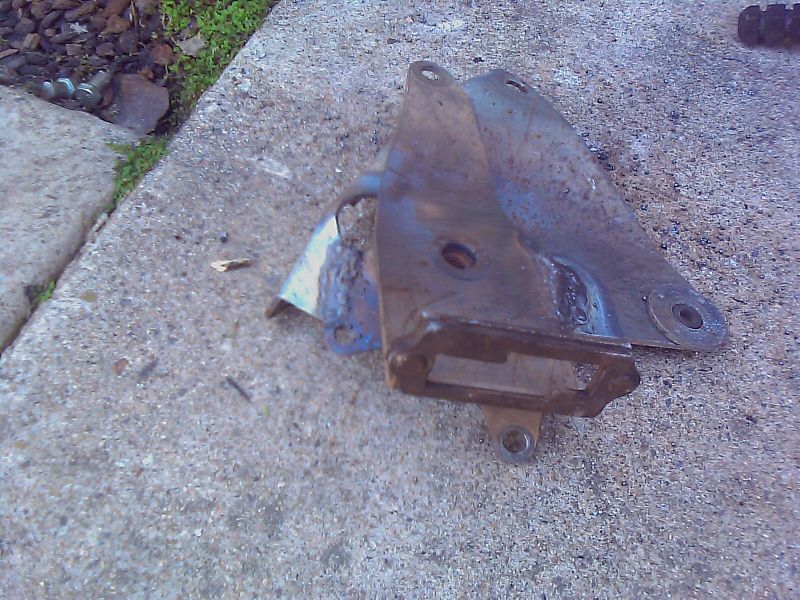
I placed the AX-15 next to the AW4 to compare the locations of the transmission mounts in relation to the skid plate. It was a little too hard to do that with the transmission in the vehicle. I decided to use the AX-15’s trans mount(2 bolt) because it was simpler and didn’t require modification of the skid plate. The mounting plates were completely different but the bolts and holes lined up almost perfectly from front to back. The AW4 mount had mounting holes that were about 2 inches wider than the AX-15. I torched the AW4’s trans mount to see if the AX-15’s mount would slip inside it. It didn’t. It would have required so much modification that I gave up on that idea pretty quickly. The AW4’s exhaust hanger bracket was made out of the same thickness metal as the trans mount and it was much wider. I chopped the exhaust hanger off the bracket and drilled a few holes for the AX-15 mount. I cut a little webbing out of the bottom of the AW4 to allow for the new bolt heads. I cut the webbing close so they would prevent the bolt heads from turning. I bolted a new AX-15 trans mount to the plate and painted it. When it was dry, I bolted it to the transmission. That’s enough for one day.
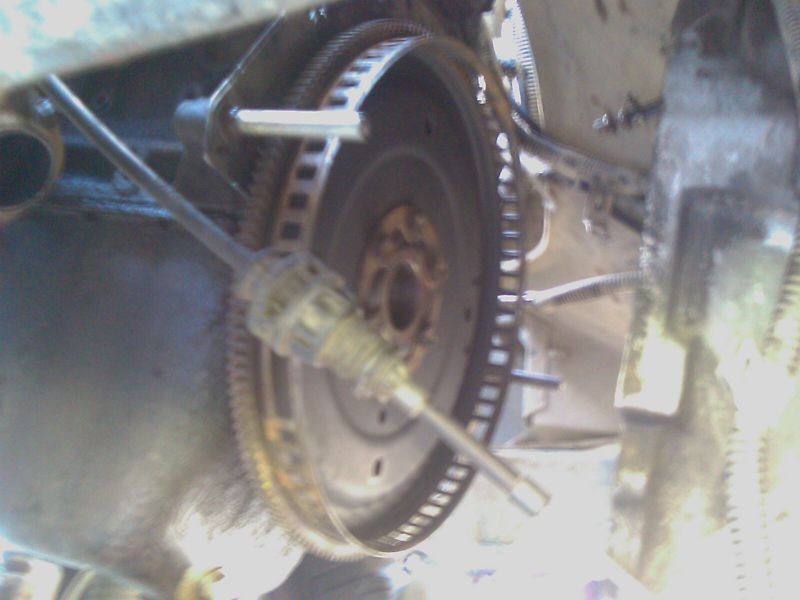
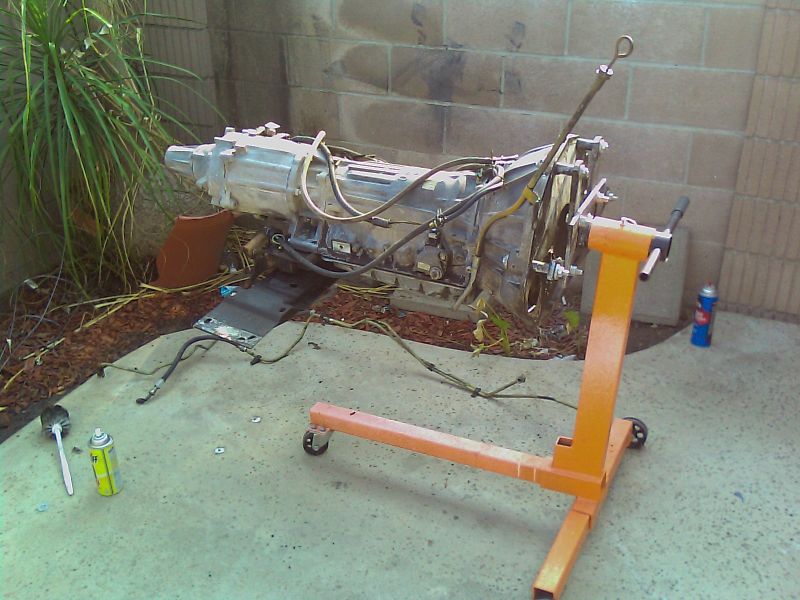
The next morning, I placed the new dust shield over the pins and bolted the AW4 flexplate to the crankshaft. I had the AW4 on an engine stand. The plan was to tip it forward to balance it on the transfer case while I slowly lowered the bellhousing to the ground. As I tipped it forward, the pin fell out of the engine stand and the transmission rotated on me.
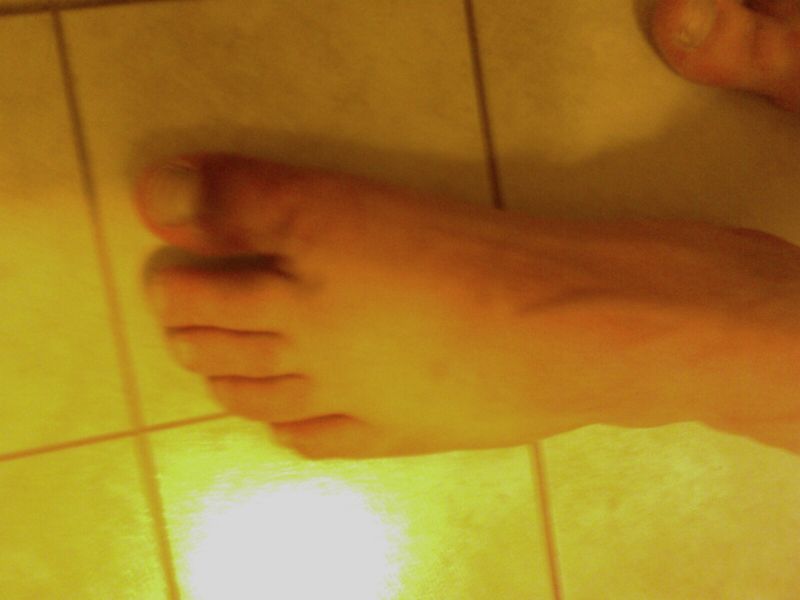
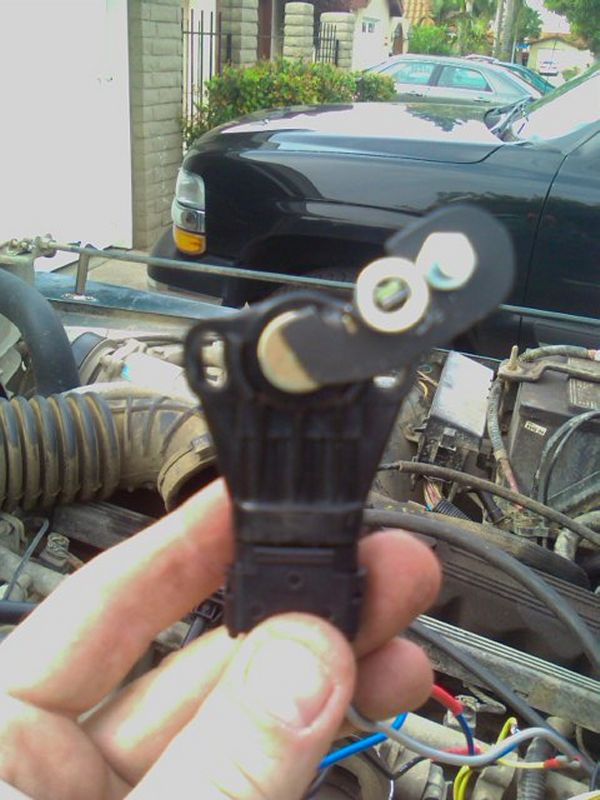
Still holding the transfer case about 2 feet off the ground, the bell housing came crashing down on my foot while the transfer case took a chunk out of my fingertip. I guess I was fortunate that my foot was there because I could have broken the bell housing if it hit the concrete. The moral of this story is to have a buddy or a cherry picker to help you lift heavy things! Nothing slows down a project like an injury. Luckily, it was my clutch foot and I wouldn’t need it. I spent the rest of the day cleaning parts and peeling plastic wire looms off the AW4 and replacing them with Powerbraid. It was about all I could do with an icepack on my foot. Heavy lifting was out! I also swapped the speedo sensor, crank position sensor and TC selector lever.
Renix AW-4 Transmission Swap into a YJ
’87 XJ AW-4 into ’93 YJ
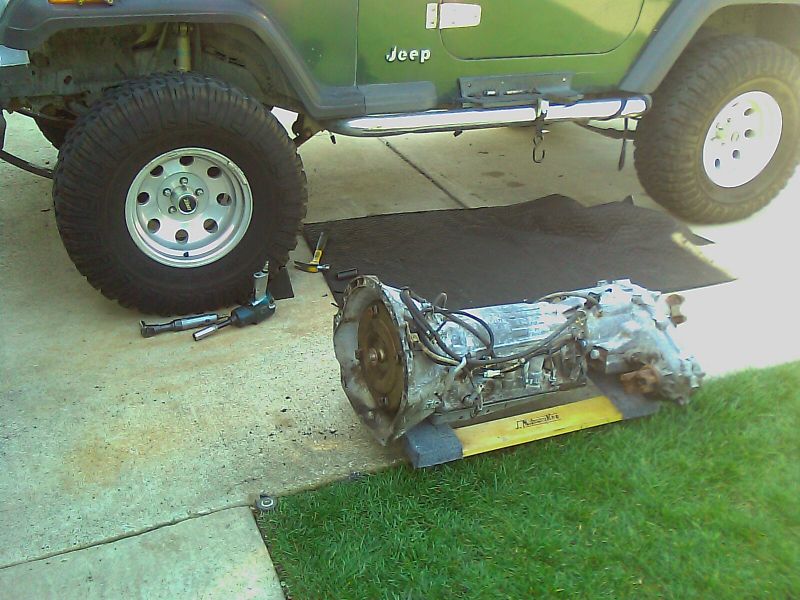
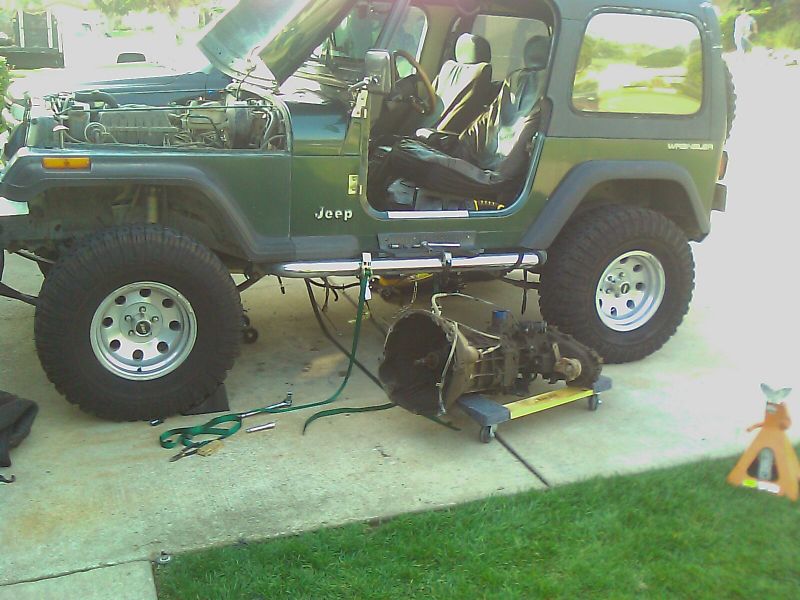
The next morning, I sucked it up and rolled the AW4 to the Jeep.
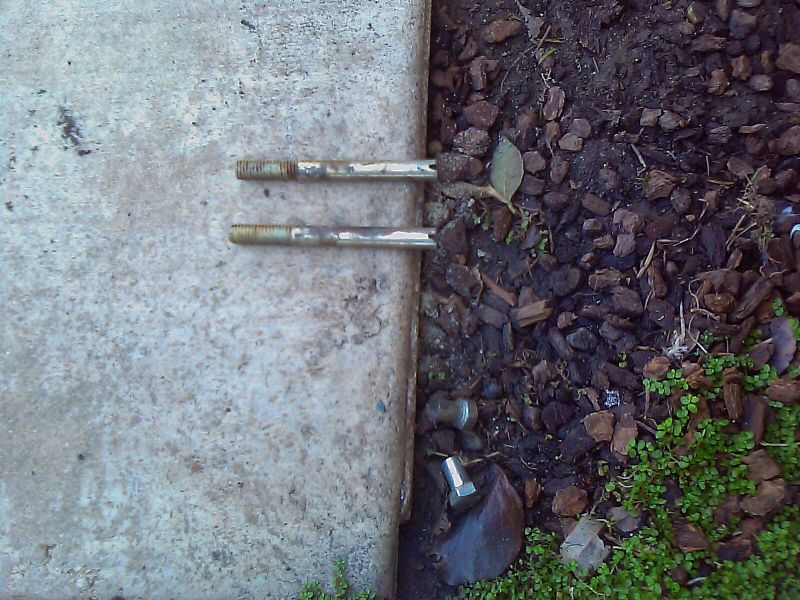
I cut the heads off and cut some slots in them just in case I needed a screwdriver to get them out. I put about 2 quarts of transmission fluid into the torque converter and popped it into the transmission being very careful to fully seat it in the pump notches. I lined it up and slid it home. The guide pins screwed right out with my fingertips and the bolts replaced them. I installed the reverse torx bolts at the top. I had a few grade 8 bolts to replace those torx bolts with but it was going to be a tight squeeze no matter what I used. I liked the shoulder on the original bolts so I just reused them. I secured the back end with a ratchet strap at about the right height. I reattached the front drive shaft and the shift cable. I drilled a 1� hole in the firewall for the shifter cable to pass through. I shoved the grommet in the hole and then attached the TV cable to the throttle.
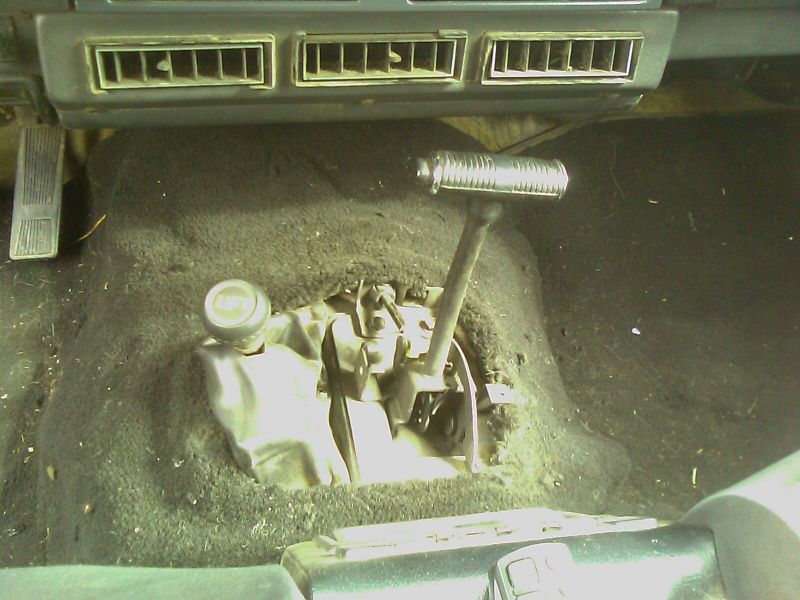
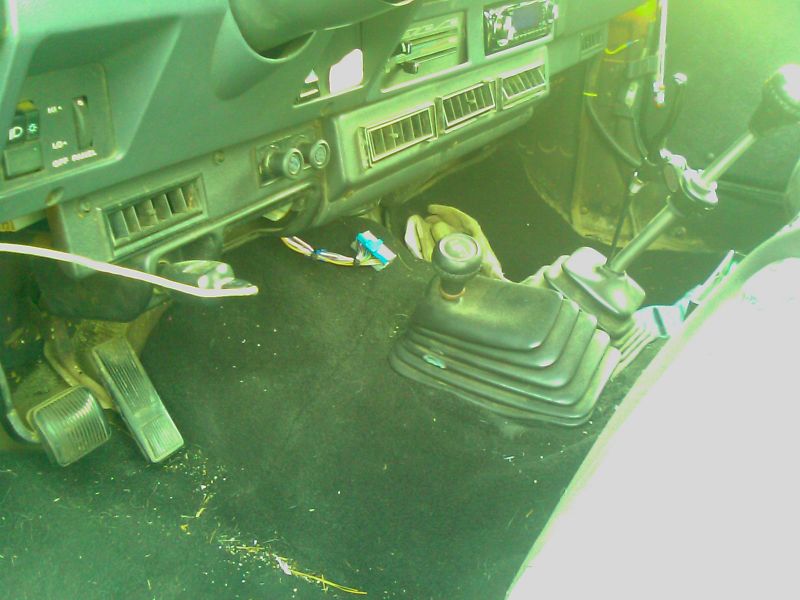
I placed the shifter in the hole for the old stick. It seemed to fit nicely. The shift handle was perfectly centered between the console and dash. I cut the left side off the shifter plate to give the 4WD lever enough room to squeeze in there somehow. I attached the cable to the shifter and ran it up and down the gears a few times. It felt pretty good. I bolted in the starter and hooked up the wires. Next, I eyeballed the angles of the TC shifter. The XJ lever was too high. To get it to work, I would have had to mount it REALLY far forward so the angle wasn’t too steep. The TJ relocation bracket I bought posed the same problem. The angles would have been better but it required the shifter to be mounted under my AC unit. People without AC can probably get away with that. I just welded my old AX-15 bracket to the transmission side pivot from the AW4. The bottom bolt hole didn’t line up anymore because of the re-clocking but it was strong enough with the 2 rear bolts. The angles were perfect and the 4WD stick was in line with the shifter.