Most folks that read the on-line TJ forums are not surprised to hear when someone reports that their TJ with 20k or 30K mile on it had to have the radiator replaced. The upper and lower plastic tanks are crimped onto the radiator core itself and it only seems to be a matter of time before this style of radiator starts to leak at the crimped seam. Mine recently did it….and the timing could not have been worse. The TJ was parked at the City Market parking lot when my wife mentioned that “we have steam coming out of the grill”. Now normally a radiator problem in a parking lot is not a BIG issue. But, this was THE City Market parking lot…..you know, City Market in Moab, Utah. THE place where 4 wheelers meet up each morning to decide on which trails to run that day. And on top of that, it was a Sunday morning. Luckily, the seam held and once the plastic and metal parts stabilized (i.e., they finally heated up and expanded enough to seal the leak) and I was good to go. It all held long enough for me to finish the entire week of Jeepin’ and make it home to Phoenix. I ordered a replacement radiator from a local shop and installed it on the following Saturday. Having never been involved in a radiator swap, I decided it would make for a good write-up. I solicited the help of my buddy, Scott, and was lucky enough to have Les show up at the wrenching party too. Les had a new Currie Anti-Rock to install so we did both projects at Scott’s place. Replacing a radiator on the Jeep Wrangler is a project that most Jeepers should be able to handle.
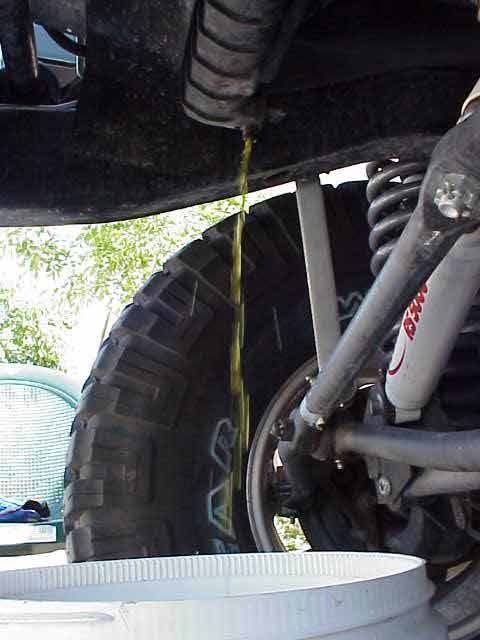
The first task was to drain the radiator. The 4.0L cooling system holds a bit over 10 quarts. I put a bucket under the petcock on the radiator and cracked it open until a steady stream was running in to the bucket.
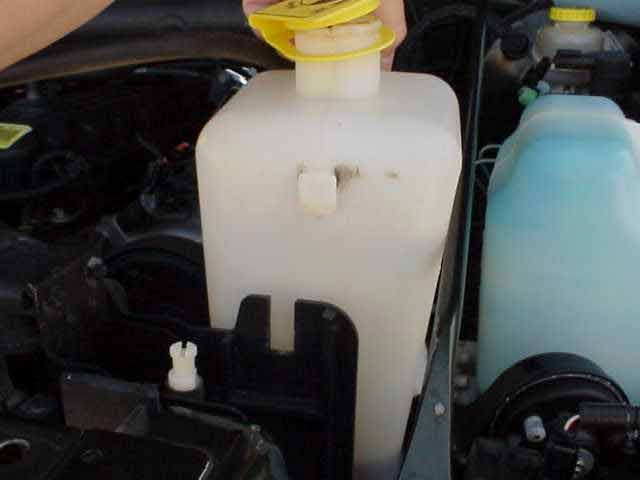
While the radiator was draining. we pulled the rubber hose from the radiator’s filler neck and then removed the coolant overflow bottle. The bottle sits in a couple of slots. Pull the bottle upwards to remove it from its mounting location. You will want to dump the contents into the bucket and rinse the bottle out. I had some fine sediment in the bottom of mine and certainly did not want to introduce it back into the system once everything was replaced and refilled.
The fan shroud is held on with 4 bolts. Scott handed me a 3/8″ air ratchet and it made pretty easy work of those bolts. While it could be done with a conventional ratchet, it was nice to use the air ratchet. Remove the two bolts located on each side of the fan shroud, near the top and bottom of the shroud.
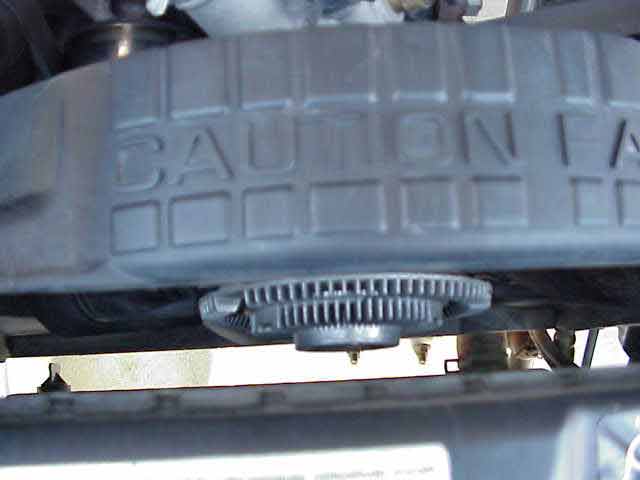
With the fan shroud bolts removed, you can push the fan shroud back towards the engine. By doing so, you will be able to make enough room to be able to remove the 6 bolts that hold the radiator in place.
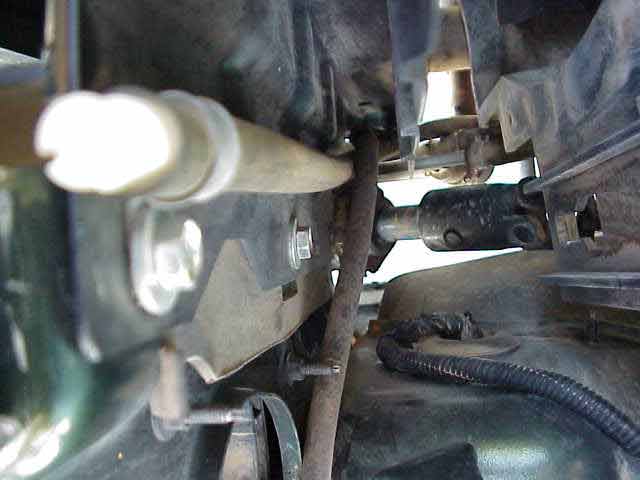
Here is a view of the driver’s side of the radiator. You can see 2 of the 3 bolts (the closest one is a bit out of focus) that you need to remove in order to free the radiator. I found that the 3 bolts on the passenger side are best reached with a 3″ socket extension.
Note: I got an e-mail from a Jeeper who had recently changed his radiator. He noted that the bottom two mounting bolts on his TJ’s radiator did not have to be removed since the mounting holes were slotted. He as able to loosen them (without removing them) and then slide the radiator off of the bolts. You may want to check and see if yours is setup this way as it will save you some time.
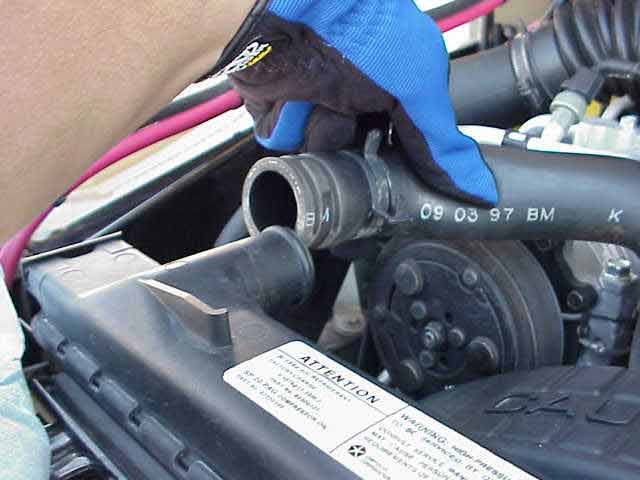
Remove the bottom and top hose (shown above) from the radiator. I was going to change out the hoses but after getting a chance to examine them closely, I decided to leave the factory hoses in place. I carry a spare upper and lower hose in the back of the Jeep so I am not too worried about it.
TJ Radiator Replacement
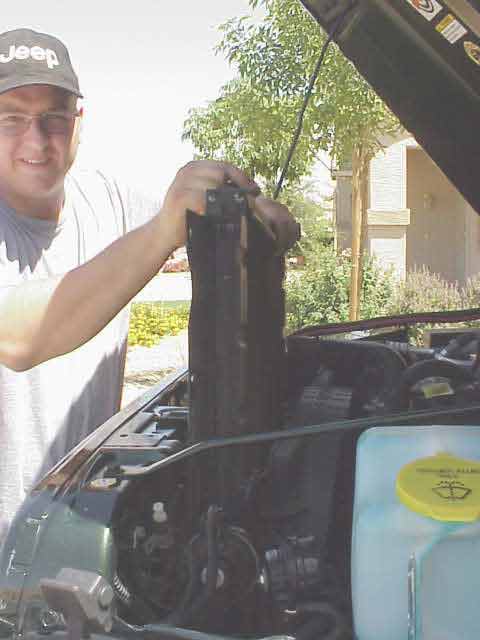
With the radiator drained of coolant and the 6 mounting bolts removed, Scott lifts the old radiator out of the vehicle. You will need to wiggle the fan shroud a bit while you slide the radiator out. Although not a requirement, having a friend around when doing this part of the project sure does come in handy.
Since the cost is minimal, I picked up a new thermostat and a housing gasket. I had been carrying a new serpentine belt in my parts box for the last year. There were a few cracks in the original belt and I decided to swap the new belt in while I was doing this job. I’ll keep the old belt in the parts box as a trail spare. I should comment that according to the factory service manual, small cracks running across the belt are not the “BAD” cracks you need to worry about. The cracks that run parallel to the grooves in the belt are NOT good cracks and you should replace your belt immediately;.
NOTE: If you are not replacing the thermostat or the serpentine belt, skip the following steps that detail the removal of both of these items.
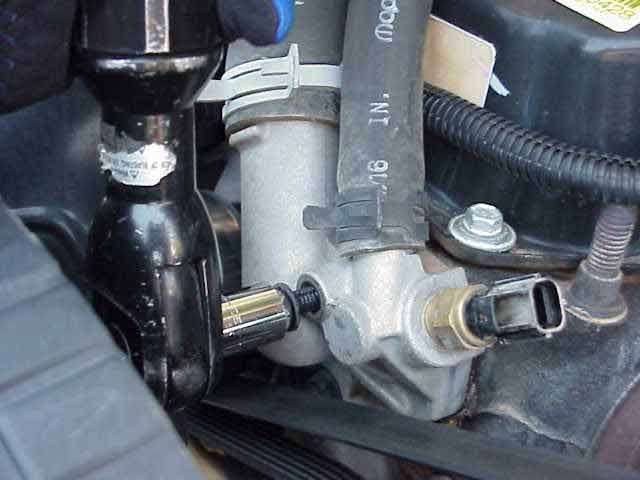
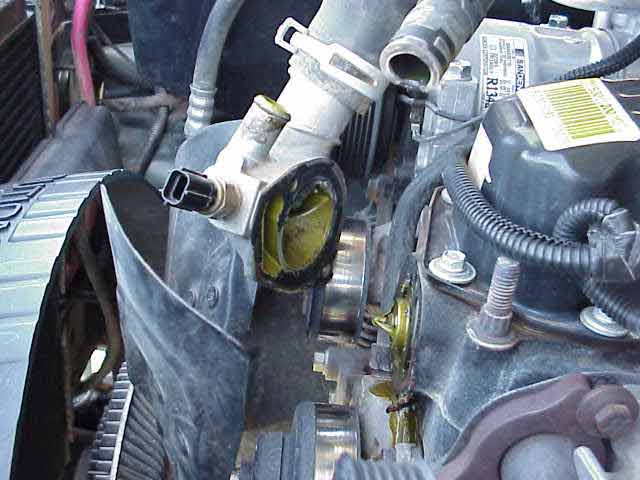
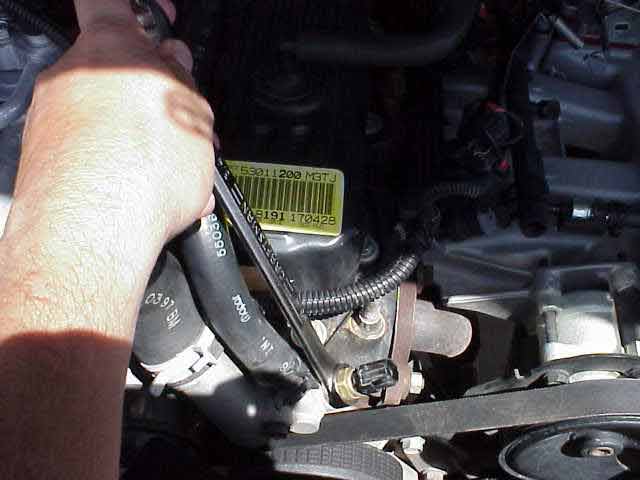
With the old radiator out of the way, I grabbed the air ratchet and started to remove the thermostat housing bolts. With one bolt removed, I decided it would be easier to remove the second one after removing the serpentine belt. Don’t forget to unplug the electrical connector that is attached to the temperature sensor.
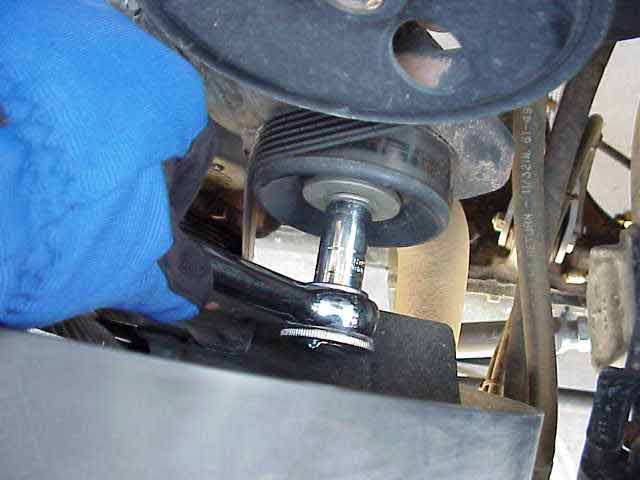
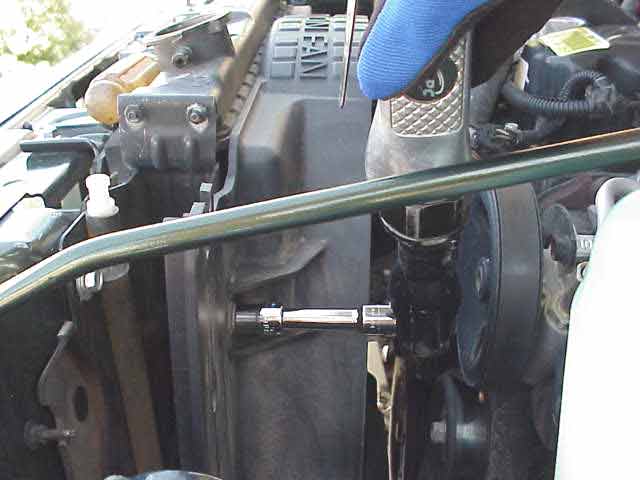
To remove the serpentine belt, you need to loosen the bolt in the middle of the idler pulley. Mine was on pretty tight and I ended up standing on the bumper to get some adequate leverage with the ratchet handle. Once this bolt is loosened, you can loosen the idler adjustment bolt and put some slack in the belt. Be sure to note the routing of the belt around the pulleys. It can get a bit confusing when you put it all back together. If you don’t have a diagram handy, be sure to draw one (just in case).
With the belt removed, I took the second bolt out of the thermostat housing and carefully removed the housing. The gasket will most likely peal apart and leave some of itself on the housing and some on the engine block. Pull the heater hose off of the housing too. You can flush the heater core by removing the other heater hose where it attaches to the engine block and running a garden hose into the end of the hose you removed from the housing.
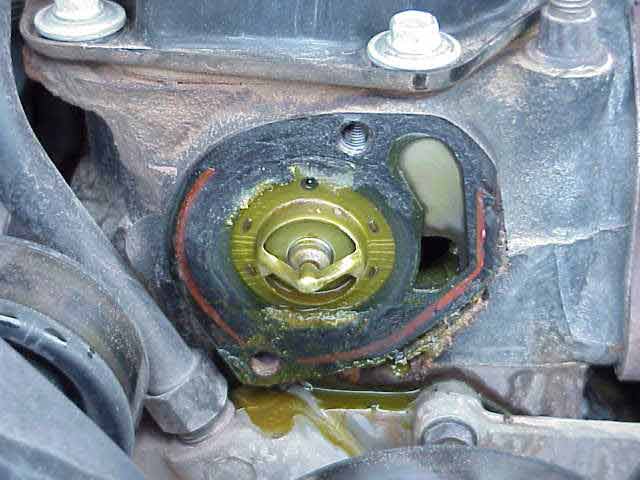
Note the orientation of the thermostat so that you install the new one correctly. Remove the thermostat (it just sits in a recessed area on the block) and thoroughly clean the area of the old gasket material. Once the thermostat is removed, you can flush the block with a garden hose. Put the catch bucket under the lower radiator hose to catch the coolant coming from the block.
TJ Radiator Replacement
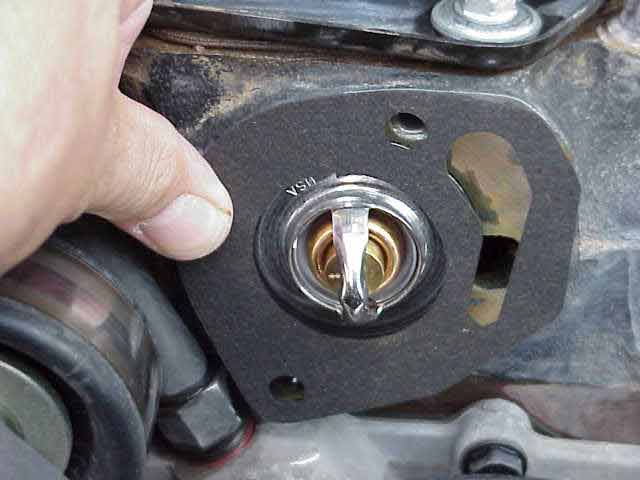
After both the block and thermostat housing surfaces have been carefully cleaned, insert the new thermostat and position the new gasket. Place the thermostat housing over the gasket and tighten the housing bolts to 15 ft. lbs. Reattach the heater hose to the housing and if you removed it, the other heater hose going to the block.
If you removed the serpentine belt, now is the time to install it and adjust the idler pulley. I set the tension on mine as close as I could determine to the way the old belt was prior to removal.
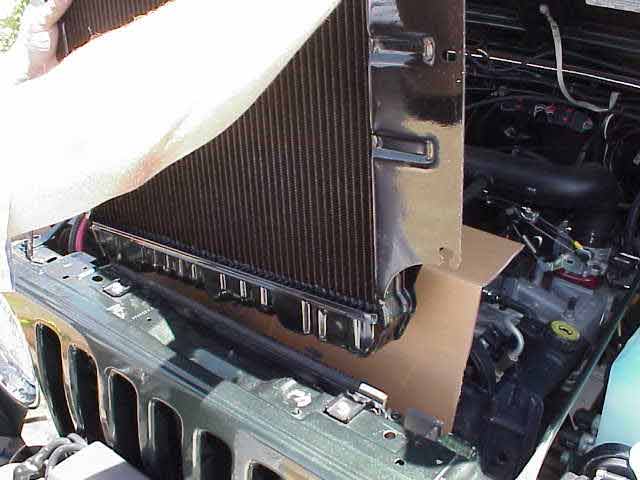
Scott gave me a good tip and I will pass it along. Take a box knife and cut up the box that the radiator came in. Take a piece of cardboard and cut it to be the same width as the radiator. Push the fan shroud back as far as it will go and then slip the cardboard in front of the shroud. Now, when you slip the radiator into place, the shroud will not dig into the radiator core fins and bend them. Thanks Scott for the tip! It worked very nicely. Now, slip the radiator into position. This is another place where having a friend around will come in handy.
Note: Some distributors carry one radiator for both auto and manual transmission TJs. (cheaper to stock just one model that fits both) The radiator for an automatic has a pair of 3/8″ fittings in the bottom of it where the automatic transmission fluid is routed through the bottom of the radiator to get cooled. If the new radiator that you purchase has a pair of fittings on the bottom, and you have a standard tranny, don’t worry….get a couple of 3/8″ plugs and screw them into the holes. This will keep “junk” out and just in case you should ever decide to get an automatic tranny, you’ll already have the necessary radiator for it.
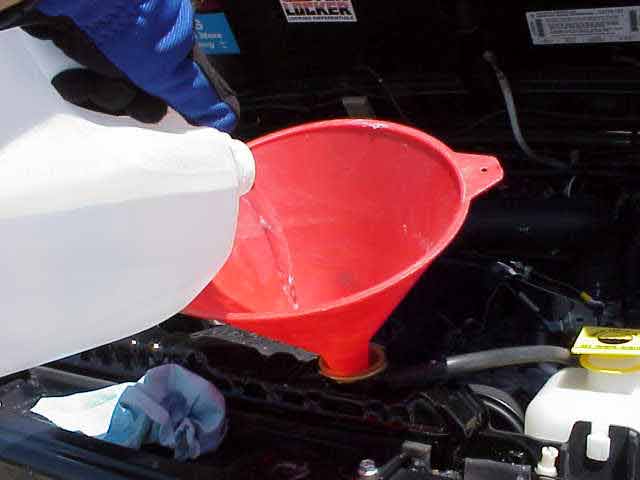
After tightening the 6 mounting bolts and reinstalling the fan shroud (four bolts there), connect both the upper and lower radiator hoses. Give your handiwork a once over just to make sure you didn’t miss anything (be sure the petcock on the bottom of the radiator is closed). I poured a full gallon of antifreeze into the radiator and followed it with a gallon of distilled water (well, almost a gallon….I put the last pint of it in the overflow bottle and then topped the bottle off, up to the cold mark, with antifreeze.
Be sure to use distilled water. You do not want, nor need, the minerals from regular water plating out on the inside of your cooling system. (albeit, you will have some in your system if you flushed it with the garden hose as I did….well, we try the best we can!)
After running the vehicle for about 5 minutes (with the radiator cap in place), I carefully opened the temp sensor. Scott said I should see some air bubbles when I did and sure enough, it burped a couple of times. He said this helps get the air out of the water jacket and prevents hot spots in the engine. It sounded good to me so I’ll pass it along here.
That was it. I cleaned up my tools and put them away and then took Lady out for a couple of miles so she could get the cooling system up to pressure. I drove back to Scott’s, opened up the hood, and then checked the system for any signs of leaking. Everything looked good so we started working on Les’ Anti-Rock bar install.
I hope yours goes as well as mine did!