These instructions are not meant to replace anything that a service manual or owner’s manual requires you to do. I occasionally get an e-mail, or a posting appears on a forum, concerning how to change differential fluid. This is necessary maintenance for anyone that 4 wheels on a regular basis. I personally follow the B schedule in my owner’s manual, but my differentials seem to get changed more often than what is specified. Here are a set of steps for you to follow that might prove helpful on your first time.
1. Stop by auto parts store and get the appropriate differential gear lube and some RTV sealant. Several companies make sealant (Permatex is what I usually get, but any good brand will do just fine). If you don’t already have one, get an oil catch pan while you are at the auto parts store. You can use it for this, your t-case and tranny fluids, and also your engine oil.
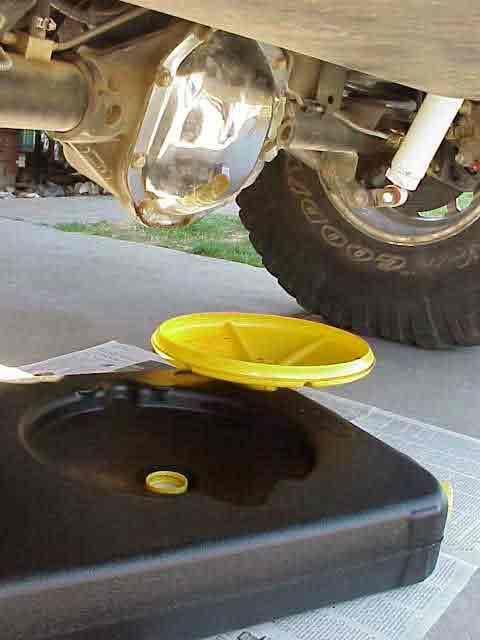
2. Place an oil catch pan under the diff. I usually spread out some newspaper underneath everything because I hate to clean oil up off of the driveway.
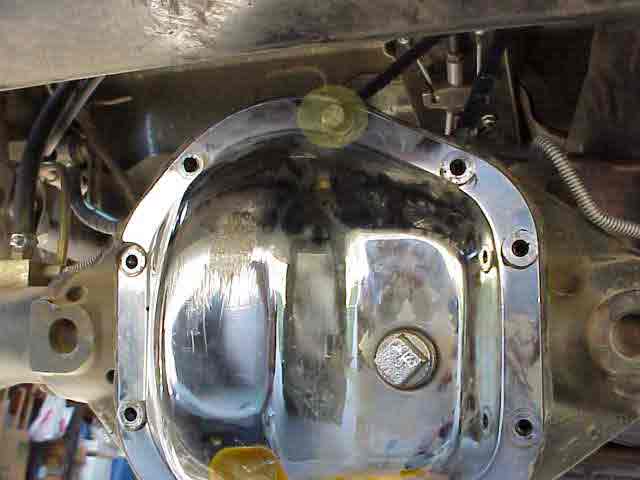
3. If the fill plug on the diff cover is a screw in type, remove it now. Next remove the bolts holding the diff cover in place. Do not completely remove one of the bolts along the top edge (see shaded area at top of pic). This bolt will hold the cover in place when you break the RTV sealant loose in the next step (and it keeps it from falling down into the oil pan and splashing the stuff all over the driveway where you did NOT put any newspaper).
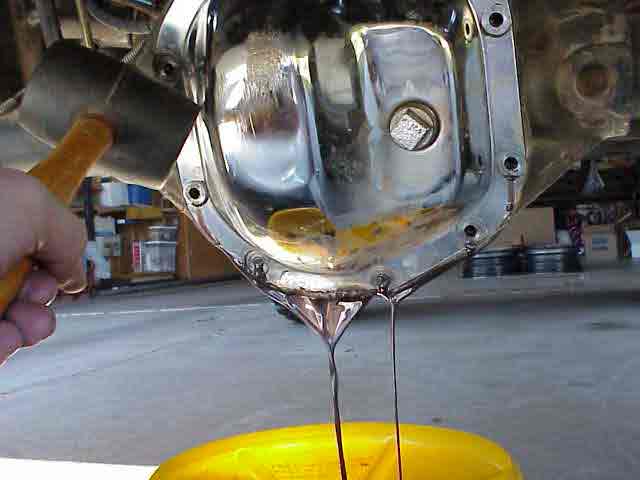
4. With a small screwdriver or a rubber mallet (I like the mallet method), carefully pry or smack the cover off and drain the diff fluid into the pan. The sealant will keep the cover stuck to the diff housing a bit, so just work the screw driver around the lower edge of the cover and carefully pull it back away from the differential. Don’t get carried away and pop it off in one big effort as it will probably dump fluid all over the place and you will have a mess. While the fluid is draining, I use a wire brush to clean the threads on the bolts. They usually have a bit of sealant on them.
5. Once most of the fluid as ran out, remove the last bolt and the cover. Using some paper towels, wipe the inside of the cover clean of the old diff fluid. You can use carb cleaner or brake cleaner to get the residue off of the cover if you so desire. Soap and water works OK too. If the fill plug in your diff cover has a magnet in it, don’t forget to clean this off as well. Take the time to inspect the material that is stuck on the magnet. A light coating of very, very fine metallic filings are pretty common. Big chunks or pieces of metal are NOT good. If you find this, have a qualified mechanic take a look at your differential.
6. I usually try to clean out the differential internals with a bunch of paper towels. Wipe down as much of you can and get any residue off the bottom of the diff housing. Brake cleaner can be used here as well. Spray it down and then wipe it out as clean as you can.
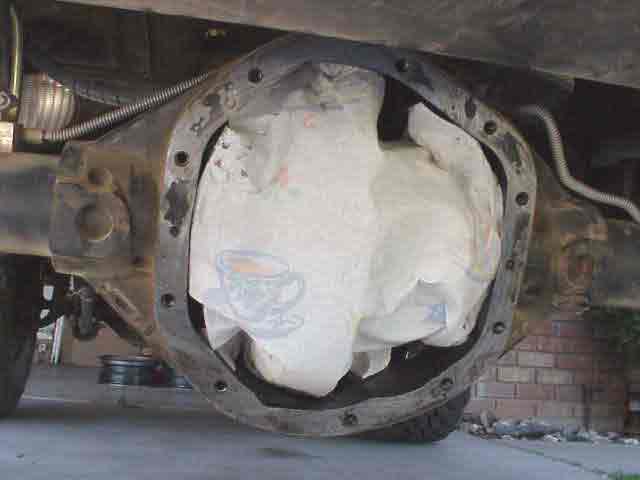
7. Clean the old RTV gasket material from both the cover and the differential housing. A $4 gasket scraper (get it from the auto parts store) is very handy here. You must have both surfaces clean before you get ready to put things back together. In the picture above, you can see I cover the differential with some paper towels while I clean the RTV sealant from the housing. Do not use a screwdriver or some such item to scrape the old RTV sealant from the metal surfaces. You do not want to scratch these surfaces. Once the sealant is removed, spray them down with some brake or carb cleaner to remove the oil residue.
8. Follow the directions on the RTV sealant tube and apply it to the sealing surface. I usually do this on the cover’s surface since it is much easier to apply the RTV to it rather than the diff housing. Be sure to apply sealant around the bolt holes in the cover too.
9. Carefully place the cover onto the housing and insert a couple of bolts to hold it in place. Try not to let the cover slide around the get sealant into the holes. If it does, you can easily clean the bolt hole out with a toothpick.
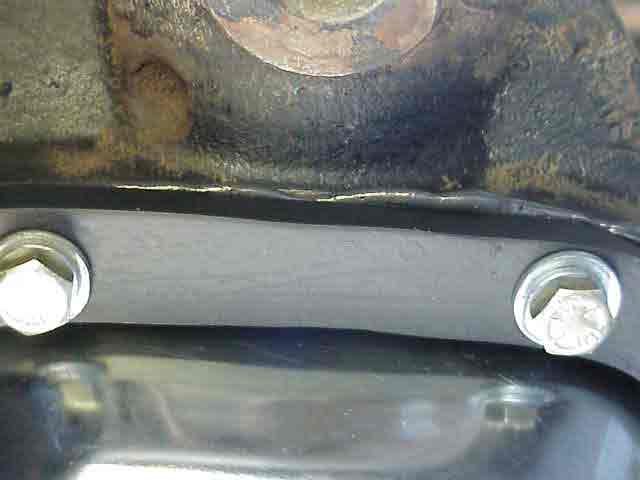
10. Torque the bolts to spec. Do not over tighten as this will cause the sealant to squeeze out and may result in a poor seal. Consult your service manual for the proper torque specs. As you can see in the above picture, there is a small bead of RTV sealant that has oozed out from beneath the cover when the bolts were tightened.
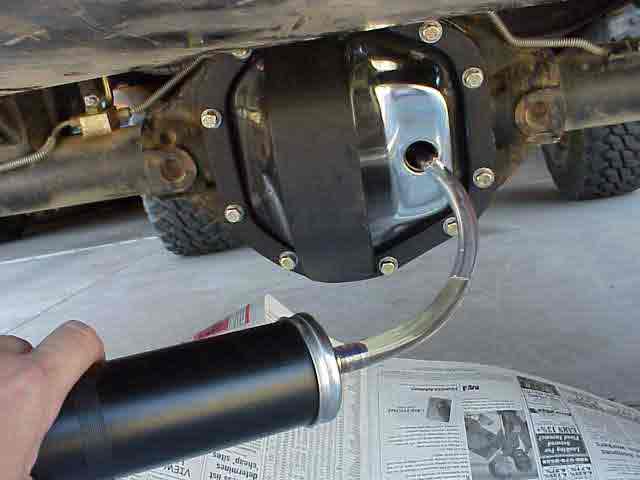
11. I usually let my covers sit for an hour or two, then I add the proper amount of diff fluid. I use a el-cheapo $8 suction gun that can be found at any auto parts store. Stick the hose in the bottle of diff fluid and pull on the plunger handle. Once the gun is full, stick the hose into the diff cover fill hole and push the plunger handle slowly to fill the differential housing. In my opinion, it beats the heck out of trying to use a funnel.
Other things to consider:
1. If you have a limited slip differential, such as a Tracloc, that has clutches, make sure the diff fluid has friction modifier in it already or buy a small bottle to add to the fluid. This friction modifier is used to increase the performance of the clutch packs in these types of differentials. Without it, the clutches will usually chatter and your differential will not perform properly.
2. Please dispose of your old fluid at a local oil recycling station. Here in Phoenix, the local Pep Boys and AutoZone auto parts store take mine. Do not pour it into some old containers and toss it out in your trash. TREADLightly goes for doing maintenance at home too!
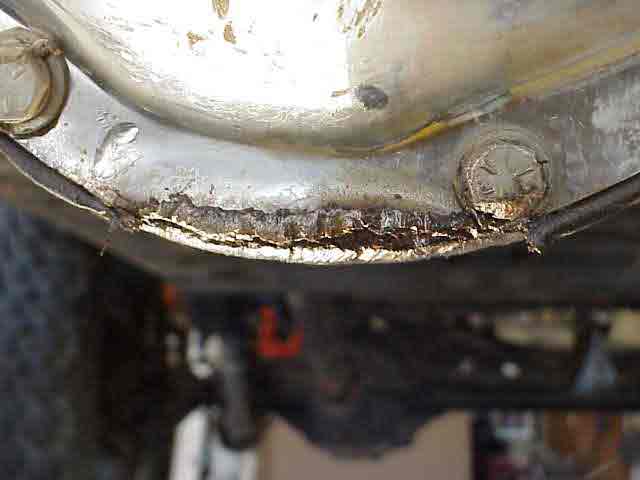
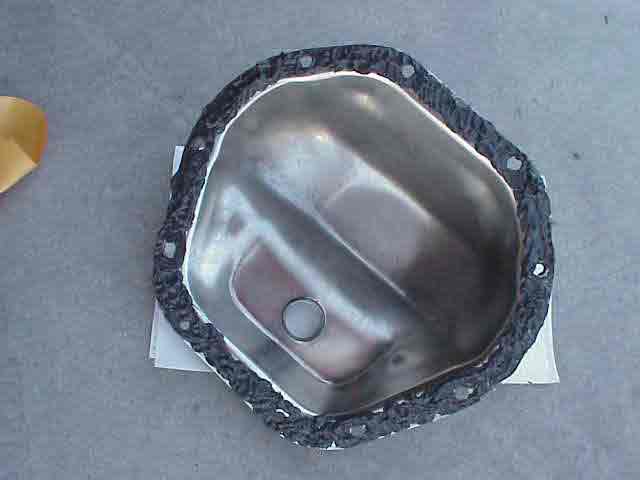
3. Always check your diff cover for trail damage. It is not uncommon to drag your rear differential on a rock while off-roading. When this happens, it sometimes catches the lip of the diff cover and causes it to peel up and cause a leak. The picture above is of such an instance, the the cover was caught and peeled while rock crawling a local trail. When you notice your diff dragging, it is always a good idea to stop (once safely over the obstacle) and do a quick check on your diff to make sure everything is OK. The cover in the above picture did in fact start to drip some fluid. I was able to hammer it back into place and stop the leak without having to remove the cover (which is a PITA when on the trail).
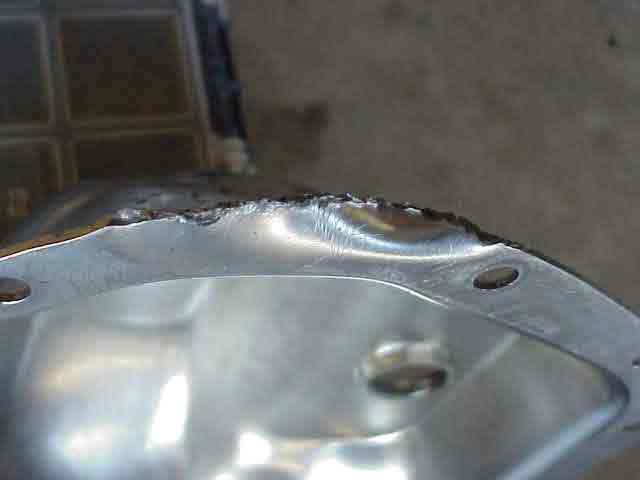
Here is the same cover from the previous picture after it was removed and cleaned. As you can see here, their was a fair amount of damage done to the cover. I was able to repair the damage by using a big hammer and a piece of railroad track (as an anvil). The edge of the cover was pounded back into shape and a file used to dress off the edge and remove the sharp burrs.