A daring individual recently chose to “break” into my Jeep and break open the locked center console and glove box. Luckily, I know better than to keep anything of value in my vehicle, and all the thief took was my 15 year old three D-cell Maglite. I was most bothered by the fact that the Jeep was parked right outside my bedroom window when the theft took place, and I heard the console and glove box breaking open. It was garbage day, and I assumed the noise was one of my neighbors taking the garbage cans out to the curb. Needless to say I was quite disappointed when I walked out to my Jeep the next morning. I immediately began thinking of ways to avoid a similar mistake in the future.
The obvious solution to car theft worries is an alarm system, but I seem to have an aversion to paying for some elaborate noisemaker. My lack of available funds is one justification, but general “alarm apathy” is the main factor for me. What is the ratio of false alarms to real emergencies? When was the last time someone heard a car alarm and did anything? I probably hear ten alarms beeping and honking at me every day and I do not even raise an eyebrow anymore. Why spend the money?
I have kicked myself over and over for not getting out of bed to investigate the noises outside, but at the time I had no reason to suspect it was not a garbage can. With this in mind I tried to think of a way to cheaply rig the Jeep so I would hear an alarm if someone opened the door while I was at home. I recently Herculined the interior panels, and during that process I pulled the fuse for the interior lights so I could leave the doors open without draining the battery. The interior lights may be activated by both the door switches and the headlight knob, so I thought the door switches could easily be liberated for use in my “alarm.” Since I was trying to keep things cheap, I decided that the existing horns would be my best bet for an alarm horn.
My original, basic plan was to splice the horns onto the circuit with the interior lights, using the existing doorpost switches. The obvious downside to this plan is that the horn will honk every time a door is opened. This is easily avoided with a simple toggle switch to open and close the circuit to the horns. I realized that the switch would need to be mounted externally if I expected to turn the alarm on from the outside, and this posed a problem. While I could cleverly hide the switch somewhere, it would be inconvenient to dig around for a hidden switch every time I park. I have seen circular locking switches mounted outside cars, and on computers, and this seemed like a reasonable solution.
I stopped by several local electronics wholesale outfits, auto parts stores and car stereo/alarm installers, but no one seemed to have access to a decent locking switch. Radio Shack carried the lock at some point for around $4.00, but it has since been discontinued. JC Whitney also carries the same lock for $9.99+ shipping. Luckily one of the local Radio Shack employees was able to track down the part at a store about 15 miles away, so I decided to just drive and pick it up.
Materials
Phillips screw driver, digital multi-meter, circuit tester, drill, dremel, wire stripper, side cutters, knife, soldering iron, 18ga wire, misc. wire connectors, heat-shrink tubing (and matches), electrical tape, zip-ties.

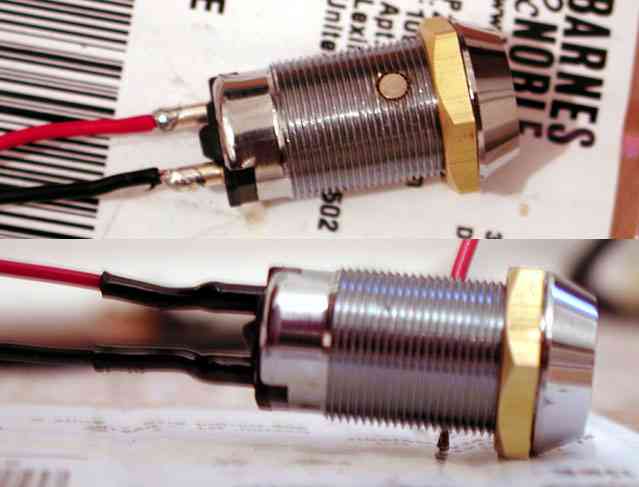
The switch comes unwired, and I soldered wires on and shrink-wrapped them before heading outside. In later pictures you may note that the black wire was replaced with a second red wire since the lock only acts as a break in a positive line.
With my lock ready I headed outside to start tearing things apart and looking for a satisfactory way to wire the alarm. The speaker cover is held on by two screws, labeled 2 in the diagram, and it may be slid down and out after they are removed. I removed a foam insulator, and four screws holding the speaker in the dash. It was also helpful to remove the dash piece below the steering column which is held on by four screws, and the steel brace below it which is held on by four screws. The lower dash piece slid over the headlight knob without any difficulty.
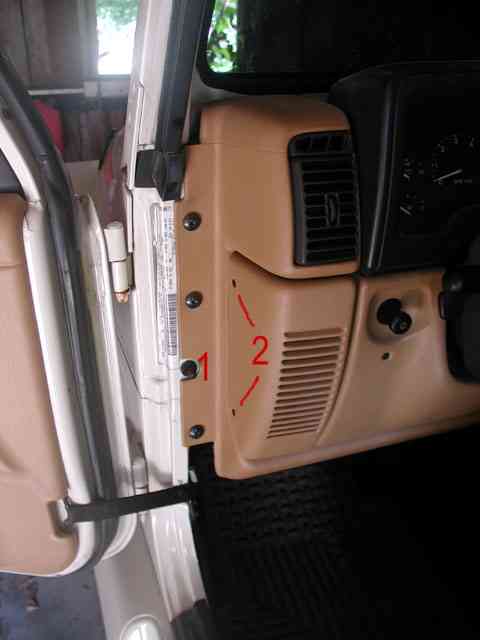
Once the speaker and lower dash pieces are removed, the door switch, labeled 1 in the above diagram, was removed by pulling straight out of the hole. The switch portion slid off of the plug as pictured below.
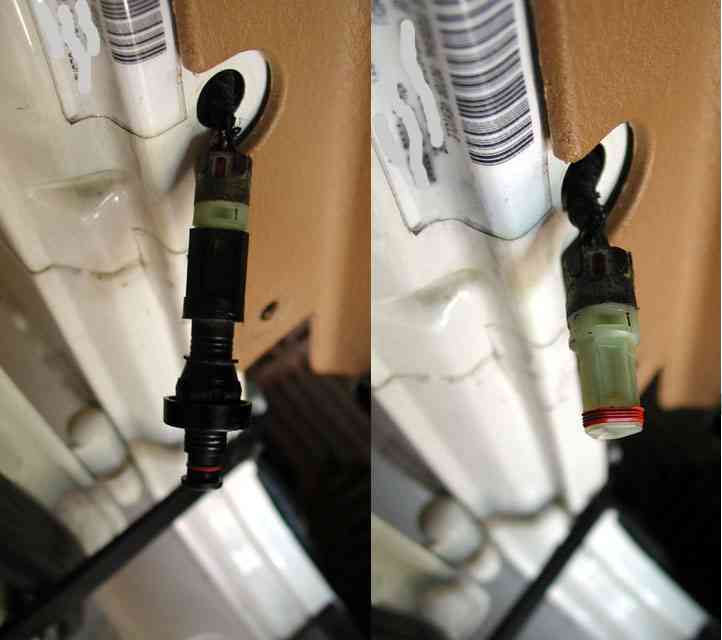
The driver’s side door plug has three wires: solid yellow (interior lights positive), yellow with black stripe (interior lights ground), black with green stripe (hot wire for beeper for keys left in ignition). The passenger side door plug does not have the black wire for the key warning beeper.
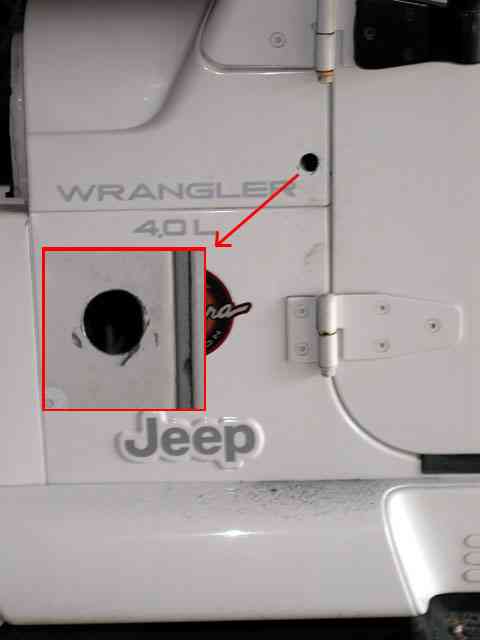
Just behind the hole for the door switch is an indentation in the two body layers. This provided an ideal location for my locking switch, so I drilled the hole and ground it to the appropriate size. I made a somewhat feeble attempt to flatten one side of the hole to match the flat side on the locking switch. I highly recommend placing a few layers of tape over the drilling area. I was lazy and you can see the big gouges I made to the left and right of the hole (the ‘scratch’ at the bottom edge is a slice of metal). It is a good idea to put some primer on the inside edges of the new hole, and I will be taking care of the gouges with some touch-up paint.
Jeep Wrangler Horn Alarm
The locking switch does not come with any type of gasket for installation, so I had to improvise. I used two plastic rings from a spool of 50 blank CDRs. With a bit of Dremel work they fit like a charm. (Before and after pictured below)

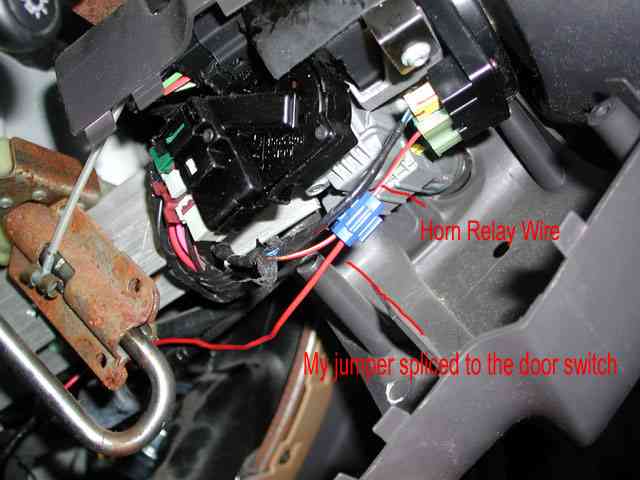
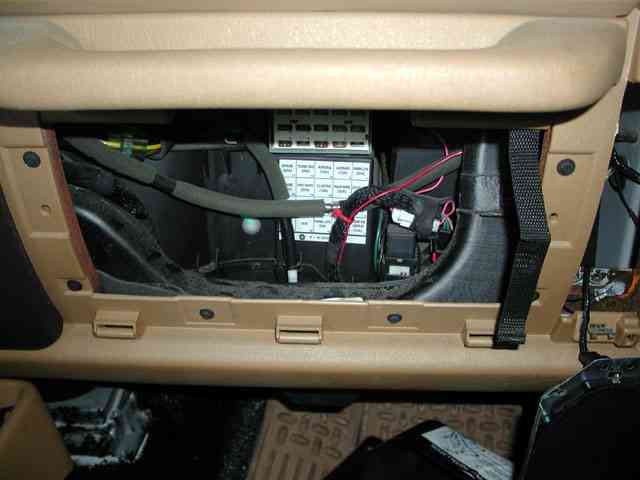
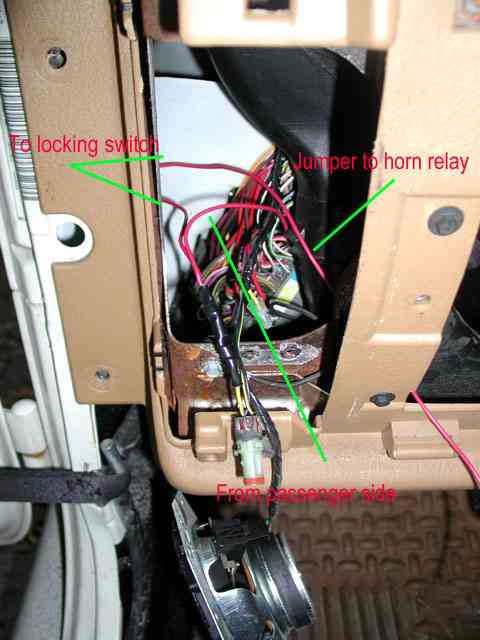
With the lock mounting out of the way I got back to the actual wiring worries. I noticed that the horn relay under the hood runs to a 20A circuit, while the interior light door switches run through a 10A fuse behind the glove box. Originally I had planned to splice the horns into the interior light circuit, but apparently that was not going to be a wise choice. I decided to pull the bottom cover off of the steering column to see if I could splice into the horn circuit closer to the horn switch. After a bit of investigation, I found the wire running from the horn to the relay. It is a single red wire with a yellow stripe, attached to a large plug just behind the steering wheel.
At this point I realized that the horn switch just grounds a hot wire to the horn relay under the hood, which actually controls the horns. This works out quite well, since the relay circuit seems to run a fairly small current (~.5A). I decided I would eliminate the interior light positive (solid yellow) that runs to the door switch plug, and run the horn to the plug instead.
On both the driver and the passenger side I cut the electrical tape back about 3″ from the plug, then cut the solid yellow wire. I crimped a cap on the live side of the wire, leaving 3″ of solid yellow wire on the plug side for me to splice in the horn jumper. I decided to insert the locking switch on the jumper between the horn relay and the door switch plug.
Since I wanted both doors wired into the horn, I had to run a wire across from the passenger side to the driver’s side. I followed the existing wire loom across, zip-tying as I went.
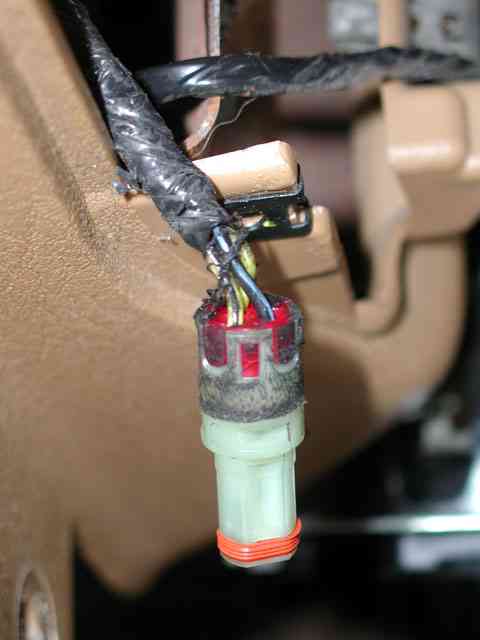
The wire to the right side was spiced into the passenger side plug, then shrink wrapped and finally wrapped in electrical tape. The crimped cap on the old interior light wire is visible in the right picture below.
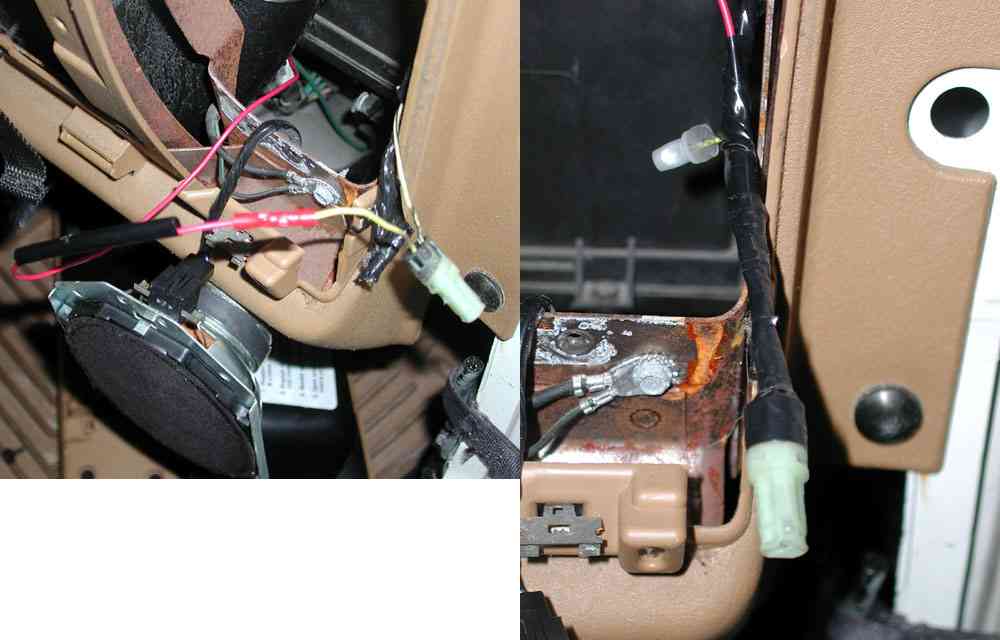
The wire from the passenger side was connected to the driver’s side switch, both of which were connected to one side of the locking switch. The other side of the locking switch was connected to the jumper from the horn relay on the steering column. Connections were crimped, shrink-wrapped and tapped up, and everything was re-assembled.
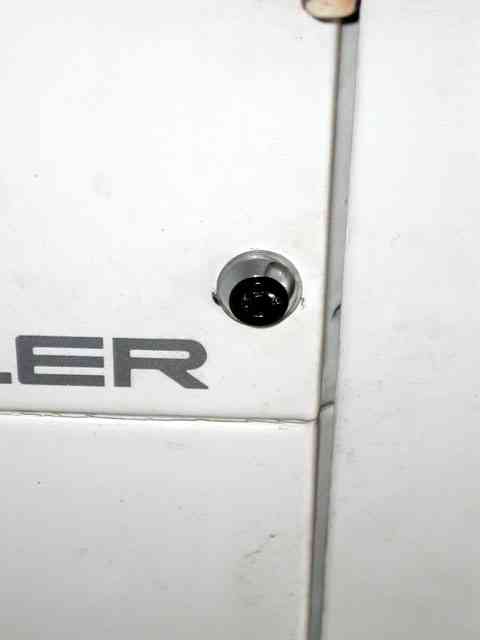
This is a final view of the lock from the outside.
I also purchased a small red 12v LED to attach to the dash, but I am holding off on installing until I can find an appropriate blinking LED. The horn will be a nice wake-up call for me, and it will certainly get the attention of a would-be thief, but in some cases a nice visual warning (other than the lock) can make all of this unnecessary.
Final Note:
The overall time I spent on this project, once I had secured the parts, was about five hours. Most of that time was spent following wires and checking circuits. If I had to do this again, it would probably take less than an hour. The total cost of this project is less than $10, especially if you have a nice selection of wires and connectors sitting around. I do not think the lock detracts from the appearance of my Jeep, and I do not feel inconvenienced by the fact that my interior lights do not come on when I open the door. I can easily turn them on using the headlight knob. In my opinion it was a simple, clean, functional modification and I am very happy with it so far. I will definitely be sleeping easier, not feeling the need to jump up and look out the window at every sound.
If you have any questions, you are welcome to email me.
Happy Wheeling,
Zach Matson