by Scott Findley
Components
TEC-YORK Clutch Model# 75R4502
Detailed info at: http://www.heco.net
York 210 Compressor
Detailed info at: http://www.heco.net
York Service Manual at: http://www.ccicompressor.com
Mounted using Kilby OBA Brackets and accessories
Detailed info at: http://www.onboardair.com/
Another interesting mod from Kilby, Mount ARB switches, air pressure indicators etc. within easy viewing and operation while off road with this:
TJ Dash Switch Center: http://www.kilbyenterprises.com
Problem that prompted this service
During low speed operation (especially noticeable when off-road with no doors etc.) there was a somewhat loud tac-tac-tac sound coming from the York compressor area under the hood. This was at a rate of about 2hz, or 2 times per second. It gradually got louder, to the point where you can hear it on all my videos and mpg�s during off-road trips this summer.
I found a few good references, but nothing with the exact details of replacing the clutch bearing. “Funnily enough” (as my Aussie friends say) I found a great write-up on a Ferrari website for enthusiasts ( I’d be afraid the work on one of those for fear of scratching it) Here is the link: http://www.ferrari-talk.com/discus/messages/30/2571.html?1092859080
While on the Ferrari rebuild he had a different clutch than mine, it gave me plenty of info to dive in, and to consider replacing the other seals in the near future, not out of need, but simply for the learning process.
This was easier than I expected
That’s always my favorite statement when I’m finished with something I haven’t done before. I did this service without removing the compressor from the TJ, and it did not cause me any extra pain.
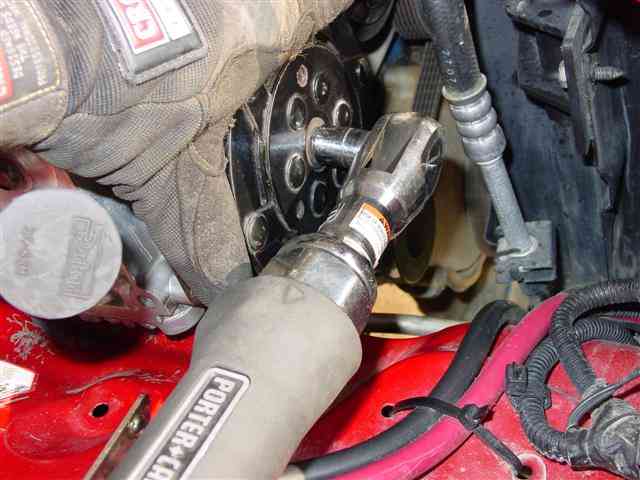
Loosen the compressor mounting bolts and remove the belt.
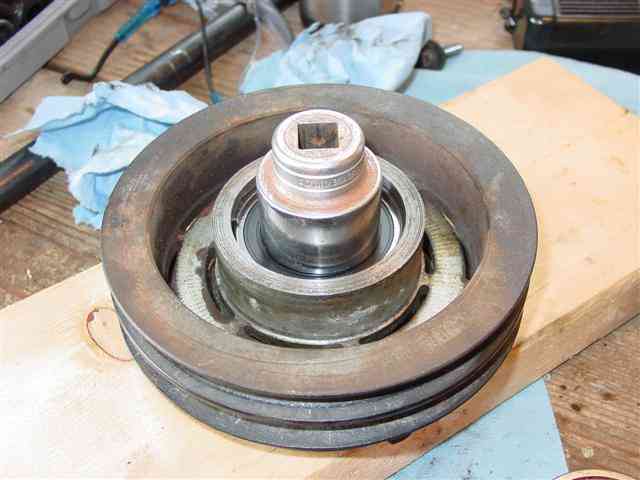
Air tools come in handy, at least it did for me. In order to remove the bolt that holds the clutch to the compressor shaft, I simply used a gloved hand to hold the belt pulley and removed the shaft bolt. I tried with a socket wrench first, but could not develop enough torque with the pulley slipping. The air wrench loosened it immediately.
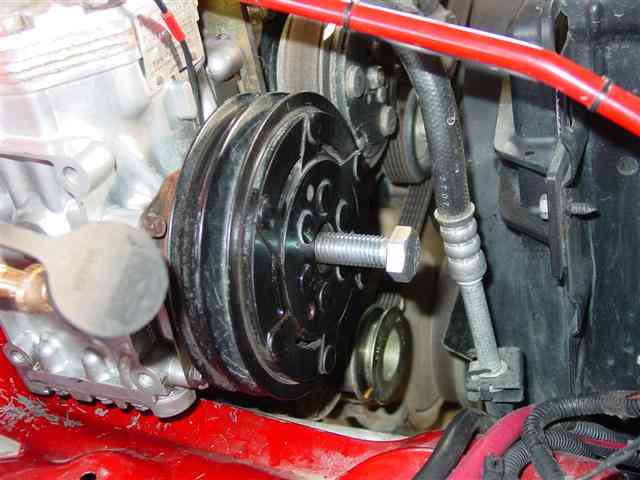
Using a 5/8″ bolt (thread count of 11 I believe) I was able to easily remove the clutch from the shaft without any hammering or prying. I’m not sure all clutches has this option, but this is why I was able to leave the compressor in the TJ for this operation. Once again, hold the pulley and crank the bolt in, and it will push directly against the end of the shaft without causing any damage to the internal shaft threads.
With the clutch removed, I went to work on the bearing removal. Since this bearing was already bad, I simply went to work hammering it out using sockets of the appropriate size to disable the pieces. Take the small snap ring off first, and hammer the inside shaft out of the bearing – this removes the front plate of the clutch mechanism from the pulley. When the two pieces separate, there is an offset ring on that must remain on the shaft of the front plate – this will set the proper distance from the bearing on reassembly.
To remove the bearing from the pulley component, you first have to remove another retention ring, and it wasn’t all that easy. I imagine there is a tool for this, but I resorted to the good old screwdriver wedgy process. Once I was able to loosen one edge of the retainer and twist it out far enough to get another flat blade behind it, I proceeded to slowly work my around the diameter and pry the ring up and out.

Now hammer the bearing out. I again used a socket to apply the force to the bearing. There is a small offset plate on the front of the pulley, and I would NOT apply direct force to this, but rather inside the diameter of the small plate. I could be easily destroyed.
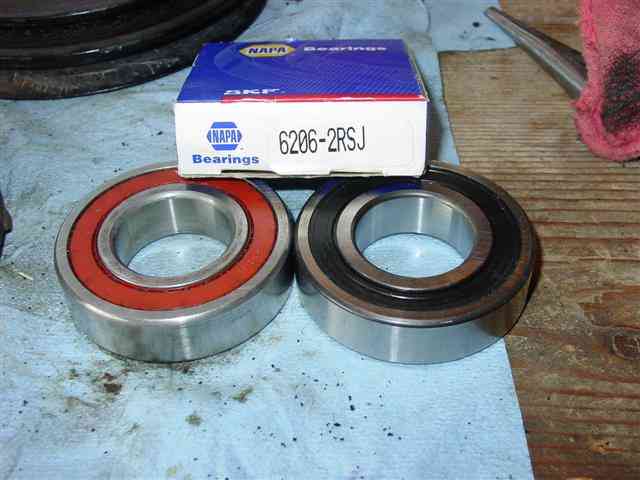
I purchased the replacement bearing at Napa. A bit pricey, but it looked like a $20+ bearing wherever you get it. Napa # 6206-2RSJ. This is a sealed bearing with no greasing required
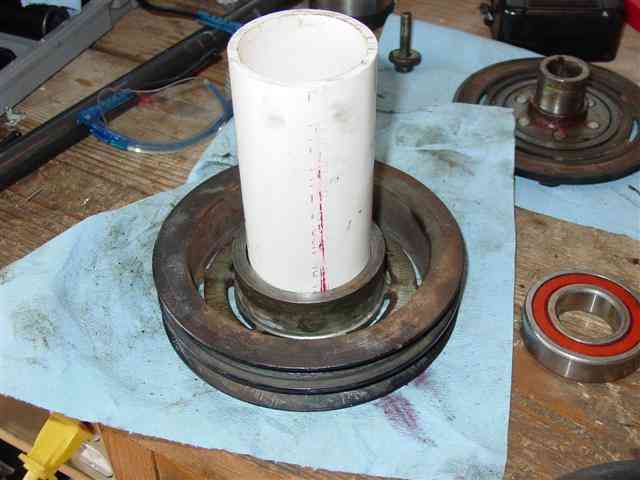
I used the old bearing as a hammering aid to install the new bearing. FIRST make sure the small/thin offset place is installed, or you’ll end up removing the new bearing. Then start the new bearing installation. Once I got it to the point that the old bearing would start seating, I was lucky to have a piece of 2″ PVC pipe on the bench (which was there as I had just used it to replace a TCase output shaft seal) and it fit the outer steel edge of the bearing just great.
Replacing the large retainer ring was much easier than removal. NOTE that there is a curve to this retainer, and it should be installed with the curve down (or the curve wrapping over the edge of the bearing) as this is somewhat molded to match the outer curved edge of the bearing.
Now make sure the offset ring is still on the front plate, and set the pulley assembly over the front plate and align the shaft into the bearing. Again I used a socket to apply pressure directly to the bearing edges, and not the rollers. Some gentle hammering on the socket and it seated perfectly.
Now just replace the snap ring to ensure the front plate can’t walk forward, and your about done.
I took the opportunity to clean everything before re-installing. Re-install the entire clutch system back onto the compressor, and I simply reversed the process from above using the air wrench to seat the pulley system over the shaft and drift key. Once it was �snug� I torqued it by hand to 25lbs.
I watched belt play and noticed that when the clutch is engaged, there is significantly more belt wobble. I tightened the compressor belt (a not so pleasant task but worth the effort) by loosening the 4 main bolts from the Kilby bracket to the compressor, and using a prybar I exerted pressure under the compressor and re-tightened the bolts until the compressor on belt play was greatly reduced. Be careful NOT to over tighten the belt as I believe this is what helped lead to my original bearing failure. I read about 100lbs tension is right, but have no idea how to measure that.
My obnoxious tac-tac-tac sound is gone, and I’m still my retentive self.
Scott Findley
“Goose” and “Scott_KY_98TJ” on the boards.
[email protected]
www.kentuckykrawlers.org