Note: Toys by Troy shut down their operation at the end of 2007. Instead of removing this write-up, I am leaving it on the web site for a couple of reasons. The steps for installing it are pretty much the same as one from another manufacturer and so you’ll get an idea of what is involved if you decide to do this type of modification. If you happen to come across one on the used market, you’ll have some information about it that can help you do the installation correctly.
Comments from Stu:
Ross contacted me via e-mail and wanted to know if I would be interested in an Alumi-flex steering write-up. He was getting ready to do one on his own vehicle and knew I didn’t have one on the site. While I’ve installed a couple of them, I had not done my TJ and so I didn’t take any good pics or do a write-up. I provided Ross the necessary info I needed in regards to a write-up and within a couple of weeks, he had forwarded me the fruits of his labor. So here is Ross’ write-up. Thanks again Ross for taking the time to document your installation.
Ross’s write-up:
First thing is plan to be patient, this is not for the novice. Expect more than a day to do it because there is always something that you either do not have or a bump you run into. This install is also based on my Jeep and the tools I had access too.
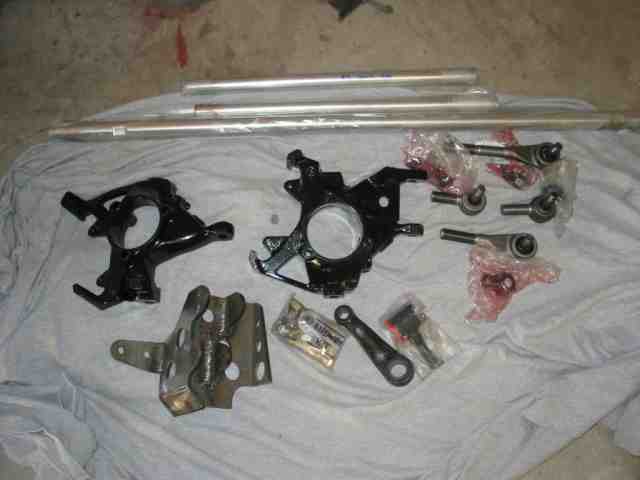
When the steering kit arrives, do a quick parts inventory to make sure you have everything. Nothing can be more frustrating than getting half way into the project and then finding out you have an extra right hand jam nut and you’re missing a left hand nut. Make sure you have the following parts:
(2) TBT knuckles, one drivers side and one passenger side (with new high steer bracket)
(1) TBT axle mounting bracket (For Traction Bar and Steering Stabilizer)
(1) Tie rod – AlumiFlex
(1) Traction bar – AlumiFlex
(1) Drag link – AlumiFlex
(2) One-ton standard TRE (one left hand threaded and one right hand threaded)
(2) One-ton high misalignment TRE (one left hand threaded and one right hand threaded)
(4) TRE boots and grease zerts
(1) Traction bar bushing fitting (axle mount)
(1) Heim joint (3/4″ x 3/4″) (frame mount to be used with Rubicon Express traction bar bracket)
(1) Pitman arm (drilled to accept one-ton TRE)
(2) Mis-alignment spacers (3/4″ x 1/2″)
(2) 1/2″ bolts, nuts and washers (for traction bar mounting)
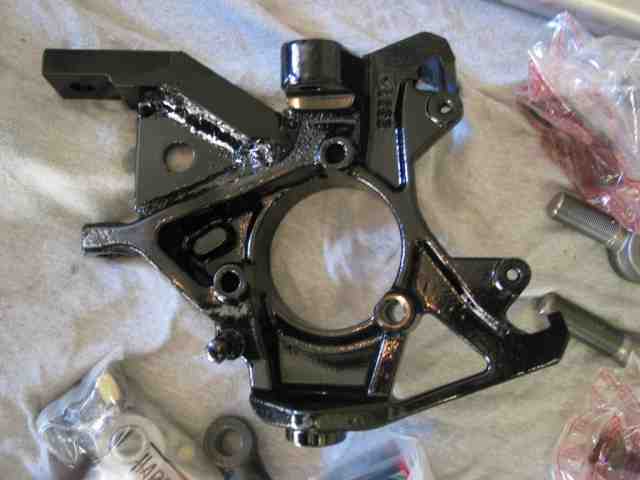
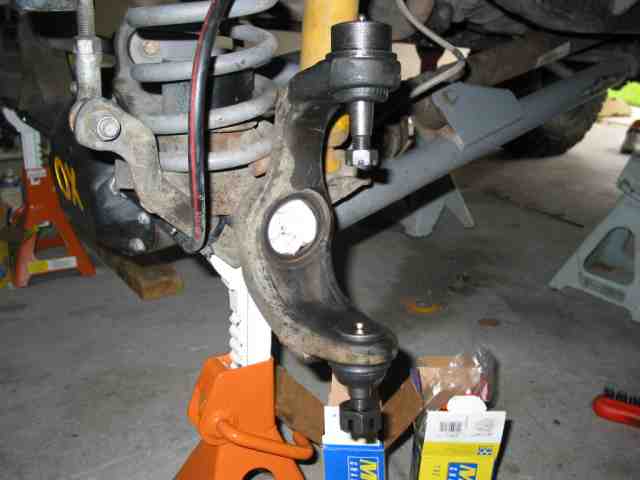
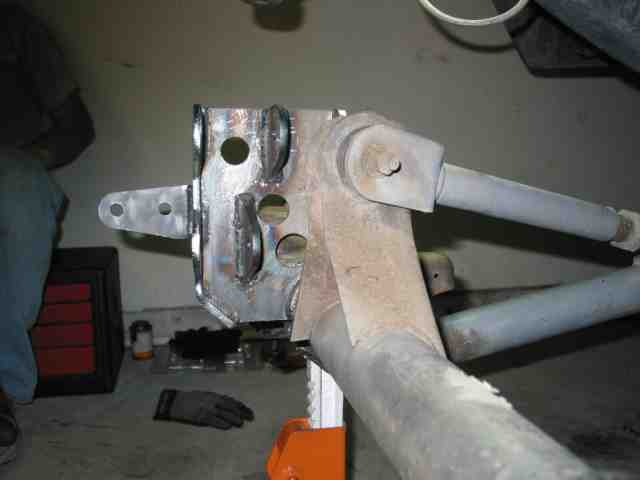
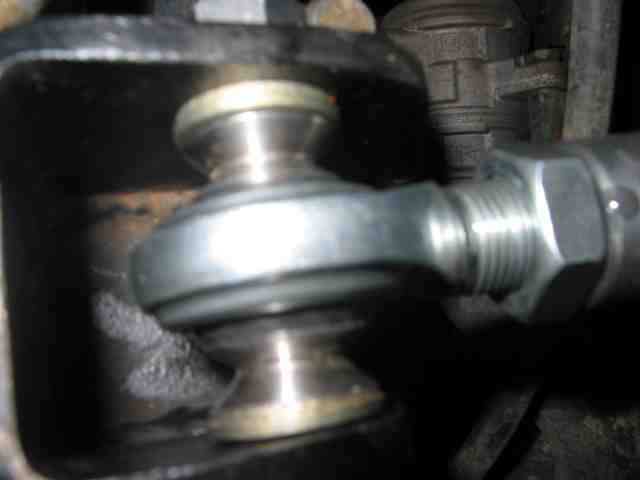
A close-up of the passenger side knuckle.
A close-up of the new bracket. This will mount one end of the steering stabilizer and the front track bar on the D30 axle.
Tools Needed:
-Welder (I used a MillerMatic Mig Machine)
-Ball Joint Separator
-Pitman Arm Puller
-NeverSeize (recommended, not required, I used this on all bolts and nuts)
-Assembly Lube (recommended, not required)
-Assorted Sockets and Wrenches
-Ball Joint Press/Puller (if replacing ball joints, recommended)
-Torque Wrench
-Grease Gun
-Grinder (get cutting blades and grinding discs)
Start by jacking up the Jeep. Put jack stands under the front axle and also support the frame near the front, a little back from the axle. You will need to remove the passenger front spring in order to weld the TBT bracket and the jack stands under the axle will have to come out to drop the axle far enough to get the spring out. This is where the jack stands under the front of the frame come to use. Of course, if you have access to a vehicle lift then you will have an easier time.
Remove the wheels, brake calipers, rotors, and axles. Be sure to zip tie the calipers out of the way so you are not fighting them the whole time. Once you get those removed and tied up, it is time to remove the steering setup you have and the steering stabilizer. This can also be a good time to remove the pitman arm you have installed on the Jeep. After those items are removed, move on to the knuckles.
To remove the knuckles, use the ball joint separator after you remove the nuts. I had planned on replacing the ball joints since I had over 50,000 miles on my Jeep with 35″ tires, so I thought this would be an opportune time. I did not want to have to come back later and remove everything again. Yes it cost $200 for a set of MOOG ball joints, but in my opinion they are worth it. I messed up my ball joints up when I removed them (without trying to) so be careful if you are re-using them.
Next comes the traction bar, the sway bar connects from the axle, and the passenger side shock. Doing this will allow you to remove the passenger side spring. I had to remove the jack stand and lower the axle to the ground with the floor jack in order to get the spring out. Once the spring is out, remove the lower bump stop. Now that this is done, jack the axle back up and place the jack stand back under it.
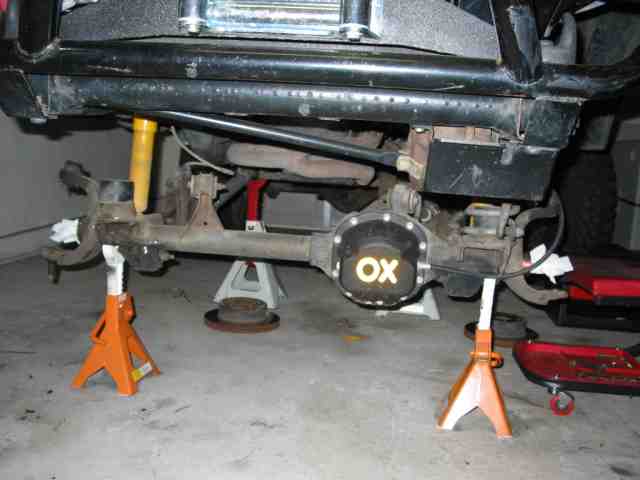
The front of your TJ should now look something like this . Note the absent passenger side spring, no steering, and no knuckles.
More Alumi-flex Steering
If you are going to replace the ball joints, now is the time. I rented a tool from Auto Zone to remove the ball joints but it was almost worthless. I had to use my creativeness and additional tools to get them out. This was one of those unexpected things. The problem with their tool is the attachments are either too large or too small to remove the lower ball joint. We went to several other auto parts stores and found the same problem with theirs. After scratching our heads, were able to hammer one side out. The other one I had to use a specialty tool (not special for this application) to get off the other side off.
Installing was easier, but when you do reinstall them (which the AutoZone kit did OK on), install the lower one first, it works better that way with their tool.
Now it is cutting time! First remove the the stock traction bar mount from the axle on the passenger side. Once you get this removed, place the new TBT bracket on the axle and check for fit up. We had to go back and trim a little more metal off the spring mount to get it to snug up square.
When you get it fitted correctly and evenly on the axle, line up the second bolt hole on TBT bracket where the swaybar mount attaches with the stock mount. Make sure that these holes line up. Also make sure that you will have clearance for the traction bar in front of the upper control arm mount on the passenger side. Assembly of the traction bar is necessary to check for fit. Once you do this you can tack the mount in place.
After you get this tacked, remove the stock swaybar mount.
NOTE FROM TBT: DO NOT REMOVE the stock swaybar mount. The new bracket you are installing is designed to have the stock mount welded to the side of the bracket. This is part of the intended design to provide support for the bracket.
You may have to remove the stock swaybar mount before you tack the TBT bracket, but be sure to mark your location. When the stock mount is removed, double check the fit up and weld it. Weld around everywhere you are able to. You can never weld in to many areas, in my opinion. Watch the temperature on the axle and make sure you do not overheat it from the welding and cause it to warp. We let the axle cool after each weld.
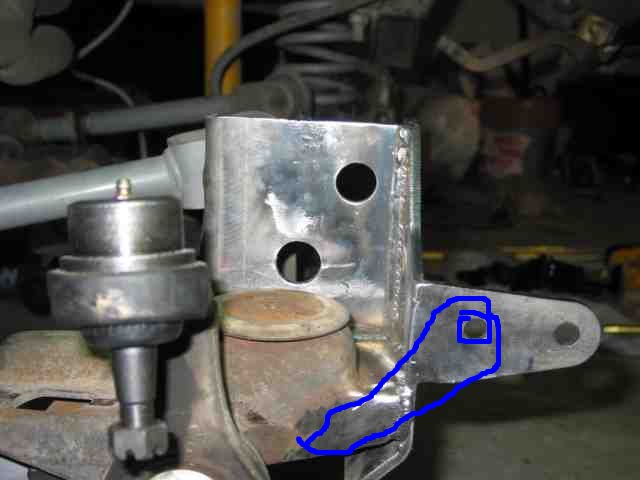
A photo of the welded bracket, looking at the bracket from the end of the axle.
NOTE FROM STU: I doctored the above photo a bit to show you were the factory sway bar mount should be (approximately) and as was mentioned, it should be welded to the new bracket.
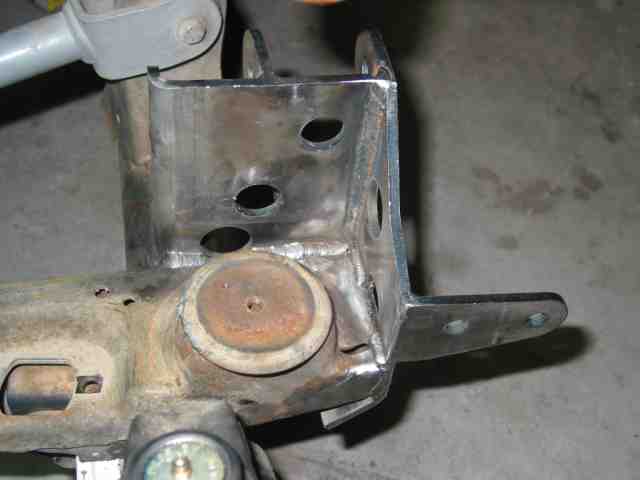
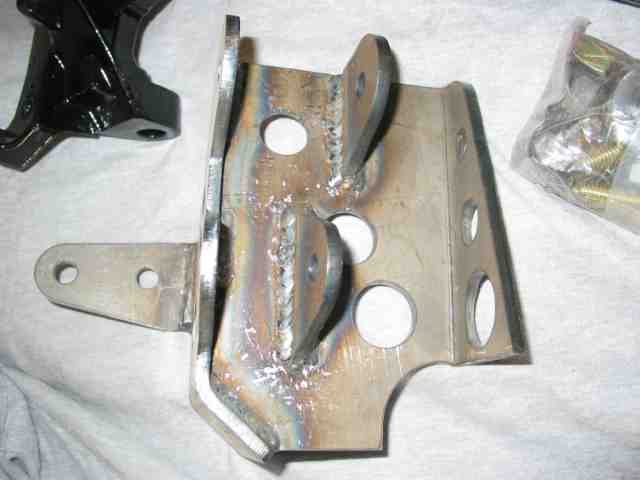
An overhead view of the welded bracket. Be sure to wire brush or grind off any rust to help ensure a good weld.
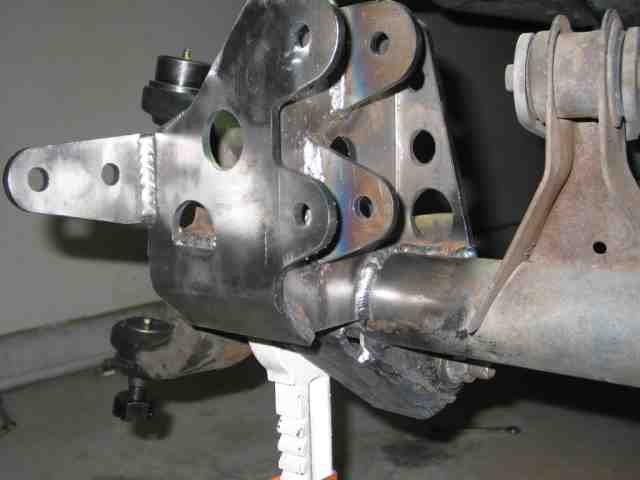
A front view of the bracket. Take your time during the welding process. Good clean metal is essential to a quality weld. Take the time to clean the old paint off of the axle tube.
A photo of the bracket taken from the driver’s end of the axle.
Toys by Troy Alumi-flex
Cross-Over Steering
Time to mount the knuckles on the inner-Cs.
To install the knuckles, stick them on and bolt them up. Be sure the grease boot is on the ball joint first. Bolt them up, torque them down, and install the cotter pin. Now would be a good time to grease them.
Now would be a good time to paint the TBT bracket.

When finished installing the knuckles and painting, it should look something like this.
Once the knuckles are installed you re-install the axle shafts, discs, calipers, etc. Torque everything down as you put it together so you do not have to come back and do it.
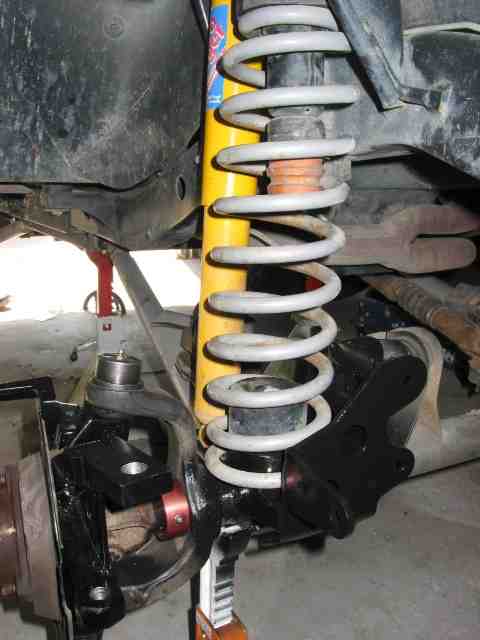
When everything has been installed and the paint has dried. Go ahead and lower the axle back down and install the passenger bump stop, spring, and shock. When those are on, put the jack stand back under the axle.
Now that the hard stuff is done, it is time to move on putting the new steering arms and traction bar on. Because the components are aluminum, clean out any burns that may be inside so nothing gets cross threaded during assembly. Before you move forward, find all the jam nuts and install them onto the TRE’s, the heim joint, and the bushing joint. When you think you have them cleaned and the jam nuts installed, run the TRE in and out of them using assembly lube to make sure nothing is still in there. Do not force anything!!! I repeat, do not force anything! Keep cleaning them out until you can run each joint in and out completely.
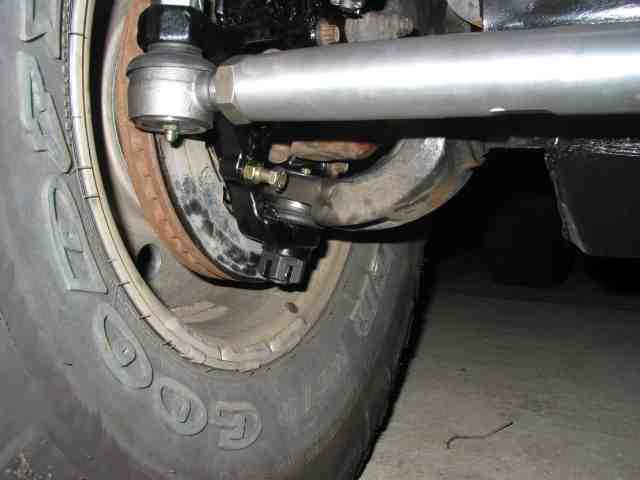
When that has been completed, thread the high misalignment TRE’s onto the short alumiflex bar (drag link), not the one that says traction bar. Thread them in all the way evenly on each side. This will allow you to have the maximum thread engagement when you start adjusting them. Do the same with the tie-rod using the short TRE’s. When you are done, install the tie-rod onto the passenger and driver side knuckles. Be sure the grease boots are installed, bolt them down, torque them up, install the cotter pins and grease them.
When done, it should look similar to this.
Now would be a good time to install the new pitman arm provided with the kit. Torque it up after it is put in place.
Toys by Troy Alumi-flex
Cross-Over Steering
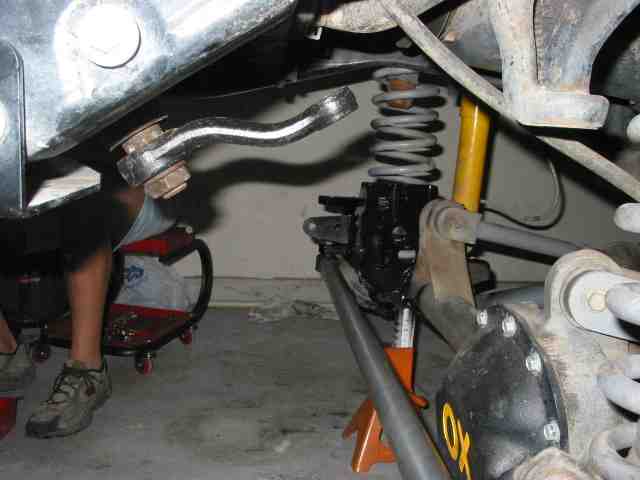
Because the traction bar sits behind the drag link, install it first. I had the Rubicon Express traction bar frame mount installed, so I was provided with a heim joint for that location. The heim join is 3/4″ x 3/4″. The kit also came with mis-alignment spacers that went inside the heim join to make it compatible with a 1/2″ bolt. To install this on the RE mount the hole will have to be drilled out to a 1/2″. It is recommended to remove it to drill out the hole. When drilling it, be sure to drill it straight and true to size. If you drill it out too much then you will have play in it, which is not good. Once you have drilled it out, re-install it on the Jeep frame.
To get the traction bar ready, use the same procedure as mentioned earlier to remove any shavings or other miscellaneous items. When this is done, install the heim on one end with a jam nut and the rubber bushing on the other. When installing, put a little assembly lube on the rubber bushing and slide it in place into the axle mount. Put a bolt through to hold it in place. When this is done, install the misalignment bushing into the heim and put it into the RE frame mount.
I had to add washers on the outside of the bushings on the mount.

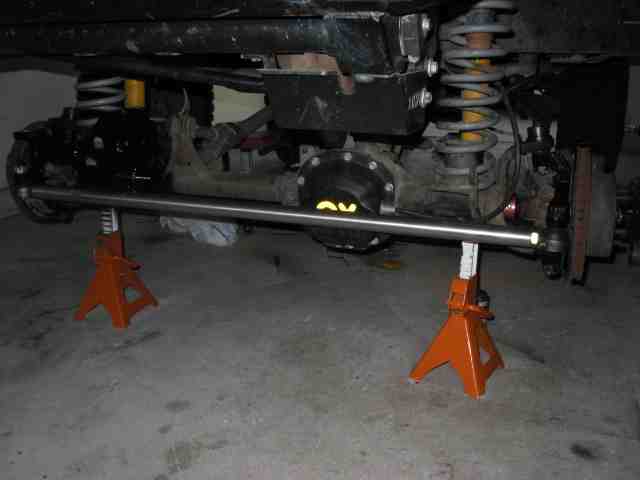
A view of the axle with the traction bar installed.
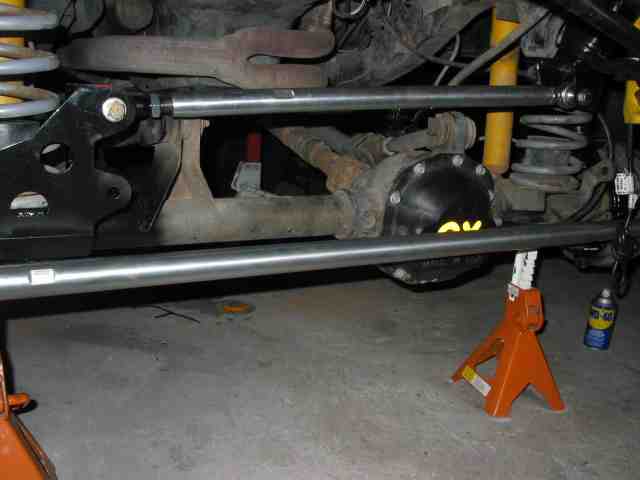
Another photo of the traction bar installation.
When completed, it should look like this. Tighten up the bolts using lock washers. Tighten up the frame mount pretty tight and the axle mount until you see the bushing start to expand. Do not over tighten the axle mount bushing because this needs to be able to rotate to flex properly.
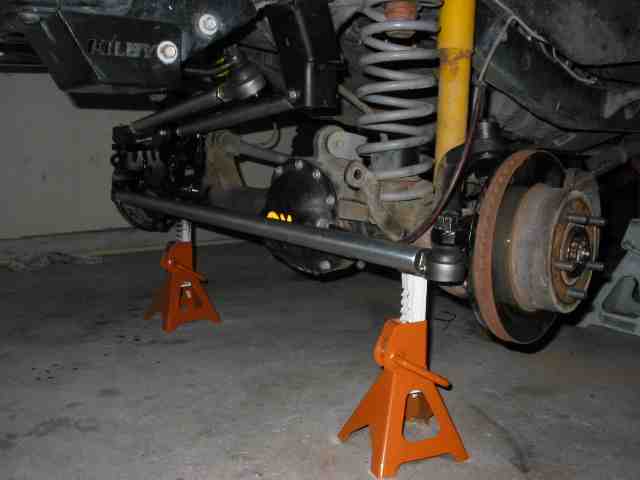
Now that this is installed, move on to the drag link. Rotate the knuckle so you can install the drag link. You can adjust the length later. As before, install the grease boot, nut, torque it and cotter pin it. You should now look like this.

Now everything should be installed. Check to make sure everything has been pinned, you greased everything and no extra parts are laying on the floor (at least parts that need to be installed).
Since a new tie rod was installed, you must set the toe-in on your front tires. Rather than describe it all here, check out Stu’s write-up and save yourself a few bucks by skipping that appointment at the alignment shop.
Next thing to do is to adjust the traction bar. You need to get the axle centered under the jeep. You can look to see how much the tire sticks out outside the fender, this is not exact, but close enough for me. Once this is done you can center you steering wheel by adjusting the length on the drag link.
When you are done with all this, make sure all the jam nuts are tight! With the front axle still on the jack stands you will now need to re-adjust you steering stops. I went to the local hardware store and bought new bolts (longer) and nuts to replace the ones installed on the knuckles provided. DC tacks the nut on the bolt used for the steering stops on the knuckle so they are worthless if you have to adjust them.
Screw the new bolts all the way in with a nut installed on each to lock them in place. Get your buddy to turn the wheels back and forth until the tie-rod hits something, mine hit the TBT bracket on the passenger side and the diff cover on the drivers side. Adjust the bolts until you can turn it without hitting anything except the steering stops.
Here is a picture of what the steering stops looked like when I was done.
Again, make sure every bolt is tight, everything is greased and everything is installed. Now would be a good time to remove the jack stands. Once you completed all of this and have double checked it all, is time for a test drive.
I drove it around and noticed an instant change is steering; One word, “WOW”. What a difference it makes. The steering is so much tighter, the bump steer is completely gone and and it drive like a caddy (not really, but it was a huge improvement). As I had aligned my vehicle before with a tape measure and did not have any issues when I drove it around, I left it like it was. You may want to go it it professionally aligned, but for me it was good to go!
Toys by Troy Alumi-flex
Cross-Over Steering
I was schedule to go to Hot Spring, Arkansas to the Superlift Off-road Park that next weekend after I did the install. Just in time! I was planning on towing my Jeep the 500 plus miles from Houston, TX, but the trailer deal fell though so I drove it the nine hour trip. I was impressed the whole way on how well it handled and how the ride improved. It cruised 70 mph plus the whole way without a hitch. Now that I had put 500 plus miles on it on the road and proved its performance there, it was time to test it out off-road!
Off-road there was also a single word that I could uses to describe it, again it was “WOW”. The kit is awesome. It allowed me to steer ten times better than with the kit I had before. My steering box loved me the whole trip. It is nice to have a draglink that is parallel to the tie-rod. I also smashed it to a lot of rocks and the Alumi-flex kept on ticking. It also allowed me to have some serious flex! Here are some off-road pictures.
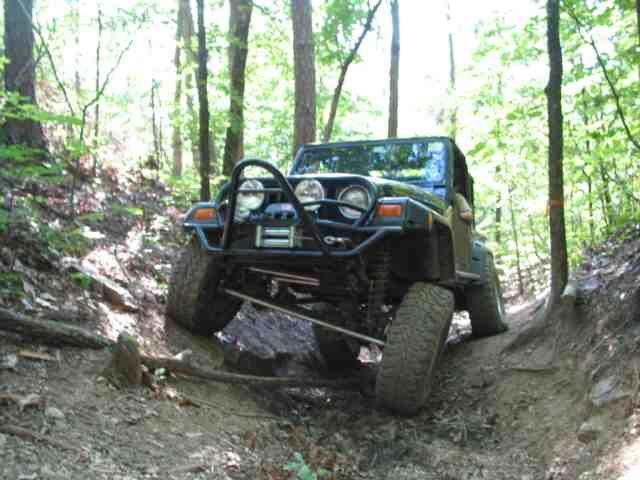
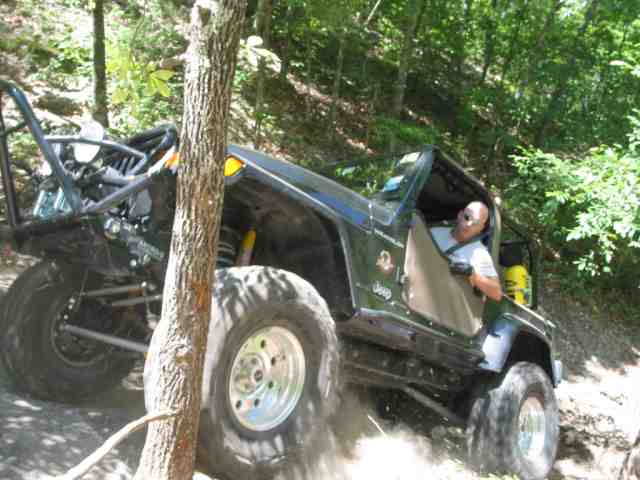
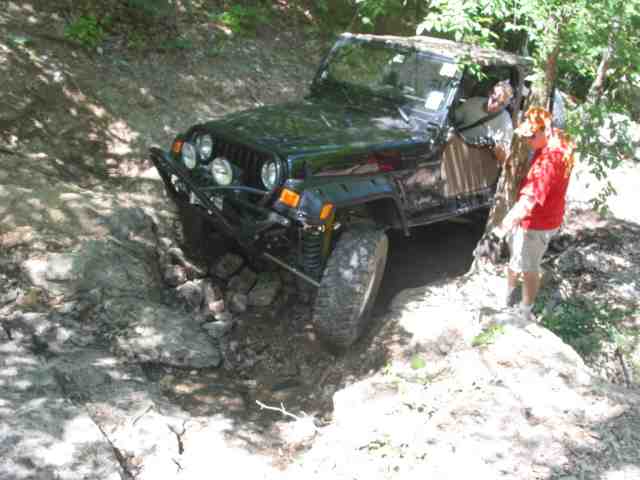
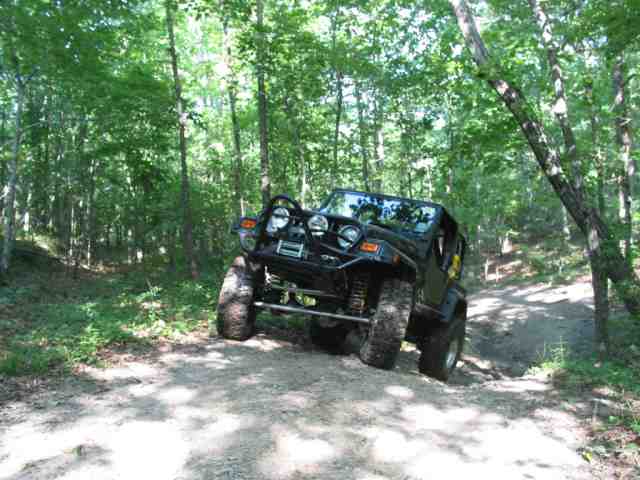
All in all it is an awesome kit. Fit for on-road and off-road use. Would highly recommend this to anyone looking to get the best steering setup (in my opinion) for a Jeep. Thanks to Troy and all your guys and gals at Toys by Troy, another great product!