After my 2nd lift build-up, I was right at the ragged edge for my front brake hoses. When Lady flexed her front axle to the limit, the front brake hoses were right at the point of being too tight. I am still running stock lower control arms up front and that might be the reason I am not getting as much flex as some folks do….assuming I am not getting the maximum amount. But regardless of the reason, I just wasn’t comfortable with the zero margin being given by the OEM hoses.
New “custom” lines are rather expensive, so I followed the suggestion of a CA friend of mine (thanks Robert) and opted to install a pair of stock YJ lines. These lines are several inches longer than the stock TJ lines. They can be had from any local auto parts store (I had to wait a couple of days while they ordered them) which makes it a pretty inexpensive and easy to do project. You will want both the left and right front hoses for a ’95YJ. I got mine at a local Checker Auto store. A local Jeeper recently did his and was nice enough to pass along the Raybestos part numbers, which are BH38861 & BH38862.
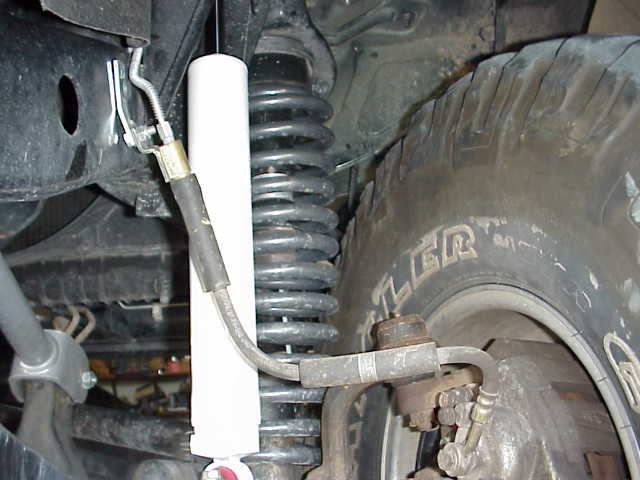
Here is a picture of the stock TJ hose. I am using the lowering bracket that I installed when I did my first lift, the Tera 2T. If I remember correctly, the brackets actually came with the quick disconnects that I installed at that time.
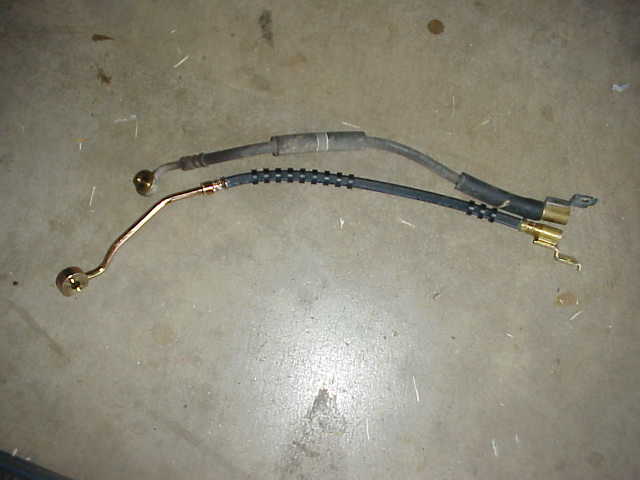
Here is a picture of my stock TJ hose and the new stock YJ hose. As you can, the YJ hose is several inches longer. The rubber portion of both hoses are almost the same length. The rotor end of the YJ hose has a much longer metal portion as you can see. I checked this after installing the new hose and it did not seem as though it would present any kind of problem. The metal part might even provide a bit more protection in this part of the brake system.
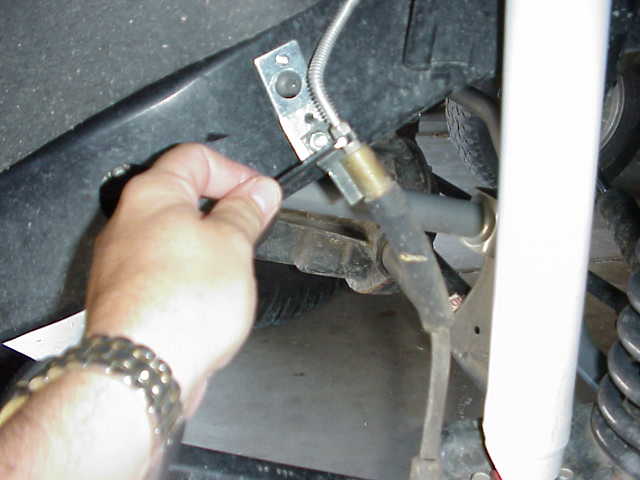
Installation is easy enough to do. Here I am removing the metal brake line from the rubber hose. Be sure to lay a few sheets of newspaper and/or have some rags handy as some brake fluid will drain from the caliper and hose when the hose is removed.
After you have removed both ends of the hose, check to make sure that the copper washer came off when you removed the banjo bolt from the caliper. The banjo bolt is the special bolt that connects the hose to the caliper. It has a hole drilled in it that allows the brake fluid to flow through it. There are actually two copper washers.
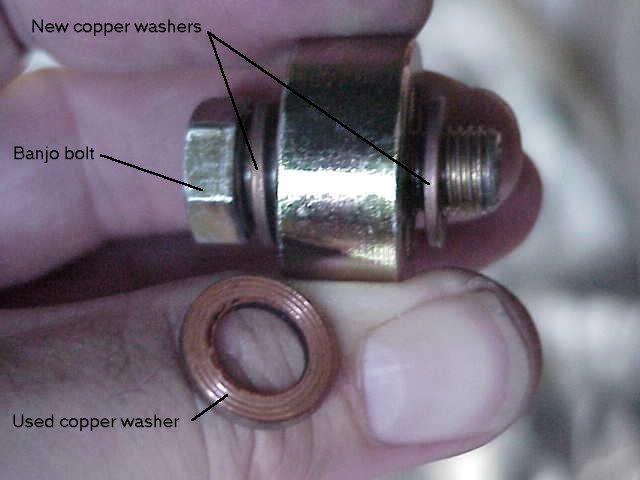
As you can see in this picture, one goes on each side of the fitting. USE NEW COPPER WASHERS! A new pair came with each of the hoses. In the picture above, you can see the old washer and the rings in it that resulted from it being used. The copper washer actually deforms into the rings on the hose fitting and provides a high pressure fluid seal. THIS IS VERY IMPORTANT because having your front brakes leak while in use is NOT a fun thing to have happen. A friend of mine had his brake hose fail two months ago while we were running Moab. Luckily it was on an easier trail and no one was injured. Needless to say the hose failure got his undivided attention right there and then! We cut the rubber hose off the caliper and folded the hose back over itself, then clamped it tight with a vice-grips. This kept the pressure in the line and allowed him to complete the trail with one front brake. He commented that the grabbing on the asphalt road was really bad, since he only had one brake up front. He promptly had it replaced the following morning before he went back out on the trail.
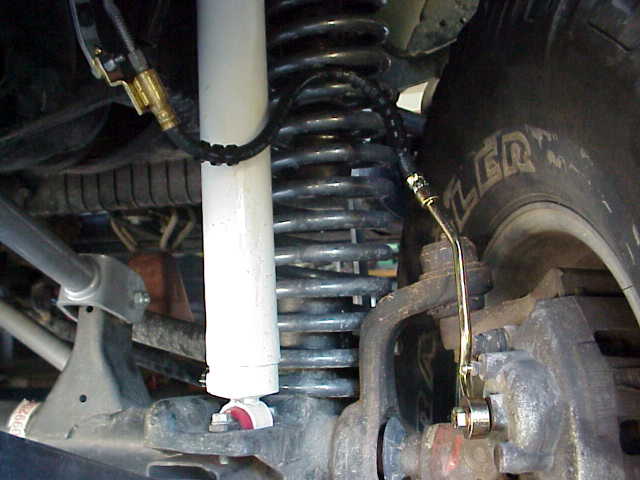
Here is the passenger side with the new hose in place. Looks pretty good to me! After everything was tightened, my wife hopped in the driver’s seat and did the brake pedal pumping while I opened and closed the bleeder valve (in sync with the brake pedal). It took about a 1 minute to get the bubbles out. I then moved my tools over the other side and replaced that line as well. If you have not bled your brakes before, you can get some extra info here on doing it.
This is a very easy mod to do and the price is pretty good to boot. Be sure to pick up an extra can of DOT3 (at least for the TJs) brake fluid. I used about 8~10 ounces while bleeding down my front lines. Be sure to recheck your fittings after your first test drive and make sure you have no brake fluid leaks. You might want to bleed your lines after a couple of days if they don’t feel up to snuff. If you just can’t get the bubbles out, you can always stop off at one of the local service stations in your area and have them pressure bleed them. They hook up a machine that blows those bubbles out in nothing flat. I asked the tech at a nearby EXON station what he would charge me (this was Plan B in case A failed) and he told me he would do it for $5. Can’t go wrong on that deal!