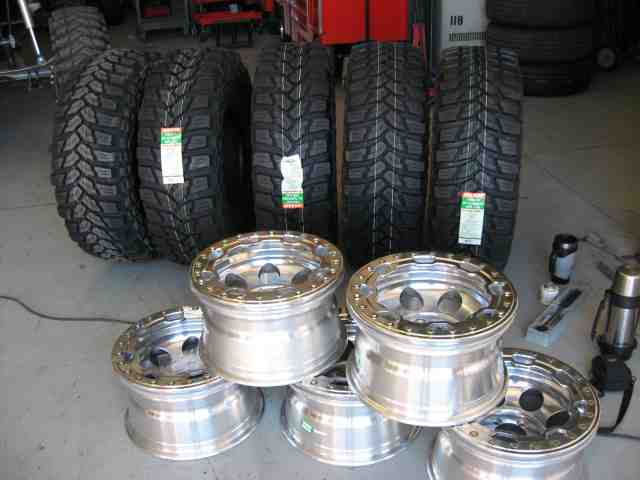
Do-it-yourself wheel/tire kit!
I bought Lady, my ’98 TJ, in the spring of ’99. With the factory 28″ tires soon removed, I went to 30″ tires (on factory rims) and then pushed up to 32″ tires on some new aluminum wheels. A bit after that, I moved up to 35″ MT/Rs and have ran those for well over 6 years.
For over 8 years, that first set of aluminum wheels served me well…..and a friend asked me about a month ago if he could buy them as soon as they were off of the TJ. (yes, he is fully aware of the rock rash they proudly display) For several years, I’ve wanted a set of beadlock wheels. To date, I’ve not managed to totally loose a bead but I’ve gone down to 3 PSI from burping air (that was on Hell’s Gate in Moab) which was spooky.
By this past December (2006), I had finally saved enough $$ to have a set of beadlock wheels. I opted to have them built by a local sand rail fabricator, Danny Foddrill. He has a very good reputation in the sand dune community and if the wheels he builds can take the pounding dished out by the dune jumping sand buggies, I felt confident I could crawl through the trails and come out OK.
I had gotten a set of Procomp Extreme Alloy 1069 series wheels from Troy at Toys by Troy which were then delivered to Danny for the conversion. The Procomp 1069 series is a MT Classic II style wheel. Since I wasn’t planning on upgrading my axles (resulting in a different bolt pattern), I got the 5 on 4.5″ bolt pattern with 3.75″ backspacing. This would fit my Warn hub conversion and the Alloy USA axles in my D44 rear axle. The backspacing was within a quarter inch of my old wheels so I knew I would be good there.
Danny had a set of Champion “C3 FM” lock rings hanging on the wall. The “FM” stands for flush mount, as you can see here. You’ll still get some alloy metal transfer from the rings into the holes as the rings grind on the rocks but the chances of peeling a bolt head off are pretty much negated.
Champion makes a good product and have been in the business since 1985. The lock rings are CNC machined from 6061 T-6 aluminum plate. The lock ring surface that contacts the tire are knurled to prevent tire rotation on the wheel (which keeps the wheels/tires in balance). I like the extra “bling” of the C3 outer ring and decided to go with them. A replacement set of 5 outer rings are just $100 per ring (ouch!). Amortize that over a few years of use and it doesn’t amount to that much…..at least that is what I kept telling myself as I was deciding on the rings.
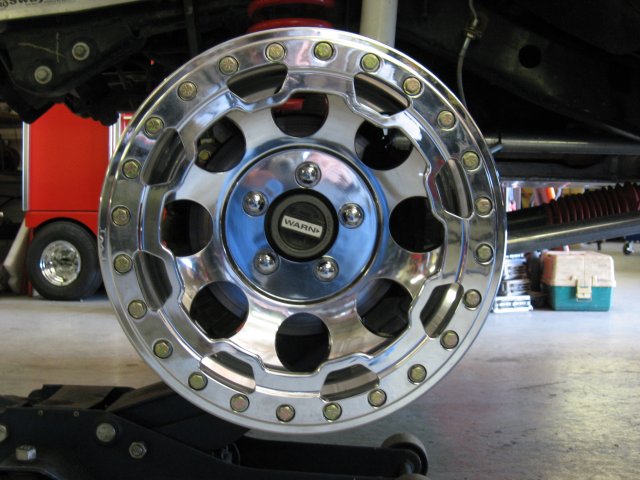
One of Danny’s techs did the machining and TIG welding and had my new beadlocks finished in about a week. There was no hurry as I hadn’t selected tires yet. I wasn’t going to put old tires on new beadlocks…..that just wouldn’t be right! After picking up the new wheels, I had to see how it looked on the front axle. YEAH! Not only did they fit, they looked great too!
OK, about a quarter of the job was done….I had the wheels, now what tires to get?
Troy had recently returned from the 2006 Parker Desert Splash event (Nov. 2006) in Parker, AZ where he had ran Shari’s TJ with a new set of 35″ Maxxis Trepadors tires. I was pleased to hear that he didn’t take out a sidewall as he seems to have a knack for doing that, regardless of tire size. The trails offered at Desert Splash range from mild to wild. Given that the TJ came home with plenty of fresh undercarriage grinding, it was easy to see that Troy didn’t take the easy trails nor the easy lines. He was impressed with the new Trepadors…..and given the fact that they were brand new, with no break in time, the sidewalls flexed well and the tires held their intended line. I’ve ran new MT/Rs often enough to realize that you don’t get optimal performance on a fresh set of tires. Competition guys will not run a new set of tires for the prize money until they are broken in….they simply don’t hook up good enough otherwise.
Maxxis lists the M-8060 Trepador Radial as a specialty off-road tire. The 35″x12.5″x15″ tire is rated load range “D” ( in comparison to Goodyear’s MT/R load range “C”) and uses 6 ply, double steel belted radial construction. The 35″ version is siped and is available for 15″, 16″, and 17″ wheel diameters. The sidewalls are 3 ply and the tire, un-mounted, hits the scales at 68.2 lbs. The tread blocks are 22/32″ tall which provides just under 3/4″ of tread.
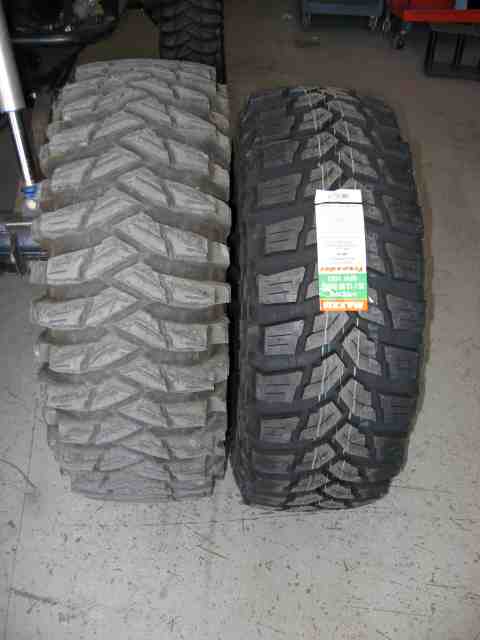
Here is a pic of an un-mounted 35″ Trepador next to a 37″ Trepador competition tire on Brad Kilgore’s buggy. Kind of like a big brother, little brother snapshot. Yes, both are directional tires.
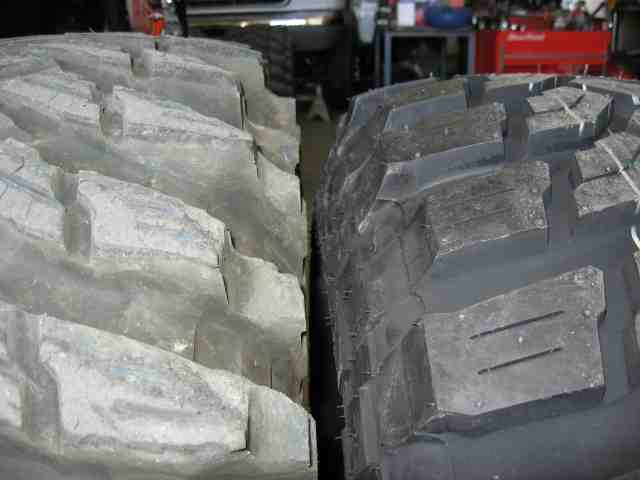
A closer shot here shows the siping on the 35″ tire. The shoulder/sidewall lugs are not as aggressive on my 35″ tire however it has more than the MT/R it replaced.
OK….time to get the Trepador tires onto the beadlocks.
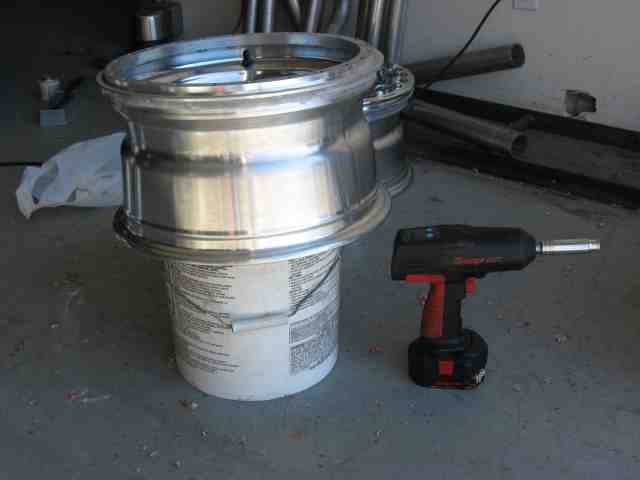
As with any other TJ project, you’ll need a couple of tools. In this case, a 5 gallon bucket and an impact gun are two very important tools to have. The bucket allows you to get the tire up off the ground a bit (anything similar that will do the job is just fine) and the impact gun (or perhaps a heavy duty cordless drill) saves you bunches of time as you screw the 24 grade 8 bolts into the lock rings. In addition to this, you’ll want an inch pound torque wrench, some anti-seize compound, and two or three tubes of RTV. I wrapped up the tool list with a couple of tire irons and a couple of small pry bars (by small, I mean the ones that are about 10″ long).
A week or two before the tires arrived, I broke out the RTV and spread a nice bead of the sticky stuff along the TIG weld where the ring lock attaches to the wheel. This is a good practice which will take care of a small pin hole in the weld. I’ve seen more than one beadlock that goes flat in a week’s time. RTV is cheap and this is good insurance for sure….and it beats the heck out of having to break the wheel down later on and apply the RTV that you should have done before you mounted the tire! (no, I didn’t learn this by trial and error)
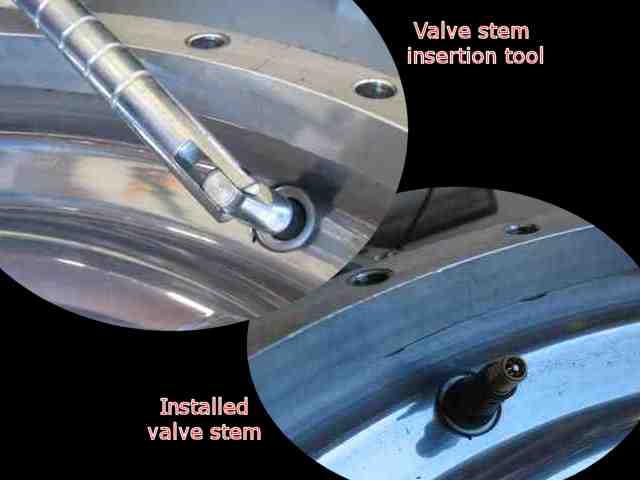
What I almost managed to do was assemble a beadlock and tire without putting in a valve stem….DOH! So get out your valve stem insertion tool and do all of the wheels NOW! Poke the valve stem through the wheel and thread the insertion tool onto the valve stem threads. Using the “prying” leverage that the tool offers, pop the valve stem into position. It is so easy with the right tool…..cost is under $10 and worth the investment.
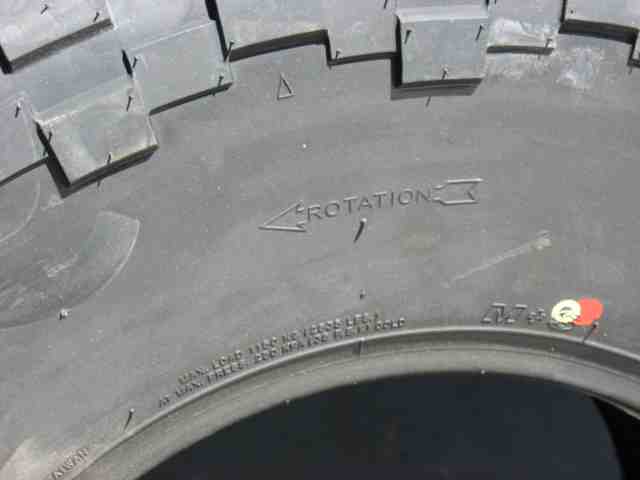
One other important detail….pay close attention to the tire rotation arrow. Maxxis went to great expense to ensure your tire provides you with maximum traction and performance. Do you and them a favor and orient it on the wheel correctly to take advantage of this! I mention this only because I’ve seen folks mount the tire (usually the 2nd or 3rd one) and after all is said and done, realize that it will be rotating backwards once the wheel is bolted to the axle. I’m not sure if I’ve done this or not….but I know I didn’t do it this time for sure!
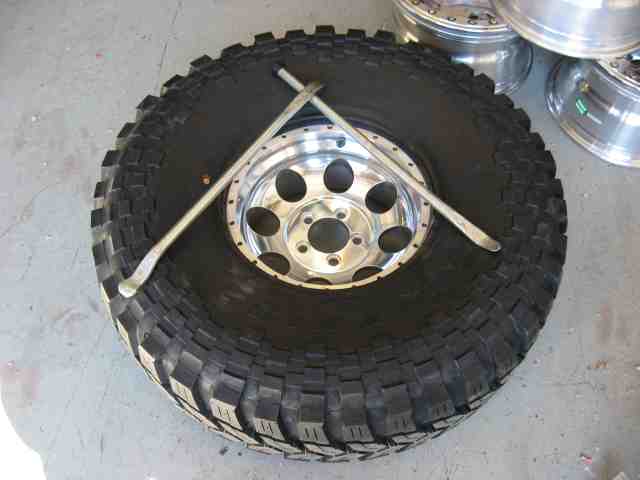
With the valve stem installed, I set the wheel on the floor (not quite bucket time yet), noted the direction of the arrow (yep, it is going the right way), and worked the inner tire bead over the lock ring. If there had been two of me, I could have done this without tire irons….but I was a pit crew of just one so I cheated and helped the tire slip onto the wheel. Took less than a minute to coax the tire into position.
Once the inner bead was fully on the wheel, the wheel and tire were placed on top of the 5 gallon bucket. Doing this saves you from bending over so far (it’s an old folks and sore back thing) AND it allows the weight of the tire to work in your favor. I used a pair of small pry bars to work the outer tire bead around the lock ring, getting it flush and even. You want to be certain to get the tire properly positioned around the inner ring…..nice and even it must be…..ready for the outer ring to be drawn tight against the tire to lock it into position.
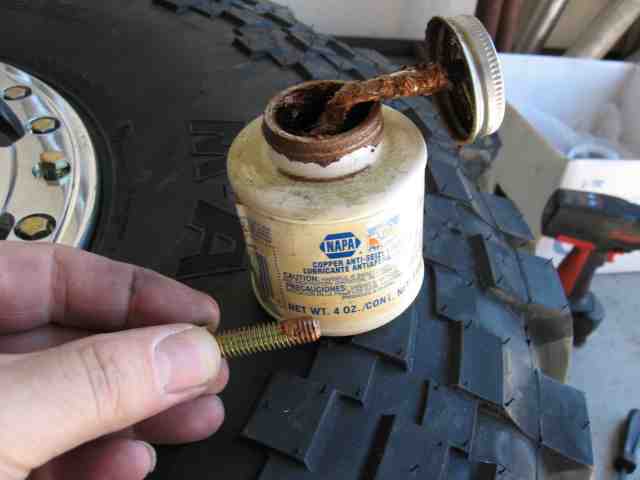
The two lock rings are held together by grade 8 bolts. While the bolts I used were zinc plated, I used a small amount of anti-seize compound on the end of the bolts. If you are new to anti-seize, you will find that a little goes a long way. Dab a small bit on the first 4 or 5 threads, set it aside, and repeat 23 more times on the remaining bolts. By the time you are on tire #5, you will be a pro at this step!
Beadlocks and Maxxis Trepadors (assembly required)
With the bolts ready to go, I positioned the outer ring (line up the bolt holes with the inner ring), made sure there was a flat washer in each of the ring’s 24 holes, and then promptly discovered that my bolts were too short.
NOT TO WORRY….. I was ready for that. Depending on the brand of lock ring, length of bolt, and the thickness of the tire’s bead, the bolts may be just a bit too short to get going. I had 4 bolts sitting nearby just waiting for this situation….these were my “starter” bolts. They were a quarter inch longer than the others. That extra 1/4″ was all that was needed for me to get the ring clamping process started. I positioned the four starter bolts (I used grade 5 since I could easily spot them and they would be removed in a few minutes) equally around the ring and put several full turns on them using a regular ratchet.
NOTE: I should mention here that you do not want to permanently replace the short bolts with longer bolts. There is a good chance that a longer bolt will bottom out against the wheel (where it passes through the inner lock ring) and you will not achieve the proper clamping force to hold your tire in position.
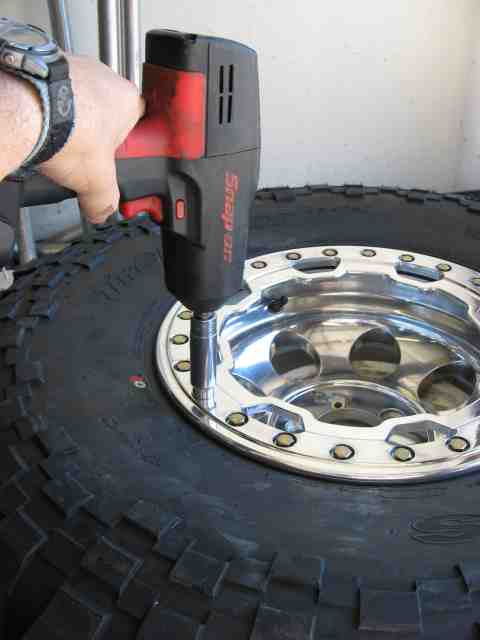
With the outer ring now slightly compressed, I was able to thread in a pair of the Grade 8 bolts on either side of each starter bolt. Once I had these 4 pairs started, I removed the starter bolts and continued hand threading each bolt into one of the 24 holes. When I was confident that all of the bolts were threaded into the inner ring correctly (now was not the time to cross thread a bolt), I switched over to the battery powered impact wrench. I used a criss-cross pattern (much like tightening lug nuts) to snug the bolts down a turn or two at a time. Take your time and keep the pressure even. You can watch the gap between the inner and outer ring disappear as you continue to snug the bolts tighter and tighter.
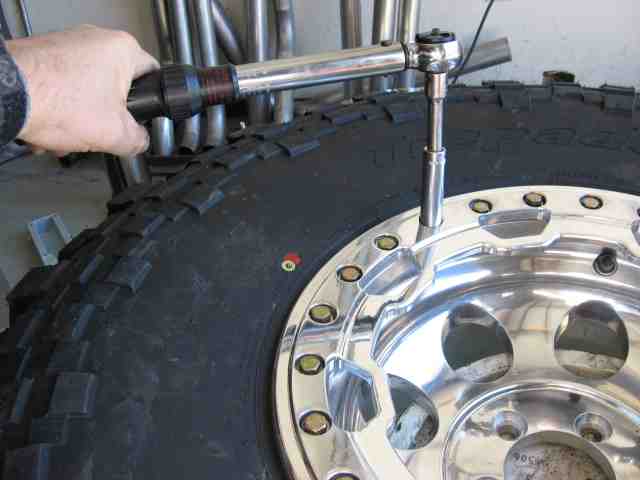
When the gap between the two rings started getting smaller, it was time to check my progress using an inch pound torque wrench. Follow your manufacturer’s recommendation for proper torque specs. The Champion rings are torqued to 168 inch pounds. I bought a Craftsman 3/8″ drive inch pound wrench several years ago for another project. It was just what the doctor ordered for doing these bolts.
Plan on spending some time on this part of the project. Work your way around the wheel. You will eventually get to the point where the bolts are all properly torqued and they won’t turn any further when you check them for the “umpteenth” time. This is the point where having a stool next to the bucket works out well…..it’s all about saving the backs of us ol’ timers.
For me, the score was 1 down and 4 to go. My back was holding up pretty well (I wouldn’t be saying that by the time #5 was wrapped up) and I was ready to go again. Did I mention you need to watch for the rotation arrows as you mount the tires. <grin> Just in case you may have forgotten about it.
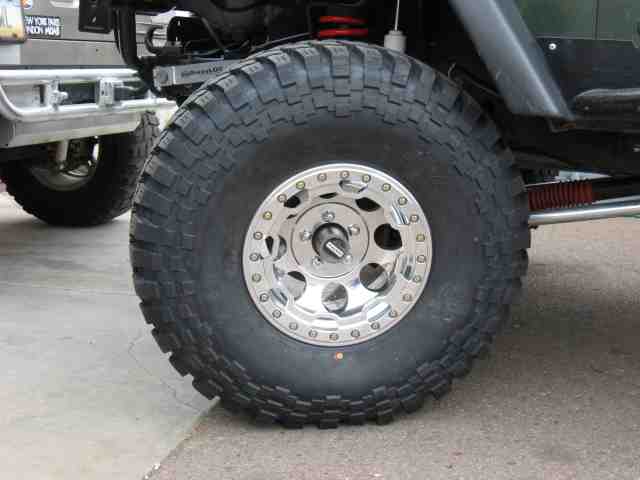
Well, here is a pic of my hard work mounted on the driver’s side of the D30 front axle.
A couple of items I noted as I did the installation. I gained approximately 3/16″ at the front bumper. Given that the MT/Rs that were on the front axle had about 3K miles on them, I don’t attribute the height change to the MT/Rs having low tread. The Trepadors run closer to true size.
For those of you wondering about the footprint of the Trepador, I checked the MT/Rs against the Trepadors and found that the span from outer most tread block edge to outer most tread block edge was 3/4″ more on the Trepadors. This measurement was taken with both tires inflated to 29 PSI.
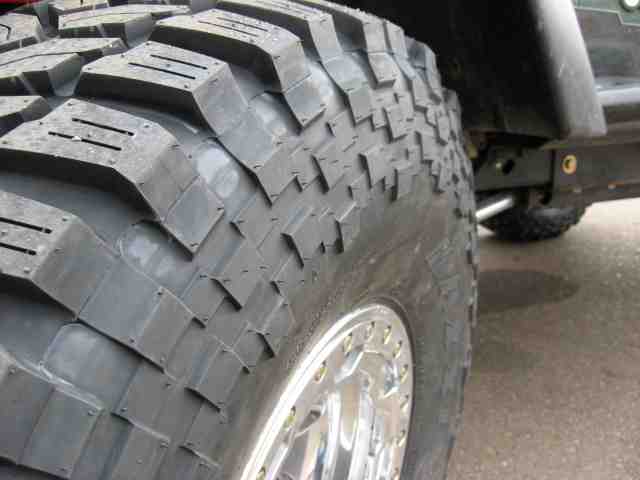
A little closer pic showing the sidewall lugs. As I mentioned, they are not as aggressive as the Trepadors that Brad has on his buggy, but I am confident I’ll see improved performance when trying to get the sidewalls to bite against the rocks.
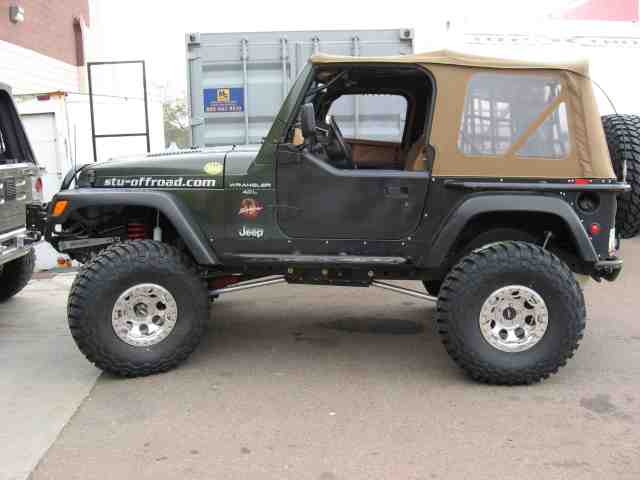
Poser photo with all tires mounted and ready to go. I torqued the lug nuts to 100 foot pounds and then drove the vehicle home (about 20 something miles). Since these were new wheels, I broke out the torque wrench and checked the lug nuts. Sure enough, a few of the nuts were a bit loose (took about a quarter turn) while several on the passenger rear took a good turn to snug them back to spec. After putting another 25 miles on them, I checked them again. This time, only 1 lug nut took just a small amount to snug it down (maybe an eighth of a turn). I’ll check them again in a hundred miles and see how they are doing. With this kind of investment in wheels and tires, I’ve no intention of skipping such a simple yet important maintenance step….doing so could have easily led to my losing a tire on the freeway. That would NOT be a good thing!
I drove Lady to work this morning (I usually van pool) just to see how the tires performed on the freeway. Although I don’t use her as a daily driver, she averages just under 10K miles per year. I don’t tow to the trails so highway handling is just as high on the list for me as is trail performance. I ran her up to 80 MPH this morning to see how the tires felt….no vibrations. As I usually cruise about 65~70 MPH, I felt this an adequate speed test. I had the tires balanced at a local Discount Tire and watched the tech has he spun them on the machine. I didn’t note how much weight each tire took but the first two tires came off the machine with 3 and 5 ounces respectively. Thanks Maxxis for making a good tire!
That is about it for now. As soon as I get these on the trail (hopefully in a couple of weeks), I’ll add some first impressions in regards to trail performance.
Good trails and remember to TREADLightly!
Beadlocks and Maxxis Trepadors (assembly required)
Update: 3/20/2007
The previous weekend has come and gone and I’m back from some great wheelin’ in Lake Havasu City, Arizona. The Sidewinders 4×4 club hosted there annual Desert Run event which was well attended, in my opinion. I would guess some 300+ wheelers hit the trails to enjoy the scenery and rocks that abound in the area.
I made the mistake of letting Troy pick the first day’s trail (gotta blame him for something every now and then) and so we ended up on a top rated trail called Copperhead. At the trail head, I aired down to 8 PSI. It was a guess on my part having never had these tires on the trail before. As it turned out, I was very happy with the performance and doubt I will go much lower….perhaps a pound at the most.
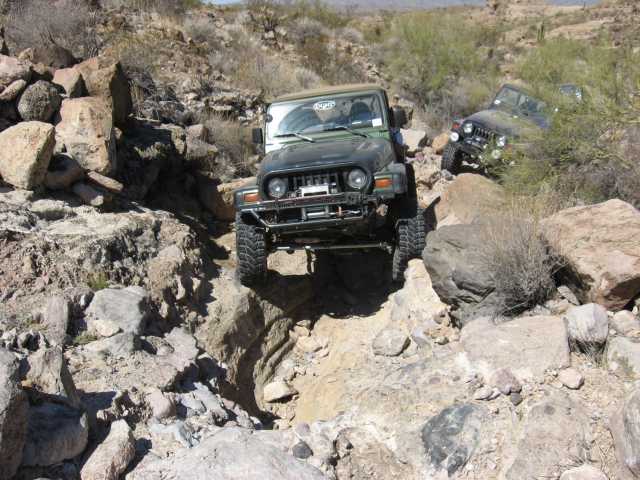
The trail lived up to its name and within about 100 yards of the trail head, we were squeezing through a soft top unfriendly obstacle just so we could get to the base of the 30′ waterfall. Troy, what the heck did you get me into (again!)?
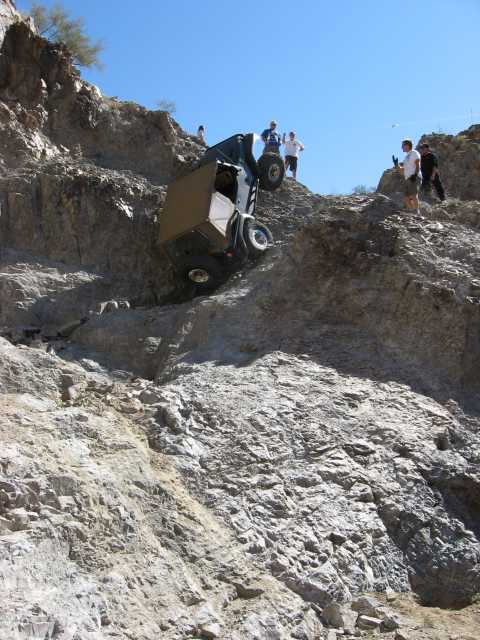
The beadlocks did their job of keeping my tires firmly seated. The Trepadors did their job in keep my tires firmly planted on the rocks. Lateral slipping was minimal although there were a few times when defying gravity was just not possible. Hey, it happens given enough weight transfer and an off-camber posture.
In the above photo, I have but two tires touching rock….the passenger rear and the driver front. The winch cable, with the help of a long extension, extended well over 100′ to the closest anchor point. Needless to say the passenger rear tire is carrying virtually all of the vehicle’s weight. Is that a load range C waterfall? The front tire was being held against the rock by the winch line. The best part….no tire farts, no air burps….I’ve lost a bead in situations similar to this and was overjoyed that it didn’t happen here.
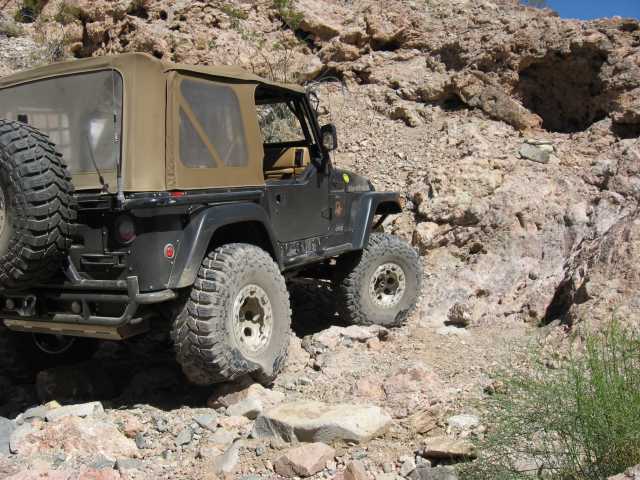
Right from the start, tread and sidewall flex were NOT an issue. I was concerned about hitting this level of trail with a complete set of green tires. While I had rolled several hundred miles up on the highway, this was the first trail action they had seen. No disappointments here! The previously mentioned 8 PSI allowed them to wrap rocks (as clearly seen in the above photo) for maximum traction and a quality ride (assuming you can have a quality ride on the trail).
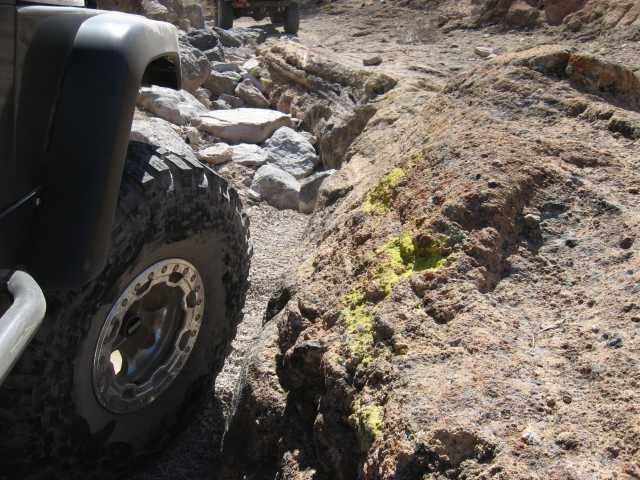
I watched the driver’s side tires as much as I could on Saturday’s trail, Boulder Gultch to see how they responded to the endless wash of rocks. This was more typical of the trails we see north of Phoenix in the Table Mesa area. I was able to keep lines on the rocks that provided as little as an inch of usable tread surface. There was more than a time or two where I apologized to the tire gods for doing what I did to the sidewalls.
As I told a couple of friends, I’ve pushed MT/Rs tires on my TJ for over 6 years with under several lifts and vehicle configurations. The current lift is hitting year #4 and my auto tranny has been in just short of 18 months. I’m very comfortable wheelin’ it as configured and was surprised to find obstacles/ledges that I was certain would require 2 or 3 attempts but yet I crawled through on the first try. I’m not trying to say these tires make you a better wheeler, but I think they may compensate a bit for one not always picking the most optimum line. <grin>
Sidewall bite was beyond anything an MT/R ever offered. Tire chunking….virtually nothing at all. A bit on the outer lugs here and there, but I am not talking “chunks”…..more like a little bit of corner rounding (which is preferred by the competition folks). The siped tread seemed to do well in the rocks and this was the first tire I’ve run that had it.
The two major waterfalls I ran were anything but easy….and I worked Lady right to the limit before pulling out the winch cable. Troy noted on the second waterfall that if I had stayed with it a bit longer, he was confident I could have gotten to the top unassisted. I’m not sure if that would have happened or not, but I can say I made it further than I expected….and while doing so, the stability and traction was better than what I’m accustomed to.
I realize that a weekend of wheelin’ does not prove a tires worth when looking at total cost of ownership. At this point, I am sold on the Trepador, no question about it. Highway noise and road handling are both an improvement over my previous setup. While we suffered 4 or 5 sidewall slices on Boulder Gultch, I am happy to report that none of them were mine! (I did have an offer from one of the sidewall slicers to buy my 35” MT/R take-offs.)
I’ll continue to update this write-up, as promised, as I get more trail time. In a month, they will see a week’s worth of wheelin’ at Moab. I can’t wait to see how they do on the sandstone.
Update 4/10/2007:
I copied the following from the JU forum…..some initial impressions from 99GunMetalTJ after recently installing his Trepador tires:
“Made my first run on my new 35×12.5×15 Trepadors. 2.5 hr.’s of highway driving one way to the trail. The tires handled great on the road and hardly make any noise. We experienced a light dusting of snow on the roads Friday night and they seemed fine in these conditions also. Finally on Saturday we hit the trail. The first trail is primarily rocks that had a little snow on them. I had only aired down to 15 PSI and the tires work great. They flexed awesome even at the higher PSI and gripped the rocks great. The side lugs work great in the rock. A couple times the only part of the tire on the rock was the sidewall the lugs held it right on. On our way to the next trail we encountered some mud. It wasn’t the deep nasty stuff, which I try to avoid anyway, but just that top 2-3 inches of slimey stuff. The tires seemed to clean themselves great. The second trail had a combo of rocks and slimey mud. Even with a coating of slick stuff on the tires they still climbed the rocks great while climbing out of a hole. I was pleasantly surprised by the performance of these tires and my buddy told me he hardly ever seen me spin a wheel. I think they’ll do great in my conditions. I didn’t notice any chunking, gouging or tears.”
Here is another response in the same JU thread…..this one is from TheGriz:
“I had a chance to put them through the paces at URE this weekend. They shed mud quite well. It didn’t take a lot of wheel speed to clean out the voids. The mud wasn’t deep, but it was quite thick (red clay).
They crawled flawlessly in the rocks. Kept my foot out of the gas and kept wheel spin to a minimum, they did their job flawlessly. I did chunk-off half of an outer lug on a rear tire, it was a big chunk, quite a bit larger than the smaller chunks I used to lose on MFG MTs. Road noise is still at a minimum, but I do get an occasional squeeky high-frequency noise from them. Somewhat hard to explain, but certainly not a rubber lug hum.
Overall, I could not be happier with the tires and the upgrade from 33s to 35s on minimal lift (3″ lift 1″BL).”
Update 04/15/2007:
I spent the day on Hell’s Revenge here in Moab. I was hoping I would be able to make it up the last obstacle, Tip Over Challenge, without engaging the lockers. I had set tire pressure to 9 PSI at the beginning of the trail but didn’t check it later….I’ve no doubt it was up to about 10 PSI by the time we got to the obstacle in the early afternoon. Anyway, I made the lower section just fine….never chirped a tire. The upper section denied me until I flipped on the lockers. It wanted to hook up but just couldn’t quite do it. So….I tried.
One thing I noticed today was that the Trepadors are much quieter on the slick rock. The MT/Rs constantly bark and chirp while making a turn in 4WD. Mine were quiet as a church mouse unless I was pulling a steep uphill climb….then I could get a little noise out of them every now and then.
Updated 04/24/2007:
A few more comments in regards to the remainder of the trails I ran at Moab.
I finally got a chance to try the Trepadors at a lower pressure. We ran two trails towards the end of the week, the first was Pickle, the other was Mashed Potatoes. Pickle is fairly similar to the trails we run here in the Phoenix area. Since Pickle had a couple of good waterfalls in it, I dropped the pressure down to 6.5 PSI and left the job of keeping the tires on the wheel to the beadlocks. I didn’t hear an air burp all day long. The traction was great and the performance on the waterfalls couldn’t have been better, IMO. No sidewall cuts, no issues…..the tires continue to work.
The best part was after running them at 6.5 pounds of pressure, I was able to air up at the end of the week and drive the 9 hour trip back to Phoenix without any tire balance issues. I could NOT have accomplished that with conventional wheels as I would have spun the wheel inside of the tire at the low air pressure while on the trail.