

It was a couple of years ago when I first ran across the 12voltguy.com web site. I remember the first time I saw the web site. Lots of “stuff” for doing electrical projects on your vehicle. Since then, I’ve exchanged a fair amount of e-mails with Darren, the “guy” in 12voltguy.com. His business has grown from a basic parts supplier to one that delivers just about any type of electrical 12V panel you can think of.
Some time back, Darren released a great little in-cab winch controller that a lot of Jeepers have installed. I have one in my TJ and the install details can be seen here. It has served me well ever since I first installed it.
Darren is familiar with my site and had seen my home-made ARB switch panel. I hope he wasn’t taking pity on me when he asked if I might want to try a new panel for the ARB switches. So I took him up on his offer. Comparing his to mine….well, it’s just no contest. His panel put mine to shame and then some. And the cool part was the new black finish that this panel sports. No longer are you relegated to having your aluminum panels in shiny aluminum finish.
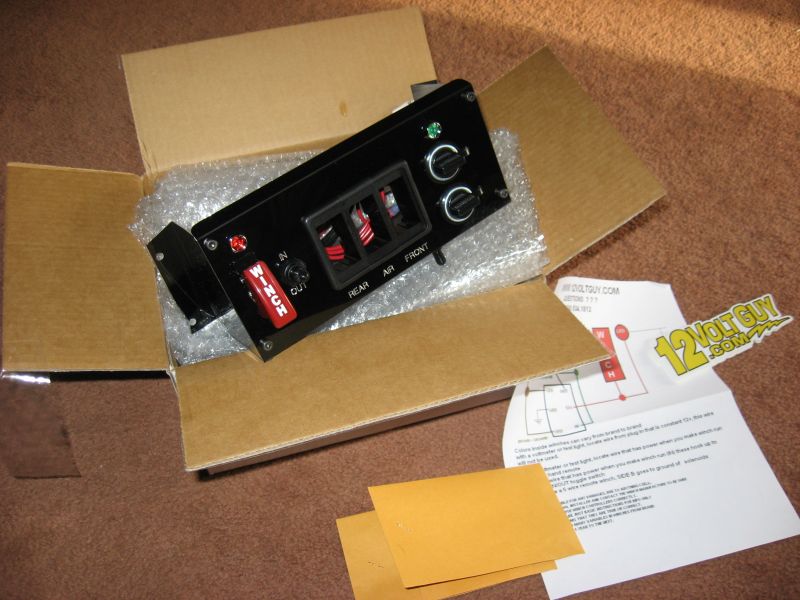
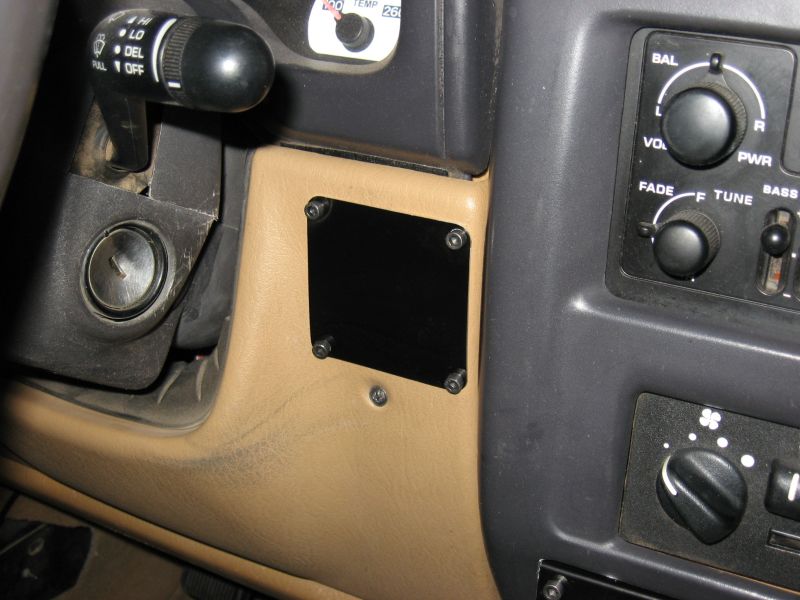
This is the first test panel for the early model TJs. Before it gets installed, I’ll have to remove some of my own handy-work to make room for this nice looking panel.
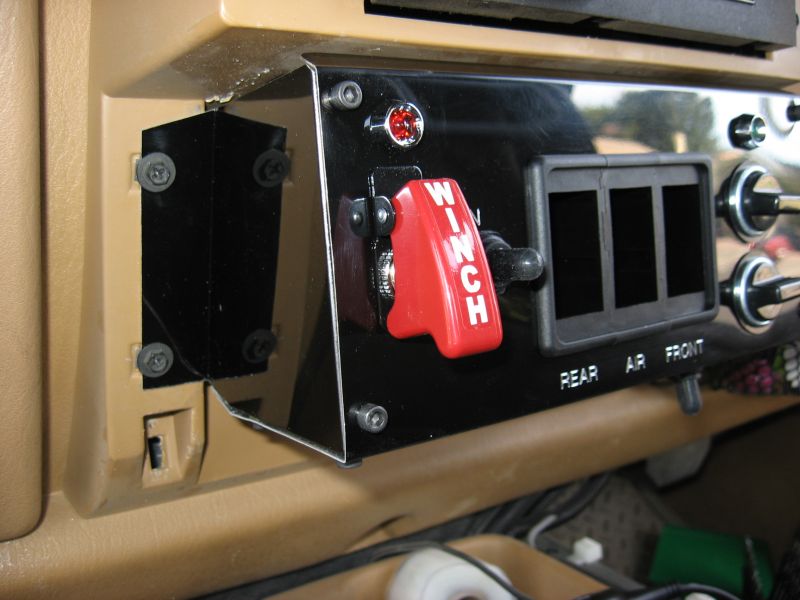
As you can see, Darren put his standard winch control on the panel along with a pair of cigarette lighter outlets. A switch on the bottom of the panel controls power to the outlets.
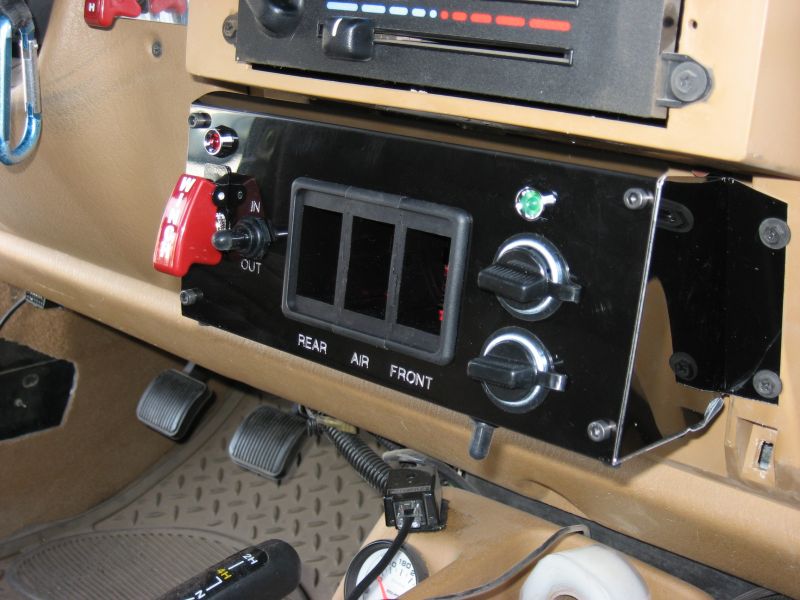
Center stage in the panel is home for the ARB switches that will be removed from my panel and relocated to this one. But….before that happens, I need to strip mine apart and modify my dash for the panel transplant. Let’s get started!
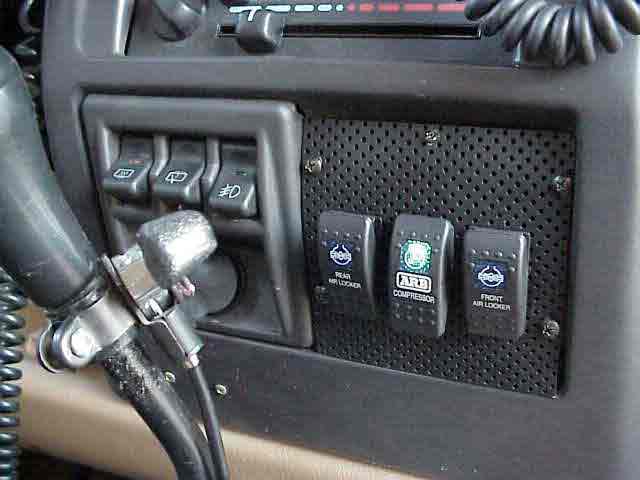
Many years ago, when I had ARB installed in my TJ, I tossed the ash tray and recycled the space for the ARB locker switches. I had quit smoking some 10 years prior to that and didn’t need the ash tray.
Across from the ARB switches are the factory hardtop switches for the rear window defogger and wiper. The factory fog lamp switch rounds out the threesome. Below those are the cigarette lighter.
The hard top has been hanging in my garage for a number of years and the factory fogs were removed long ago. While I use the cigarette lighter for charging my cell phone on road trips, getting an extra one when this one went away would be an OK deal.
It was decided….remove all of this to make room for Darren’s new panel.
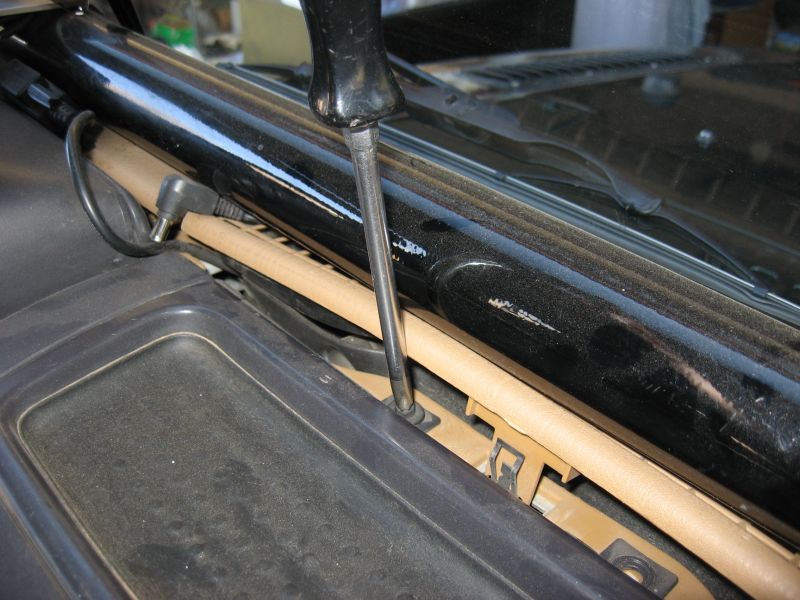
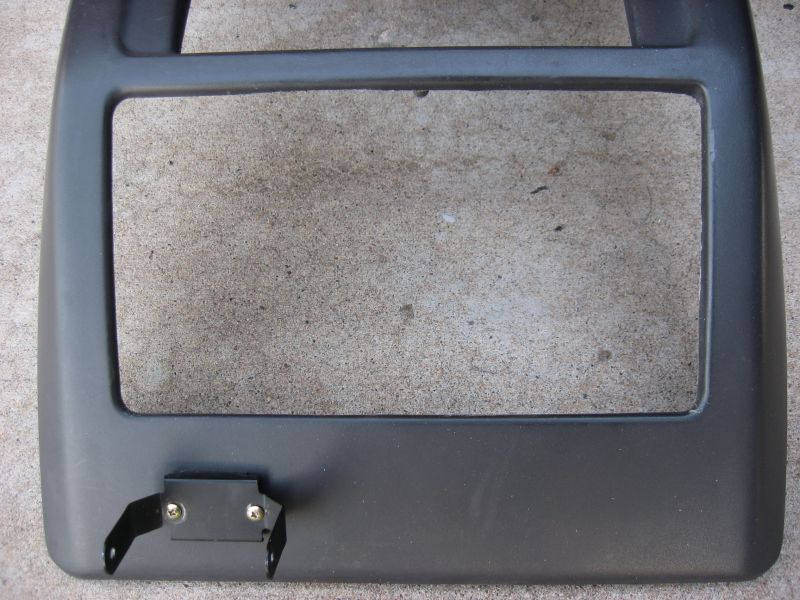
Before the factory switches could be removed, the center dash bezel must be removed. The windshield defroster vent is popped up to reveal two Phillips head screws that secure the top of the bezel to the dash.
I removed the screws that held my old switch plate in position and proceeded to remove the wiring harness connectors from the switch terminals.
With the switches out of the way, I removed the screw that secured the lower portion of the bezel. With the screws top and bottom removed, the bezel was pried off. There are four clips that hold the bezel in place. Two are located near the lower part of the bezel and the other two are near the radio area. Just carefully pry the bezel away from the dash and the clips will release.
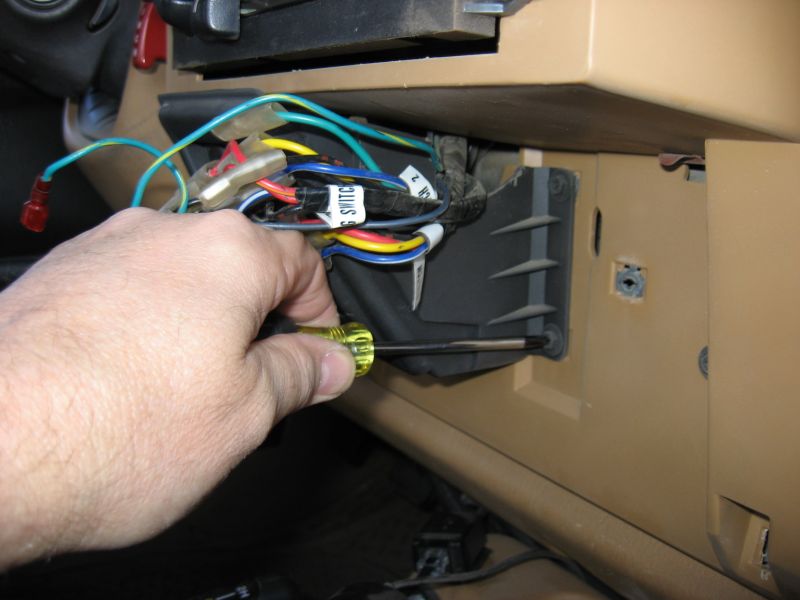
Next, I removed the four screws that held the factory switch/lighter module in position. I had previously trimmed a bit of it in order to get adequate clearance for my ARB wiring harness.
More 12V Panel
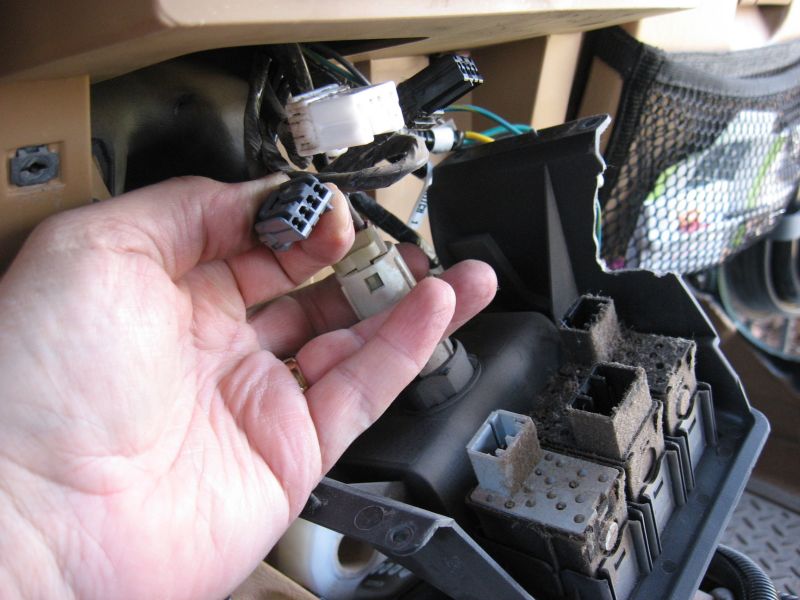
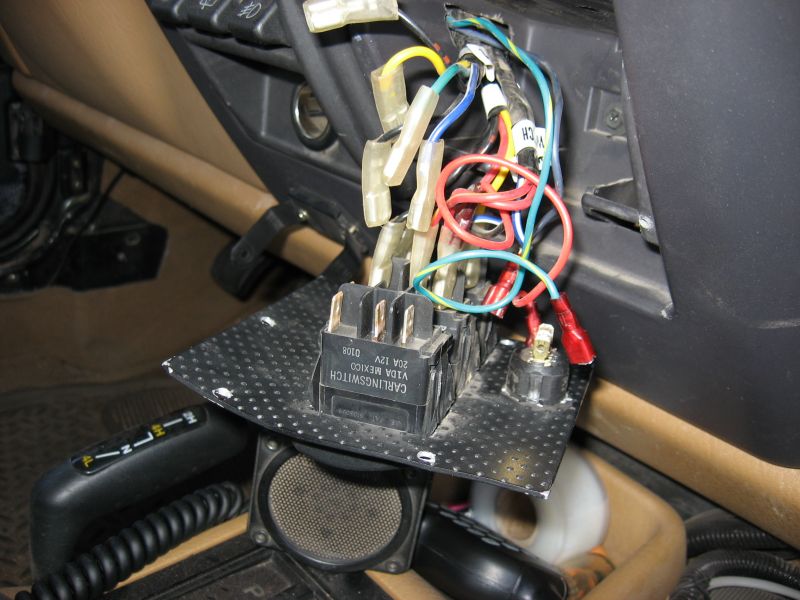
The electrical connectors on the factory switches are relatively easy to remove (geez, look at that 10 years of dust!). Like most of the TJ electrical connectors, squeezing them in the right spot makes them easy to unplug.
After the plugs were disconnected, I tucked them up under the dash, out of sight. I decided to use the feed for the factory cigarette lighter to power the new panel. The 16 gauge wire for the cigarette lighter circuit is fused for 20 amps which will be quite adequate for the new panel. The added benefit is that the power feed also has a ground wire in it and the +12V line is automatically switched off when the ignition is turned off (using a factory 12V accessory relay).
With the factory switches now out of the way, I turned my attention to seeing how the fit was going to be with the new panel.
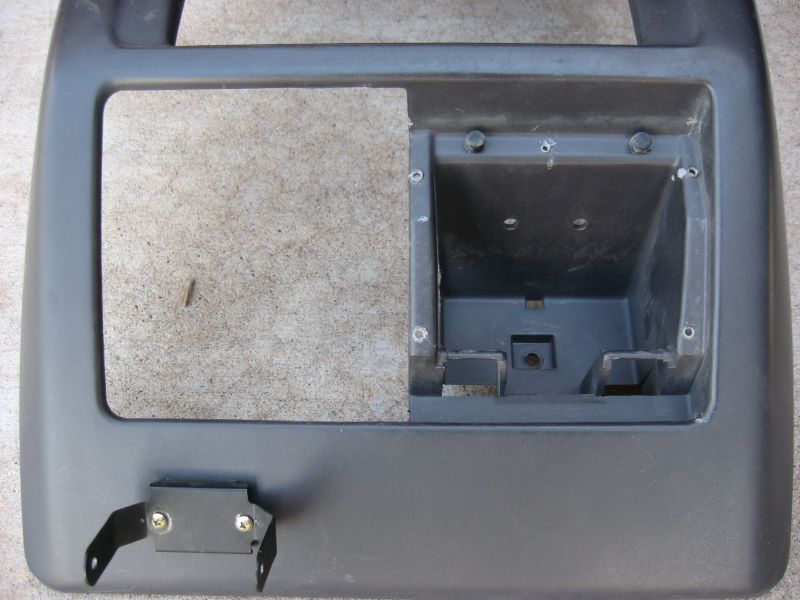
Before the panel could be fitted to the dash, there was some plastic that had a date with a small cut-off wheel, courtesy of my Black & Decker rotary cutting tool. In case you were wondering about the bracket, that holds a small speaker for my VHF/UHF ham radio. OK, so the right hand side of the bezel needed some cutting.
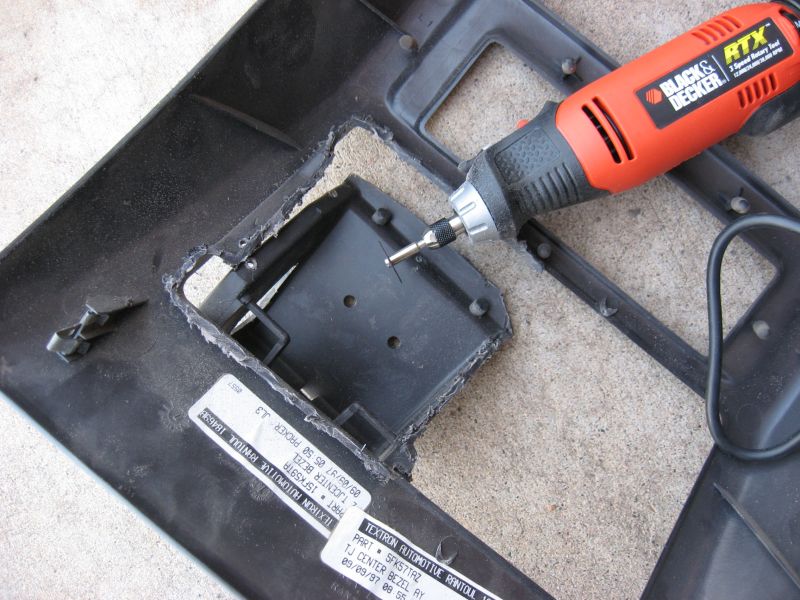
The Black & Decker made pretty quick work of getting the big piece out of the way. After the major cutting was taken care of, I switched over to a small sanding drum. By running at a medium speed and not pushing it too fast, the drum didn’t load up with melted plastic (don’t tell me you haven’t done that before) and I was able to clean things up pretty good. I used a hobby rasp and a file to finish the edges.
OK…..now I have a little working space in there to see about mounting the new panel. I did a couple more sessions with the files while I was test fitting the panel on the dash with the bezel. I find it much easier to remove material around the opening a little bit at a time. It is easier doing it that way than trying to figure out how to hide the big gap you caused by taking off too much. That is also the reason I use the files instead of continuing along with the Black & Decker rotary tool. The file is much easier to control (for me anyway) when you are getting close to the correct dimensions.

With the initial bezel trimming finished, it was time to see about getting the panel in position to see how it was going to fit the bezel.
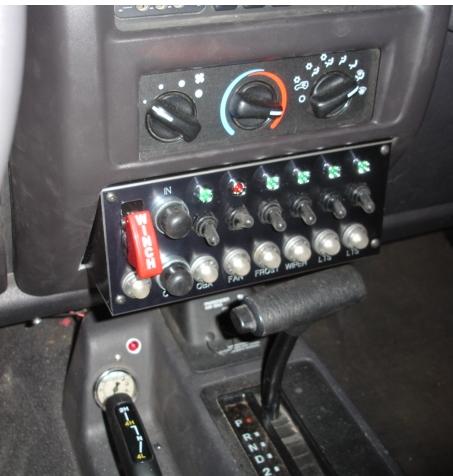
For those not familiar with the in-cab winch control, Darren uses a protected switch (under the red cover) that provides power to the IN/OUT switch. The IN/OUT switch is connected to your winch solenoids (or spliced into your regular hand controller cable). When you lift the cover and turn on the winch switch, the red power light glows to tell you your winch control is ready. The IN/OUT switch has an automatic return to center off position.
The two power outlets at the other end of the panel are controlled by a power switch located on the bottom of the panel. When the switch is enabled, the green LED is illuminated and 12 volts is applied to the power outlets. Great place to plug in your cell phone charger, iPod, MP3 player, etc.
Dash Mounted 12V Switch Panel
Since I was still in the “fitting” stage of the installation, I wasn’t concern yet with installing switches, hooking up the wiring harness, etc. That part would come after I was satisfied with the fit of the bezel and the panel mounting.
Darren positioned the mounting holes on the panel to match the factory holes that held the factory switch module in place. (thank you!)
I leveled the panel after having lightly snugged the left side mounting screws. I drilled two mounting holes on the right side and recycled the mounting screws from the factory switch module. So far, so good….I managed to attach the panel to the dash and it was straight too!
As I mentioned earlier, I did a couple of test fits with the bezel before I was satisfied with how it fit over the panel. Each time I would remove a small amount of material, try it again, remove and file it a bit more, repeating the process until I was satisfied.
Next comes the wiring harness hookup, but before that, I need to put a plug in here for Darren’s business.
While I was writing this, Darren and I have been exchanging e-mails. I was giving him feedback regarding how much material I had to remove from the TJ bezel, how the mounting holes lined up, etc. In the midst of these e-mails, he sends me one that said he had just gotten an e-mail from Ian, one of the co-hosts on Spike’s Extreme 4×4. If you watch Spike TV on Saturdays, you should be familiar with the block of vehicle wrenching shows that come on about mid-day. Anyway, Ian was scouting parts for an upcoming TJ build. I had just uploaded a folder of photos on my site for Darren so he could see how things were going. He showed the photos to Ian so he could see how the panel looked installed in a TJ. Darren said Ian wanted one for the show. I thought that was pretty cool. The 12voltguy is indeed the 12 volt guy!
OK….back to the installation.
Dash Mounted 12V Switch Panel
Hooking up the wiring was pretty straight forward and I won’t go into much detail since 90% of the connections involve hooking up the ARB switches which is not what this write-up is about.
I did recycle the two wires (+12 volts and ground) that powered the factory cigarette lighter. With the ignition switch in the OFF position, I cut the plug off as close to the end of the wires as I could. (When the ignition switch is ON or ACC, there is +12 volts on the hot wire….you don’t want to work on a live circuit.) Using crimp on connects and heat shrink tubing, I made up a pair of connectors and attached the two factory wires to the power outlet circuit via the panel’s power switch.
Next, the winch controller circuitry on the panel was attached to the existing in-cab wiring I had previously installed. Darren was good enough to include a blank panel to cover the hole in the dash where the previous in-cab controller was located. I think I might use it to hold the switch that actuates the air solenoid for my SwayLOC sway bar. If not that, then I’ll tie the SwayLOC solenoid to the ARB compressor power circuit. When the ARB compressor comes on, the SwayLOC will switch to off-road mode automatically.
Update: The SwayLOC solenoid’s control circuit has since been connected to the ARB power circuit. When the middle ARB switch (labeled “AIR”) is actuated, the SwayLOC solenoid receives +12 volts so it too energizes. Assuming the ARB compressor is up to pressure, the SwayLOC will unlock.
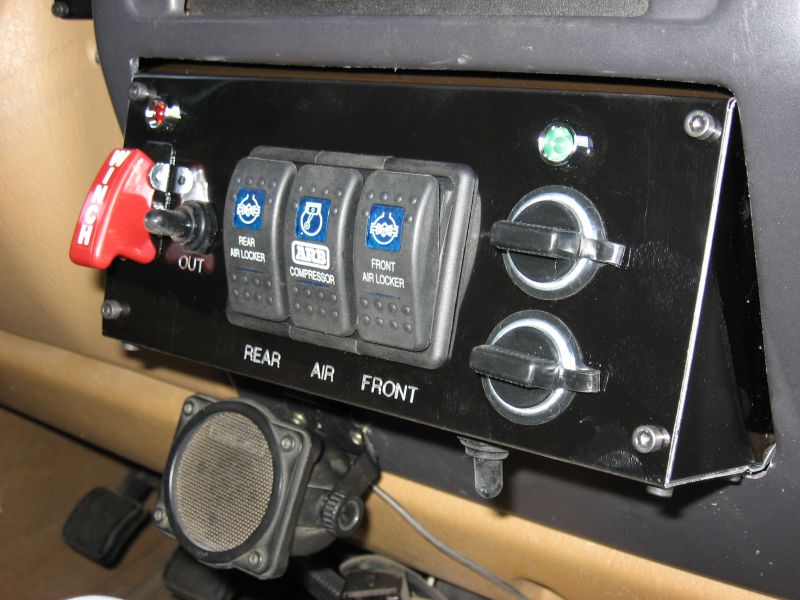
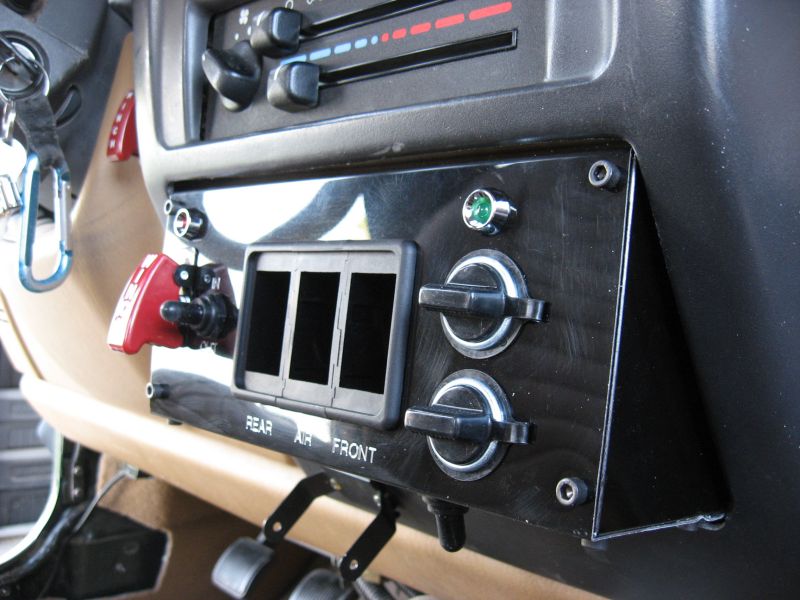
Here is a pic of the final product, installed and ready to control the ARBs, run the winch, and charge my cell phone, all at the same time! It don’t get much better than that.
Contact 12voltguy.com for pricing details. Darren can make you a panel like this one or with virtually anything else you might want on it. His web site has a great selection to pick from. Tell him I said Hello!
Update: 02/16/2008
I got an update from 12VoltGuy today. He’s been busy this past week since I put the write-up here on the site and posted a couple of threads on some Jeep forums.
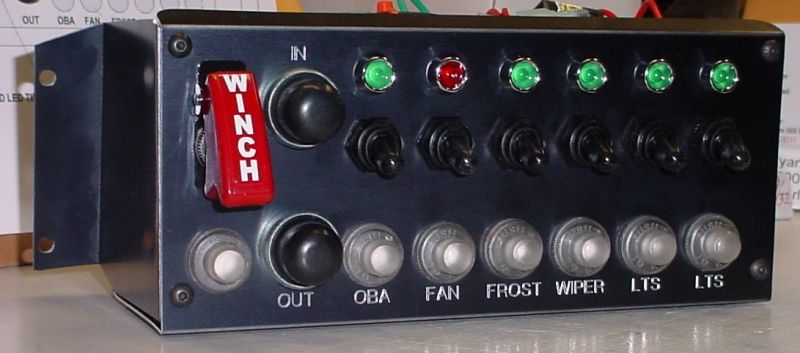
He just finished this one today. It has the winch control except that this one uses push buttons. There are 6 toggle switches with LED indicators and a circuit breaker for each of the the switched circuits. As you can see, everything is engraved with the function. Darren installed a power relay to allow the RED fan LED to be on only when the switch is off. That is the same functionality I used on my rear tranny cooler fan bypass circuit.
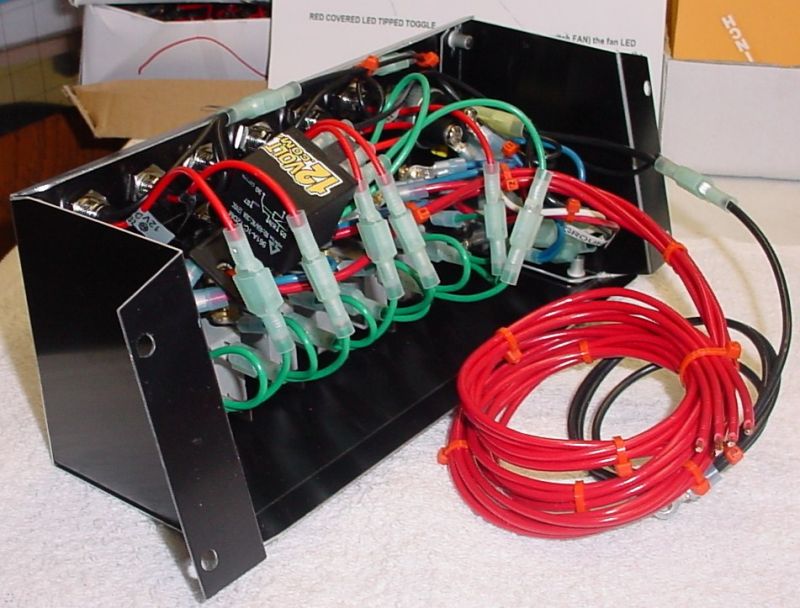
Someone on one of the forums said they wanted to see what the back of one of the panels looks like….so this one is included so you can get an idea of how things are wired.
Update: 02/23/2008
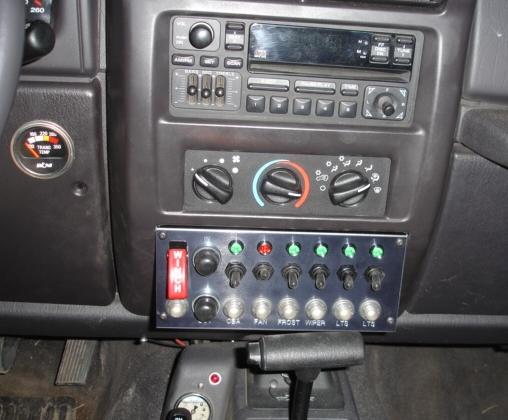
I got these two photos from KraigP who became the proud owner of the panel I mentioned in the previous update. Looks pretty good. I see that Kraig as installed a tranny temp gauge (left side of left photo). Good idea to keep an eye on the tranny temp…..that is the worst enemy an auto has.